...

Go Back   Lateral-g Forums > Lateral-G Open Discussions > Project Updates
User Name
Password


Reply
 
Thread Tools Display Modes
  #1221  
Old 12-11-2016, 04:13 PM
waynieZ's Avatar
waynieZ waynieZ is offline
Lateral-g Supporting Member
 
Join Date: Oct 2006
Location: Ma
Posts: 8,491
Thanks: 939
Thanked 342 Times in 231 Posts
Default

Now there's some nice progress! It looks good.
__________________
_Wayne________

___________________________________
https://lateral-g.net/forums/show...ghlight=FNQUIK
Reply With Quote
  #1222  
Old 12-11-2016, 07:11 PM
Che70velle's Avatar
Che70velle Che70velle is offline
Senior Member
 
Join Date: Aug 2012
Location: Dawsonville Georgia
Posts: 2,254
Thanks: 650
Thanked 184 Times in 124 Posts
Default

Chief, you have THE finest example of total rust removal from a home based build that I've seen! Very good work indeed!
__________________
Scott
---------------------------------------------------------------
70 velle' on custom chassis w/custom RideTech coilovers, RED sleeved 434” with Mamo 265’s, F-body Magnum, 12 bolt 3:73, wilwood 6/4's, bla, bla, bla...build. thread https://lateral-g.net/forums/showthread.php4?t=39631
New 434” engine build here https://ls1tech.com/forums/generatio...ved-block.html

Thanks Dad!!

My Chevelle is old school... It has a belt driven power steering pump.
They're 17's, but I keep em clean!
Reply With Quote
  #1223  
Old 12-13-2016, 09:53 AM
Sonar Chief's Avatar
Sonar Chief Sonar Chief is offline
Senior Member
 
Join Date: Dec 2011
Location: Greater Denver area
Posts: 1,366
Thanks: 245
Thanked 163 Times in 72 Posts
Smile Thanks

Quote:
Originally Posted by snappytravis View Post
Looking good, I just glanced at a few pictures, I will have to go back and read through it some more. Making progress! How was the quality of the roof panel? Did it fit nicely?
Travis, the AMD roof needed the windshield corners rebuilt other than that it fit good, little trimming here and there!


Quote:
Originally Posted by waynieZ View Post
Now there's some nice progress! It looks good.

Thanks Wayne, it's nice to see a car ... now on to the bottom!!!


Quote:
Originally Posted by Che70velle View Post
Chief, you have THE finest example of total rust removal from a home based build that I've seen! Very good work indeed!

Thanks for your comments, hopefully my build will inspire others and give them some ideas!!


Good garage day ... now I have to tidy up some stuff under here!

__________________
JUST PICTUREShttps://imageshack.com/user/mcavery


Let the house go .... NEVER give up your car!!!!
Reply With Quote
  #1224  
Old 12-14-2016, 07:42 PM
Mikael A Mikael A is offline
Senior Member
 
Join Date: Jul 2005
Location: long Island NY
Posts: 502
Thanks: 113
Thanked 101 Times in 49 Posts
Default

Moving right along I see and it looks great....I better hurry up before you catch up to me lol.
__________________
Mike a
Reply With Quote
  #1225  
Old 12-16-2016, 09:47 AM
Beach Cruiser's Avatar
Beach Cruiser Beach Cruiser is offline
Senior Member
 
Join Date: Mar 2006
Location: Virginia Beach, Va
Posts: 603
Thanks: 0
Thanked 1 Time in 1 Post
Default

I remember when mine was clean like that underneath, not so much anymore. Good work!
__________________
No Shop, No Money, No Time.... No problem!
Reply With Quote
  #1226  
Old 12-16-2016, 05:58 PM
Sonar Chief's Avatar
Sonar Chief Sonar Chief is offline
Senior Member
 
Join Date: Dec 2011
Location: Greater Denver area
Posts: 1,366
Thanks: 245
Thanked 163 Times in 72 Posts
Smile Update 12/16

Quote:
Originally Posted by Mikael A View Post
Moving right along I see and it looks great....I better hurry up before you catch up to me lol.


Quote:
Originally Posted by Beach Cruiser View Post
I remember when mine was clean like that underneath, not so much anymore. Good work!
Get the car detailed, lol!


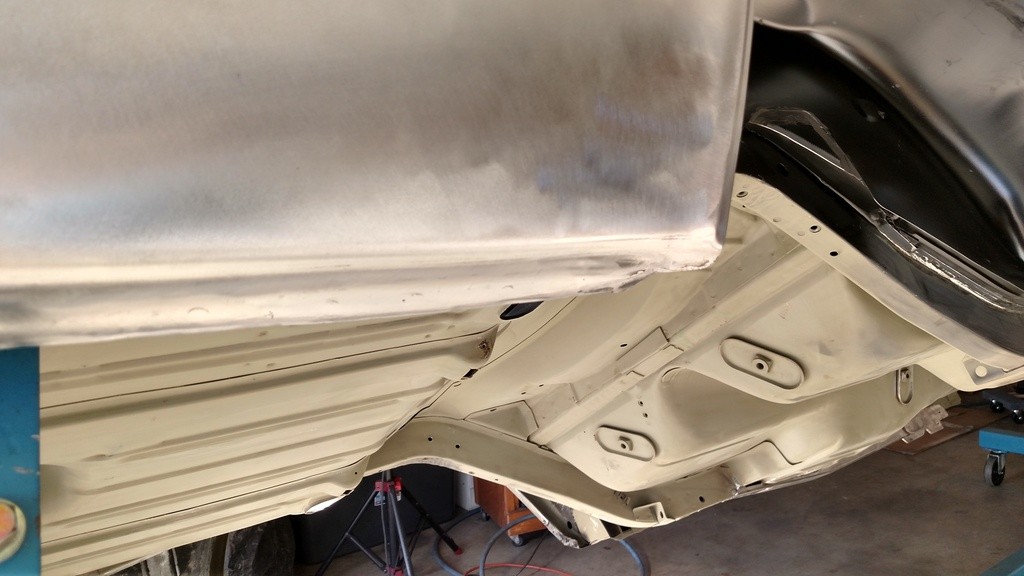
Been busy with this and that ... made the junction where the lower quarter panel to trunk dropoff meet (both sides are done!) and got that all squared away; welded the frame connectors to rear frame; sanded and prepped the underbody for Lizard Skin and started mocking up the rear window filler panel w the drip rails and hinges. I'm sure there is something I'm missing ...

Ordered a new OE dash top and that arrived today, WOW .... the first panel I don't have to modify Great stamp just like OEM so I brought out the DeWalt and got her ready for epoxy. Glad I waited for this piece cuz the other one was APOS!


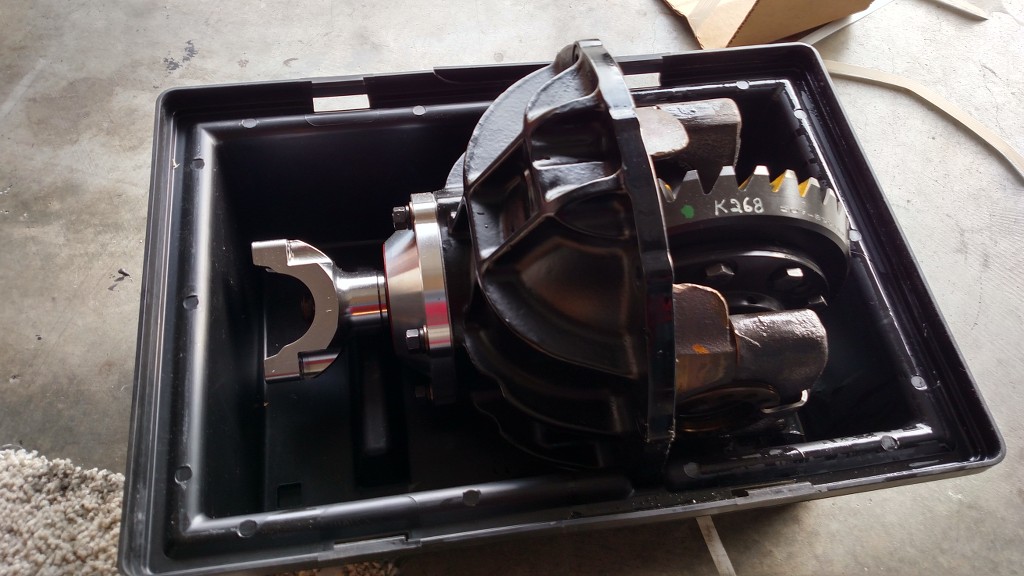
Moser center is here!


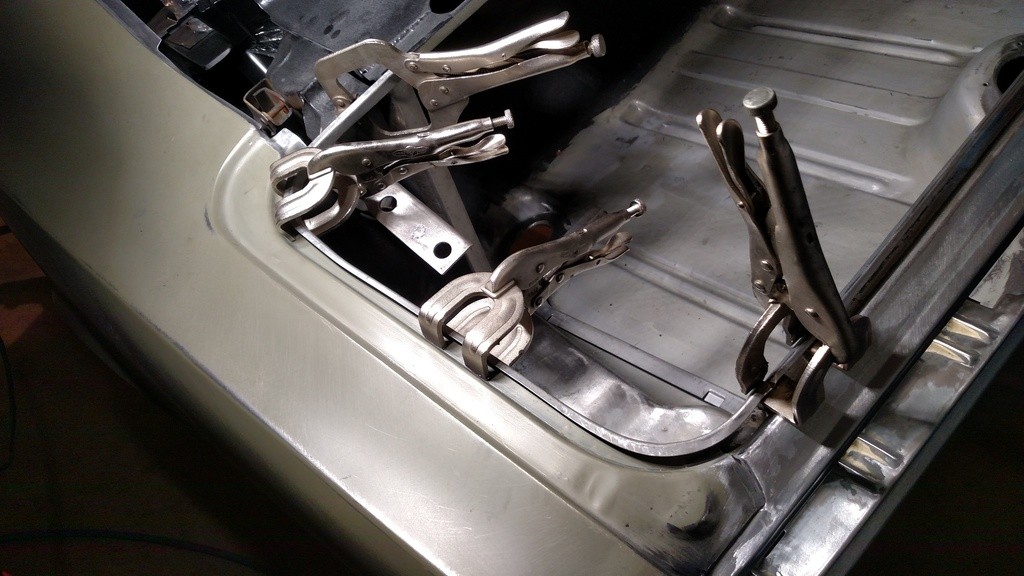
Getting the window filler panel ready for attaching!


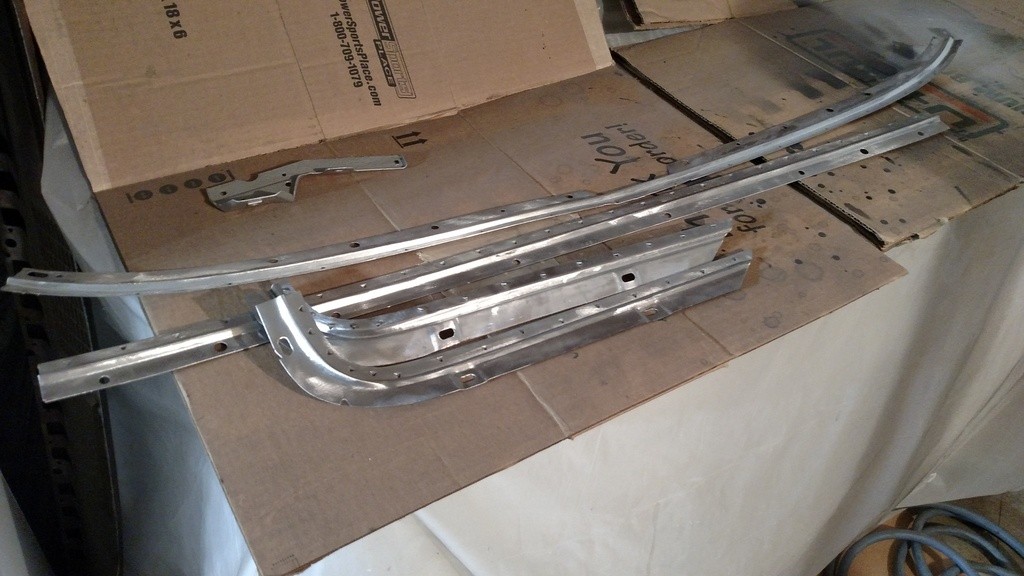
Geting that drip rail in is a trick and a half, epoxy is next and bond!


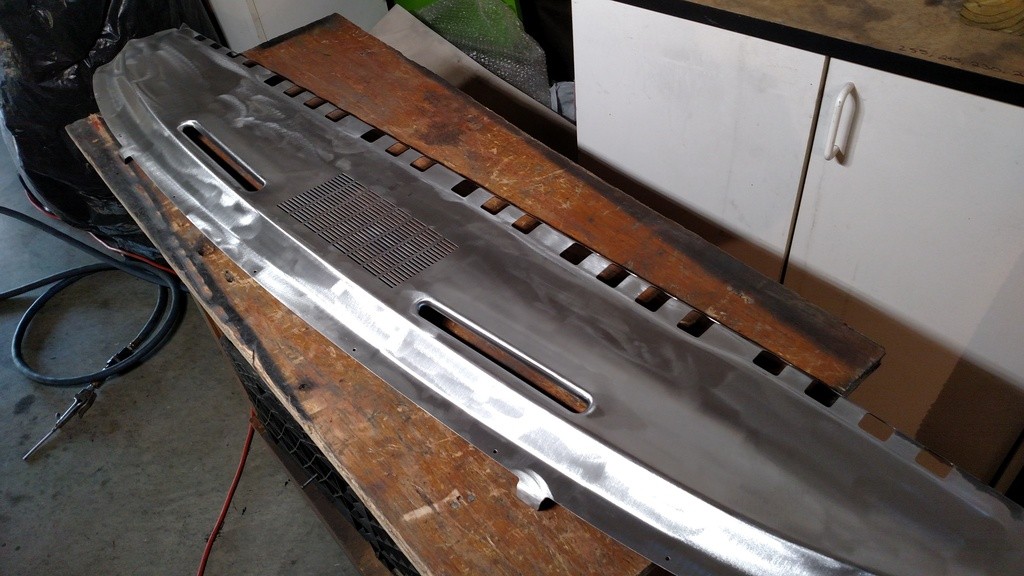
Prepping the inside window trim for epoxy!


Details is what makes this panel superior to the other POS!


Got the EDP off and ready for epoxy!

Well, there you have it, waiting for my Speed Tech tunnel to arrive here Tuesday, do the tunnel T56 mods and then get some epoxy, Lizard Skin and single stage urethane on the underside. IF the weather cooperates

Thanks for looking ...

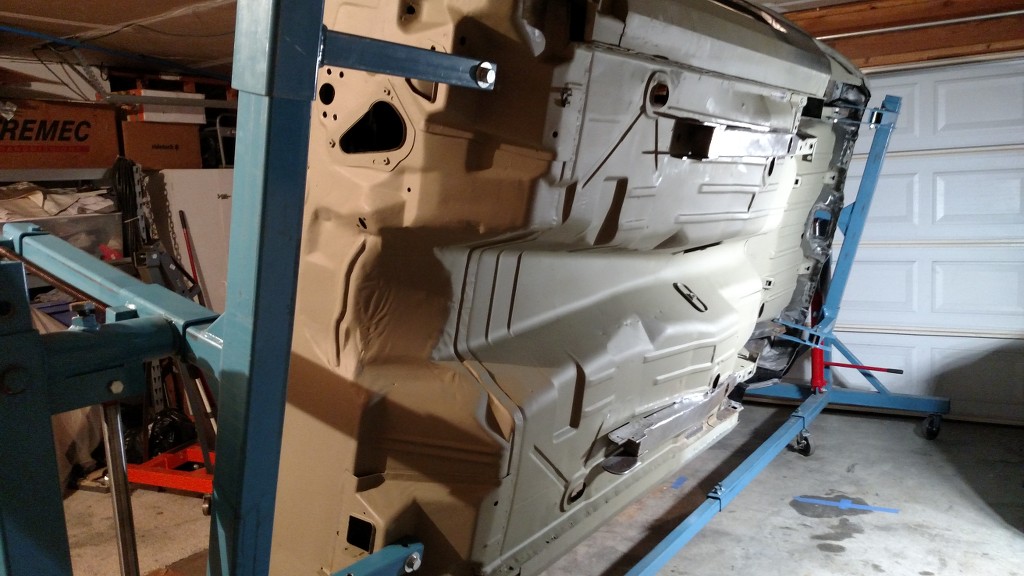
Oh here is the passenger side completed!
__________________
JUST PICTUREShttps://imageshack.com/user/mcavery


Let the house go .... NEVER give up your car!!!!

Last edited by Sonar Chief; 12-16-2016 at 06:11 PM.
Reply With Quote
  #1227  
Old 12-16-2016, 07:32 PM
rustomatic rustomatic is offline
Senior Member
 
Join Date: Apr 2014
Location: ATL
Posts: 748
Thanks: 11
Thanked 58 Times in 36 Posts
Default

Wow--somebody's crazy-motivated here. I hope to be nearing your progress level mid-way through next week, or maybe nearer the end . . .

This car stuff is an excellent cure for an end of year/term brain demolition exercise.
Reply With Quote
  #1228  
Old 12-17-2016, 04:45 PM
camarodude87's Avatar
camarodude87 camarodude87 is offline
Member
 
Join Date: Dec 2015
Posts: 32
Thanks: 0
Thanked 0 Times in 0 Posts
Default

Great build. I wish I had the skills like you. Question for you. Being a total noob (only welded once) I read that you are just bonding the inner and outer together? Also your just gluing the tubs in? Please correct me if I am wrong. I am trying to figure out how to replace my outers with my quarters still on the car. If I can mini tub just by gluing the tubs together I will do that. Less money. Thanks! I have a 69 Camaro BTW
Reply With Quote
  #1229  
Old 12-17-2016, 07:10 PM
Sonar Chief's Avatar
Sonar Chief Sonar Chief is offline
Senior Member
 
Join Date: Dec 2011
Location: Greater Denver area
Posts: 1,366
Thanks: 245
Thanked 163 Times in 72 Posts
Smile

Quote:
Originally Posted by rustomatic View Post
Wow--somebody's crazy-motivated here. I hope to be nearing your progress level mid-way through next week, or maybe nearer the end . . .

This car stuff is an excellent cure for an end of year/term brain demolition exercise.
Yes good therapy fer sure, gotta keep picking at it and it'll be done!!


Quote:
Originally Posted by camarodude87 View Post
Great build. I wish I had the skills like you. Question for you. Being a total noob (only welded once) I read that you are just bonding the inner and outer together? Also your just gluing the tubs in? Please correct me if I am wrong. I am trying to figure out how to replace my outers with my quarters still on the car. If I can mini tub just by gluing the tubs together I will do that. Less money. Thanks! I have a 69 Camaro BTW

Replacing the outer wheel house with the quarter in place can be done however you will need to get all the mating surfaces down to bare metal before bonding. So take your time and pay attention to the flanges and your cut lines and you will be fine. The strength of the bond depends on the cleanliness of the prep work and the "best fit" of the metal, in other words, you can't have gaps in the metal and expect the bond to hold as intended .... get 'er tight and clamp everything tight.

Good luck!


Kinda cold for shooting epoxy ... sprayed outside and brought the parts into the heated garage to flash and now they are sitting in the bedroom curing. I got the trunk drip rails and the top dash in primer. Tomorrow I'll get the heat going and bond the dash top.


Thanks for looking and asking questions ...
__________________
JUST PICTUREShttps://imageshack.com/user/mcavery


Let the house go .... NEVER give up your car!!!!
Reply With Quote
  #1230  
Old 12-18-2016, 01:56 AM
waynieZ's Avatar
waynieZ waynieZ is offline
Lateral-g Supporting Member
 
Join Date: Oct 2006
Location: Ma
Posts: 8,491
Thanks: 939
Thanked 342 Times in 231 Posts
Default

Nice progress! you got a lot done.
__________________
_Wayne________

___________________________________
https://lateral-g.net/forums/show...ghlight=FNQUIK
Reply With Quote
Reply


Posting Rules
You may not post new threads
You may not post replies
You may not post attachments
You may not edit your posts

BB code is On
Smilies are On
[IMG] code is On
HTML code is Off

Forum Jump


All times are GMT -7. The time now is 10:43 PM.


Powered by vBulletin® Version 3.8.11
Copyright ©2000 - 2026, vBulletin Solutions Inc.
Copyright Lateral-g.net