...

Go Back   Lateral-g Forums > Lateral-G Open Discussions > Project Updates
User Name
Password


Reply
 
Thread Tools Display Modes
  #1251  
Old 12-28-2016, 08:45 PM
waynieZ's Avatar
waynieZ waynieZ is offline
Lateral-g Supporting Member
 
Join Date: Oct 2006
Location: Ma
Posts: 8,491
Thanks: 939
Thanked 342 Times in 231 Posts
Default

Quote:
Originally Posted by Sonar Chief View Post
Thanks Wayne, how's the weather in the NE? Nice to be in Cali now!

...
Storm coming in tomorrow , luckily only rain for us.

That's a big job out of the way, and nicely done! Bravo ! On its wheels soon ?
__________________
_Wayne________

___________________________________
https://lateral-g.net/forums/show...ghlight=FNQUIK
Reply With Quote
  #1252  
Old 12-28-2016, 10:01 PM
ADY's Avatar
ADY ADY is offline
Senior Member
 
Join Date: Feb 2016
Location: Bay Area
Posts: 195
Thanks: 117
Thanked 48 Times in 34 Posts
Default

Quote:
Originally Posted by Sonar Chief View Post
Keith, a properly bonded part is stronger than a welded part ... the bonded sheet metal will tear before the bond gives whereas the spot weld will give way under tension. I did weld areas recommended as per the instructions.

To be a leader you need to innovate


Got the tunnel mods done, check that off the list ....


After the adhesive cures I'll finish off the tunnel mods from the bottom, still needs some material trimmed off, left it long on purpose!!!

Thanks for looking ...
I used the same Speedtech tunnel cover and 3M Panel Bonding adhesive (https://www.amazon.com/gp/product/B0...?ie=UTF8&psc=1) B/c my interior is finished and didn't want to risk any rogue sparks. Sure wish I had the chance to do the work without the T56 installed, made cutting the tunnel extra stressful.

Looks great!
__________________
-Adam

1968 Camaro SS

Last edited by ADY; 12-28-2016 at 10:12 PM.
Reply With Quote
  #1253  
Old 12-29-2016, 08:45 AM
Sonar Chief's Avatar
Sonar Chief Sonar Chief is offline
Senior Member
 
Join Date: Dec 2011
Location: Greater Denver area
Posts: 1,366
Thanks: 245
Thanked 163 Times in 72 Posts
Cool

Quote:
Originally Posted by gofastwclass View Post
Very nice job, that turned out very well.
Thanks, it's coming along nicely now!


Quote:
Originally Posted by waynieZ View Post
Storm coming in tomorrow , luckily only rain for us.


That's a big job out of the way, and nicely done! Bravo ! On its wheels soon ?

Thanks Wayne it was a lot of work but worth the effort!!! Yep gotta get the car off and return the rotisserie!


Quote:
Originally Posted by ADY View Post
I used the same Speedtech tunnel cover and 3M Panel Bonding adhesive (https://www.amazon.com/gp/product/B0...?ie=UTF8&psc=1) B/c my interior is finished and didn't want to risk any rogue sparks. Sure wish I had the chance to do the work without the T56 installed, made cutting the tunnel extra stressful.

Looks great!
Thanks, I can only imagine operating after the interior is in ... ugg! Hopefully you used self tapping screws to bring the two panels together when you bonded, then you just fill in the screw holes after you take them out and you are done
__________________
JUST PICTUREShttps://imageshack.com/user/mcavery


Let the house go .... NEVER give up your car!!!!
Reply With Quote
  #1254  
Old 12-31-2016, 05:01 AM
Mikael A Mikael A is offline
Senior Member
 
Join Date: Jul 2005
Location: long Island NY
Posts: 502
Thanks: 113
Thanked 101 Times in 49 Posts
Default

looks great
__________________
Mike a
Reply With Quote
  #1255  
Old 12-31-2016, 05:53 PM
Sonar Chief's Avatar
Sonar Chief Sonar Chief is offline
Senior Member
 
Join Date: Dec 2011
Location: Greater Denver area
Posts: 1,366
Thanks: 245
Thanked 163 Times in 72 Posts
Cool

Quote:
Originally Posted by Mikael A View Post
looks great
Thanks ...

Car is off the rotisserie and back on jackstands .... progress? Anyway, still need to get the roof and passenger quarter in epoxy, the rest of the floor and the dash top so I have been sanding and getting ready to spray.

I am really liking this gray more and more ... decided to put down some 16 ga over the firewall holes and reinforce the area so that's done.


So that's bonding now I can work on the 9" floater ends and get ready to put under the car .... BUT not until all the epoxy is down and dry.

Thanks for looking ... have a safe night and get home!!!
__________________
JUST PICTUREShttps://imageshack.com/user/mcavery


Let the house go .... NEVER give up your car!!!!
Reply With Quote
  #1256  
Old 12-31-2016, 06:08 PM
GregWeld's Avatar
GregWeld GregWeld is offline
Lateral-g Supporting Member
 
Join Date: Jul 2005
Location: Scottsdale, AriDzona
Posts: 20,741
Thanks: 504
Thanked 1,080 Times in 388 Posts
Default

Nicely played!


Keep pounding it buddy! You're really flying now!
Reply With Quote
  #1257  
Old 01-01-2017, 10:25 AM
HIFLYR's Avatar
HIFLYR HIFLYR is offline
Member
 
Join Date: Oct 2011
Posts: 64
Thanks: 0
Thanked 4 Times in 2 Posts
Default

That is some beautiful work !!!
__________________
69 Firebird Convertible
68 Camaro Convertible
68 Firebird H.O. 350 4sp
73 Allison Dune Buggy
Reply With Quote
  #1258  
Old 01-01-2017, 08:25 PM
Sonar Chief's Avatar
Sonar Chief Sonar Chief is offline
Senior Member
 
Join Date: Dec 2011
Location: Greater Denver area
Posts: 1,366
Thanks: 245
Thanked 163 Times in 72 Posts
Cool Long day ...

Quote:
Originally Posted by GregWeld View Post
Nicely played!


Keep pounding it buddy! You're really flying now!

Thanks Greg, I like the gray .... maybe engine compartment is getting same color?


Quote:
Originally Posted by HIFLYR View Post
That is some beautiful work !!!

Thanks, it's all in the details I think, sometimes I'm but there is always something to do ...


Speaking of getting it ... here is what I did today Good enough for body work to start now .... my favorite, NOT!!!


This side already has a round of filler, pretty close!
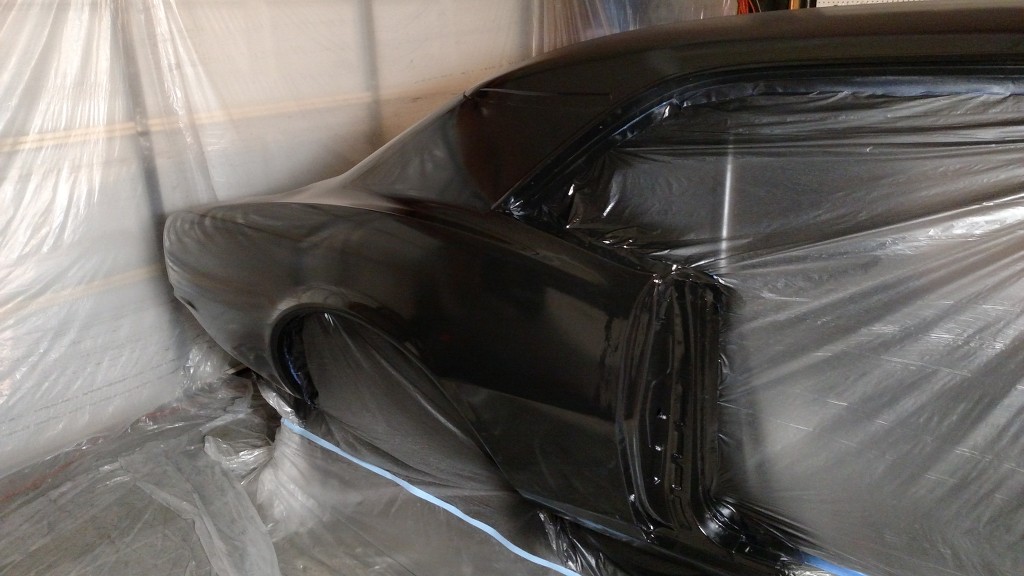
This side has no filler yet, she'll buff out!

This tail panel hasn't had color on it since .... well, last time!!!

I'll keep the heat on and let er cure and then get some short strand fiberglass on the roof to quarter panel and wherever else needs it!

Thanks for the compliments and watching my progress ...
__________________
JUST PICTUREShttps://imageshack.com/user/mcavery


Let the house go .... NEVER give up your car!!!!
Reply With Quote
  #1259  
Old 01-01-2017, 08:39 PM
gofastwclass gofastwclass is offline
Senior Member
 
Join Date: Feb 2012
Location: Behind the wheel in KCMO
Posts: 363
Thanks: 118
Thanked 40 Times in 37 Posts
Default

Nice progress. That panel bond is awesome stuff. I used it once on the back side of a shaved and painted firewall.

I like that gray for the underside. What colour will the suspension be? I would do black, but it's your car.
__________________
I build my own junk...
Reply With Quote
  #1260  
Old 01-01-2017, 08:45 PM
waynieZ's Avatar
waynieZ waynieZ is offline
Lateral-g Supporting Member
 
Join Date: Oct 2006
Location: Ma
Posts: 8,491
Thanks: 939
Thanked 342 Times in 231 Posts
Default

Keep on keepin on! Some nice progress.
__________________
_Wayne________

___________________________________
https://lateral-g.net/forums/show...ghlight=FNQUIK
Reply With Quote
Reply


Posting Rules
You may not post new threads
You may not post replies
You may not post attachments
You may not edit your posts

BB code is On
Smilies are On
[IMG] code is On
HTML code is Off

Forum Jump


All times are GMT -7. The time now is 12:13 AM.


Powered by vBulletin® Version 3.8.11
Copyright ©2000 - 2025, vBulletin Solutions Inc.
Copyright Lateral-g.net