Quote:
Originally Posted by Build-It-Break-it

Amazing work. It's funny cuz I've watched your build for awhile now and I'm excited for you. I'm sure most people on here are to. Keep at it, your not far away!!
|
Thanks, getting closer!
Quote:
Originally Posted by paulk68
completely agree such an awesome build to follow!! I can not wait to see what he does with the wrap!!
|
Thanks, never done a wrap before, steep learning curve!
Quote:
Originally Posted by Panteracer
Looks very clean... thank you for posting up
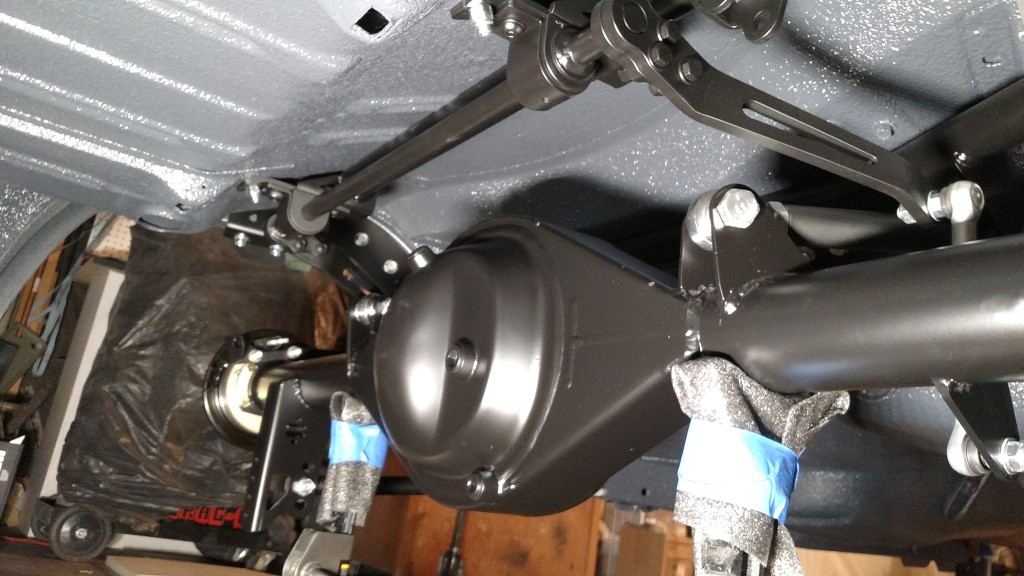
I am thinking of doing the Ridetech system vs a
torque arm and this helps me see the clearances etc
I have my 3" exhaust running under my rear end and
with this system I would not have to modify anything
Keep at it
You still in California?? having a superbowl party at
my shop in Campbell, Ca.. Pantera guys but still car guys
you and any lateral g guys/gals are welcome to come on down
442 industrial, Campbell, Ca noon till ???
Bob
|
I'm still here til end of March, thanks for the invite just not into the Super Bowl!
Quote:
Originally Posted by Zoomin
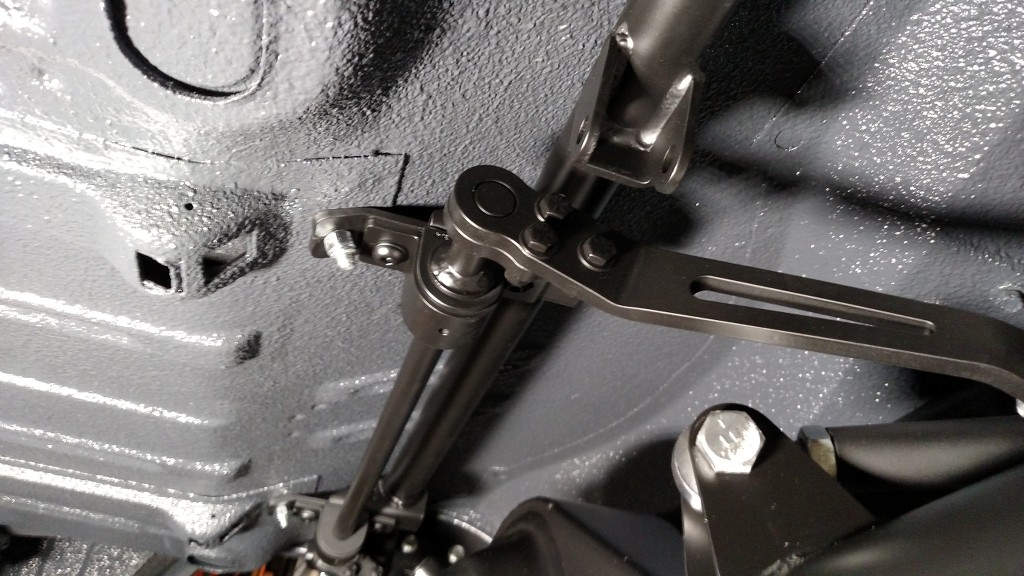
I see you are running a Ford rear along with the RT 4 link set up. Just thought I'd pass along some info about a minor issue I ran into - the lower brackets on my rear end were off 1/2 outboard on each side. Sight along the lower trailing arm and see if it looks like it's running parallel.
This difference caused the lower coil-over eye mount to come in contact with the wheel rim.
You probably don't have that issue, but it may come in handy for some to check before getting too far along.
|
I put the brackets on so all should be square, hopefully!
Quote:
Originally Posted by waynieZ
It looks good in there.
|
Thanks Wayne, think it has a nice contrast under there!
Quote:
Originally Posted by preston
That may be the correct location, its not uncommon to have the rear end pickup points slightly wider than the frame pickups on the lower arms.
Tell me about it, I've spent the last 20 years building my car all by myself in a carport no less ! I'm always fascinated by those tv shows where multiple people are working on a car, much less helping each other.
Swinging in the engine, mounting doors, taking hoods on and off, not easy as a one man show. My wife/kids start complaining after even just 30 seconds of oscillating the steering wheel or pumping the brake pedal for me.
|
Yeah it's slower when everything is painted

One man show here too!
Bad news first ... won't be able to use the same wheel size in the rear, good news is I know what will work!!!
First, there is a difference of 3/16" stickout in width between passenger side and driver's side, what ?? ... measured everything again and all is square with the mounts and rear seems the passenger side quarter panel is 3/16" narrower than the driver's side (based on rear frame rails).... go figure.
Update ... it's not as bad as I stated, it's only 3mm or 3/32" difference between sides, still gonna need more bs than these fronts!
/
Second, I have plenty of clearance on the inside, 2" to top of tub and 1" to lower shock mount, so I just ordered a larger bs for the rear rims, no biggy! I would rather have plenty of clearance to the wheel lip than just enough!
For those that need visuals ...
 Passenger side way too close to lip!
 Plenty of clearance here ... so more BS!
 1/2" to rubber!
 Almost 3/4" to rubber!
 Those wheels just look cool!
I put the driver's side through compression and it would clear w a lip trim but the passenger side was a no go ... so I'll trim the lip some and have a different bs rims on the back, no biggy! Glad I did it this way instead of ASSUMING !
Thanks for looking ...


 Brian Hobaugh SCCA National Tour June 2014
 First Hemi 'Cuda Convertible Ever Built
 Short clips: Goodguys Pleasanton autocross and pit videos


 Linear Mode

