|
|

11-17-2025, 07:10 PM
|
 |
Lateral-g Supporting Member
|
|
Join Date: Jun 2005
Posts: 8,447
Thanks: 5,658
Thanked 2,040 Times in 1,098 Posts
|
|
Love this build and cant wait to see more
Sent from my iPhone using Tapatalk
|
|
The Following 2 Users Say Thank You to syborg tt For This Useful Post:
|
|
11-18-2025, 12:26 PM
|
 |
Lateral-g Supporting Member
|
|
Join Date: Apr 2015
Posts: 686
Thanks: 1,412
Thanked 858 Times in 349 Posts
|
|
Hey Simon. Thank you!!
Yep, Scotchbrite just to clean up the tubes and the welds. Your pic is probably more likely done with a tubing belt sander. I'm going to wrap my entire exhaust so I'm not really super concerned with super detailed finishing but you should easily be able to duplicate your pic.
|
|
The Following User Says Thank You to Goosesdad For This Useful Post:
|
|
11-18-2025, 01:14 PM
|
|
Lateral-g Supporting Member
|
|
Join Date: Apr 2015
Posts: 686
Thanks: 1,412
Thanked 858 Times in 349 Posts
|
|
Thanks guys!!
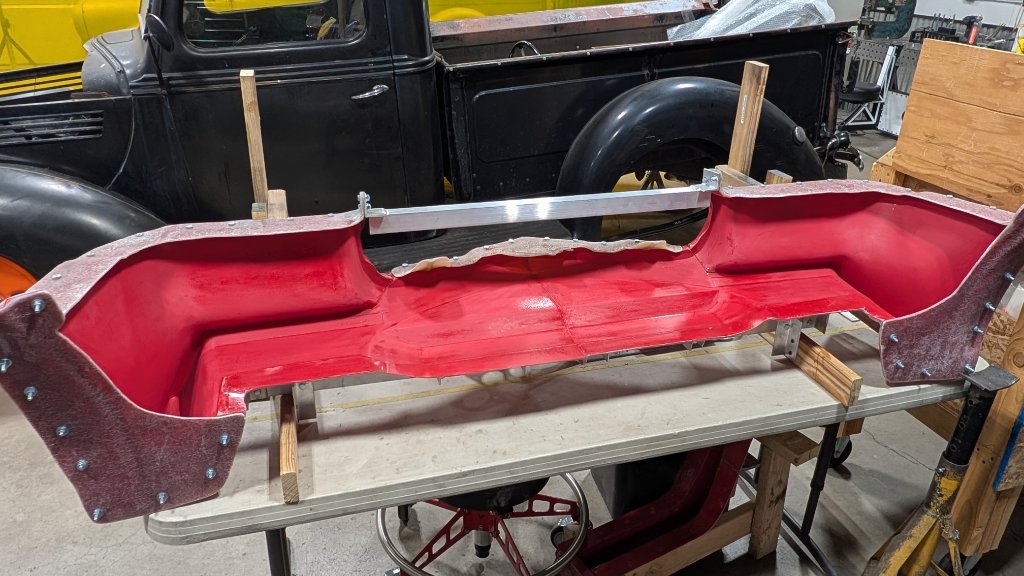
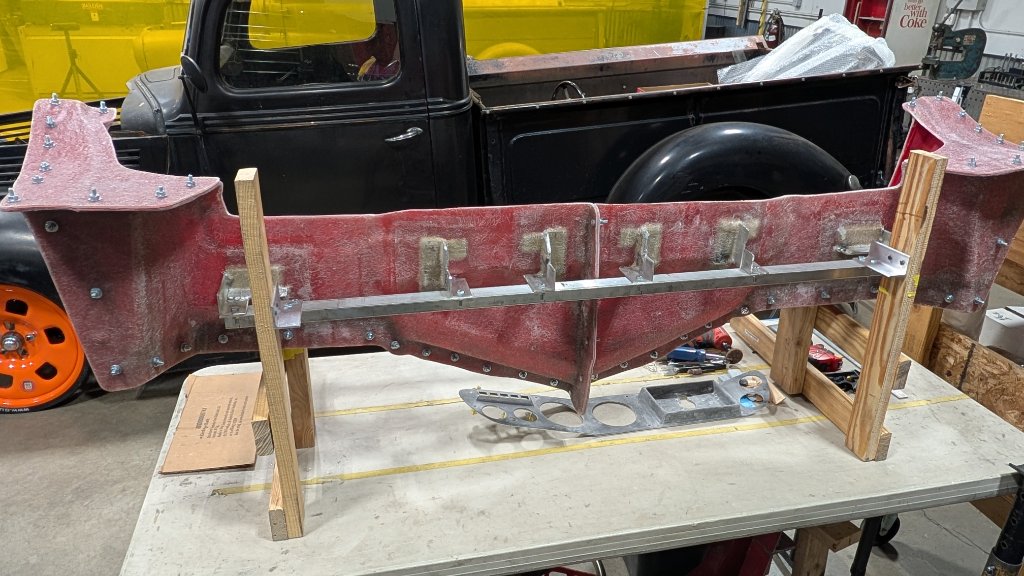
Here are the pics of molds put back together and the stands mounted. I still need to do final wet sanding and polish of the gelcoat before making the parts but that should get underway next week.

|
|
The Following 2 Users Say Thank You to Goosesdad For This Useful Post:
|
|
11-26-2025, 12:17 PM
|
|
Lateral-g Supporting Member
|
|
Join Date: Jun 2005
Posts: 8,447
Thanks: 5,658
Thanked 2,040 Times in 1,098 Posts
|
|
Keep those pics coming
Sent from my iPhone using Tapatalk
|
|
The Following 2 Users Say Thank You to syborg tt For This Useful Post:
|
|
11-30-2025, 03:35 PM
|
|
Lateral-g Supporting Member
|
|
Join Date: Apr 2015
Posts: 686
Thanks: 1,412
Thanked 858 Times in 349 Posts
|
|
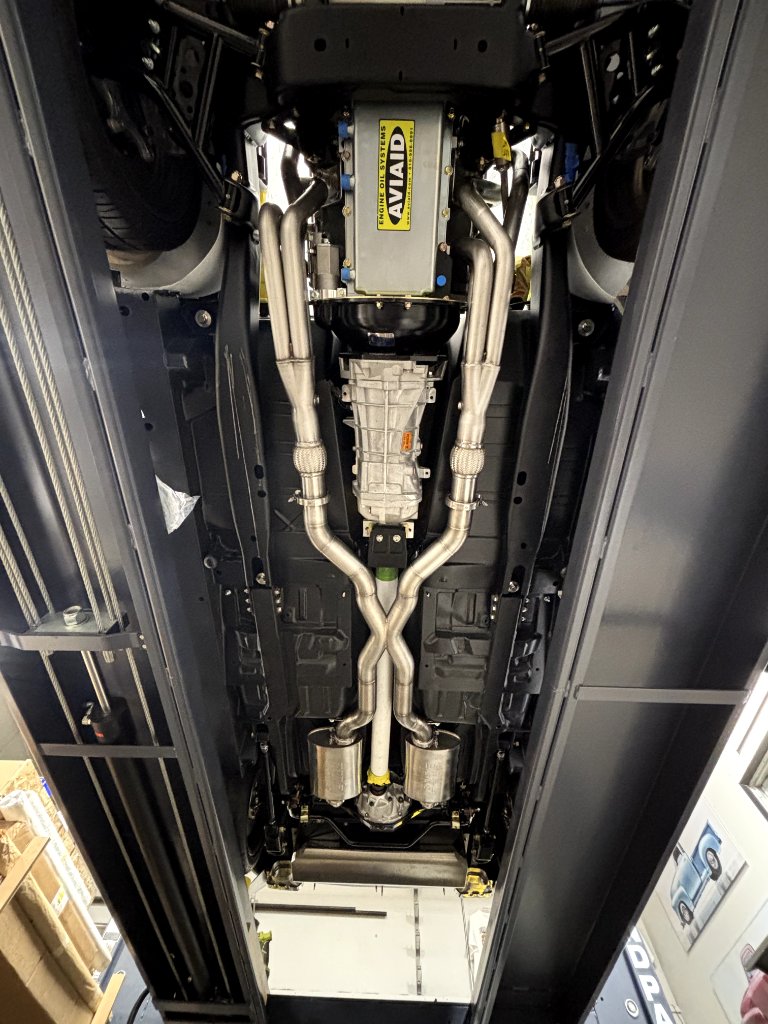
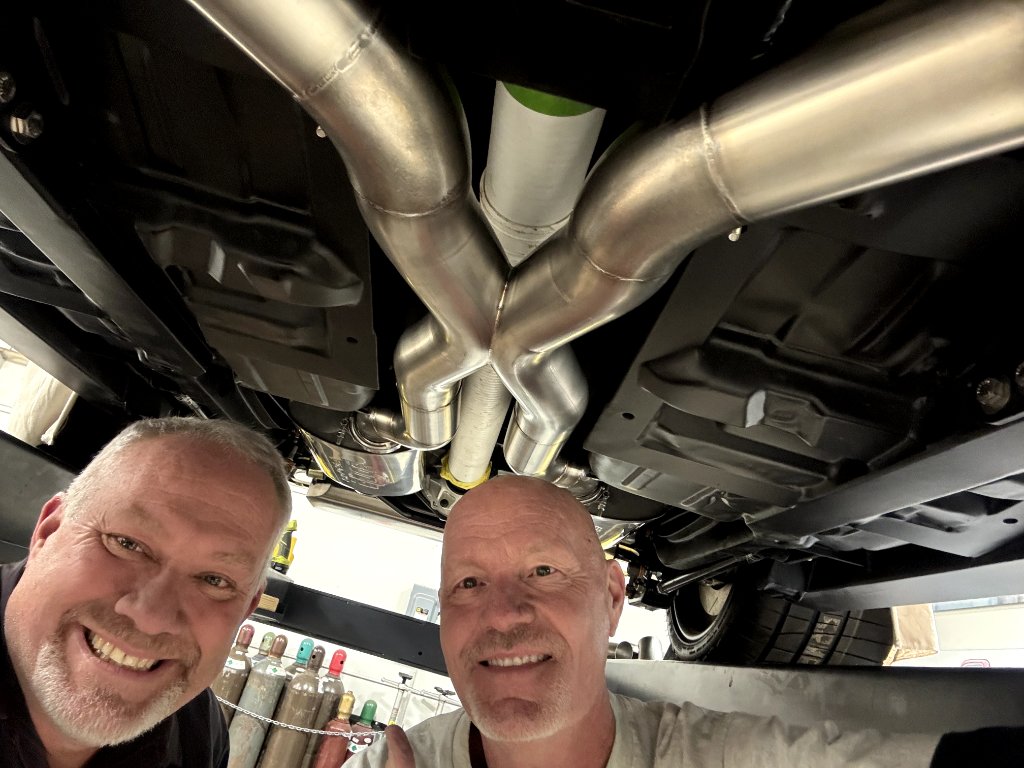
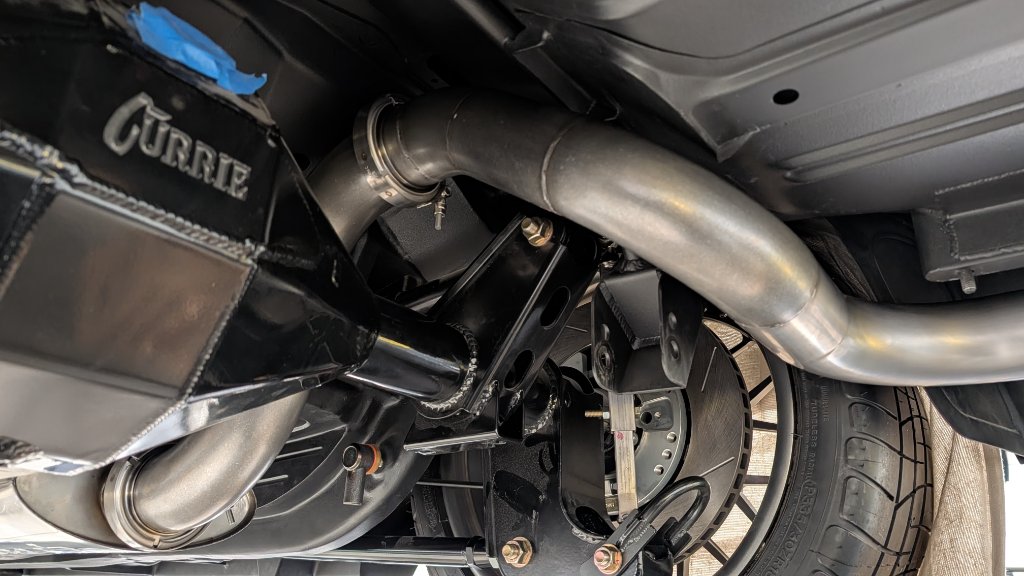
More on the exhaust.
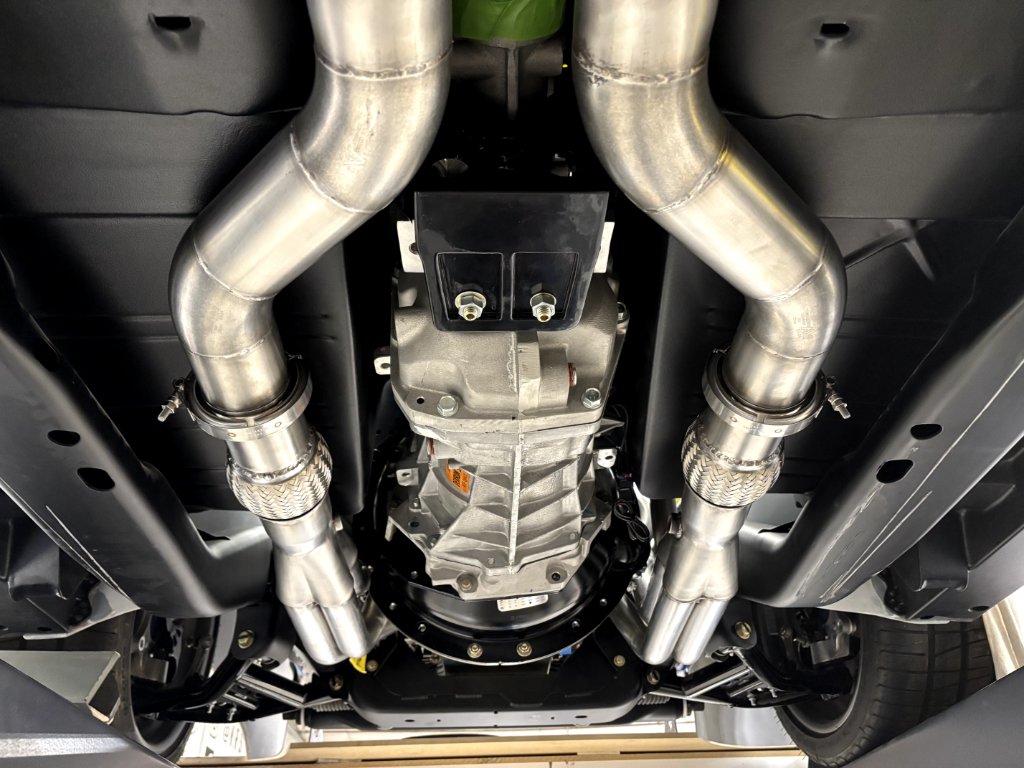
 Yes, that's 3" irrigation drain pipe subbing in for a 4" driveshaft. Ha!, use what you got!
 All buttoned up to the rear-end. We will continue out the back next week.
 I'm so thankful for Kenny Welch of Kenny's Rod Shop for helping me for the last 2 weekends get the exhaust looking real nice. So awesome to be around dudes with this level of talent.
On Kenny's advice.... Though I did buy a Borla Universal kit, he likes to use sanitary pipe elbows from an industrial piping supply house. Super clean way to have perfect flat surfaces at exactly the right angle. So, I didn't need the Borla kit but I'll find a good home for it - lesson...ask the experts before ordering! When the dust settles, I think the cost of those pieces and a couple straight sections is less than the Universal kit but the fit is sooo tight! Highly recommend!
|
|
The Following 5 Users Say Thank You to Goosesdad For This Useful Post:
|
|
11-30-2025, 04:00 PM
|
 |
Lateral-g Supporting Member
|
|
Join Date: Mar 2010
Location: San Antonio, Tx
Posts: 888
Thanks: 106
Thanked 347 Times in 144 Posts
|
|
Sanitary pipe bends are hydro-formed so they don't oval out when you cut them like mandrel bends do. More expensive, but higher quality end product.
__________________
Instagram- camaroaj
|
|
The Following 5 Users Say Thank You to CamaroAJ For This Useful Post:
|
|
12-01-2025, 07:00 AM
|
 |
Senior Member
|
|
Join Date: Nov 2021
Posts: 175
Thanks: 118
Thanked 208 Times in 115 Posts
|
|
Great info on the sanitary pipe bends. I learned something new! Exhaust looks awesome and super clean.
Man of many talents! 
__________________
-Matt-
'61 Biscayne ~ AKA BISKWIK
|
|
The Following 3 Users Say Thank You to Cramer4918 For This Useful Post:
|
|
12-06-2025, 10:36 AM
|
|
Lateral-g Supporting Member
|
|
Join Date: Apr 2015
Posts: 686
Thanks: 1,412
Thanked 858 Times in 349 Posts
|
|
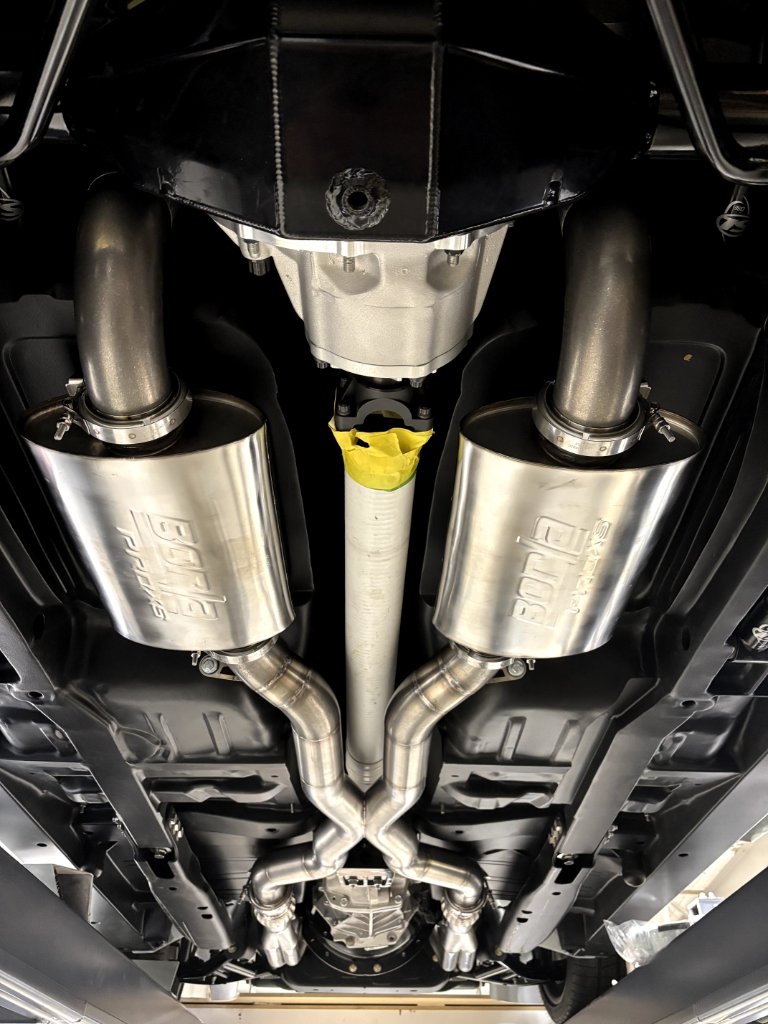
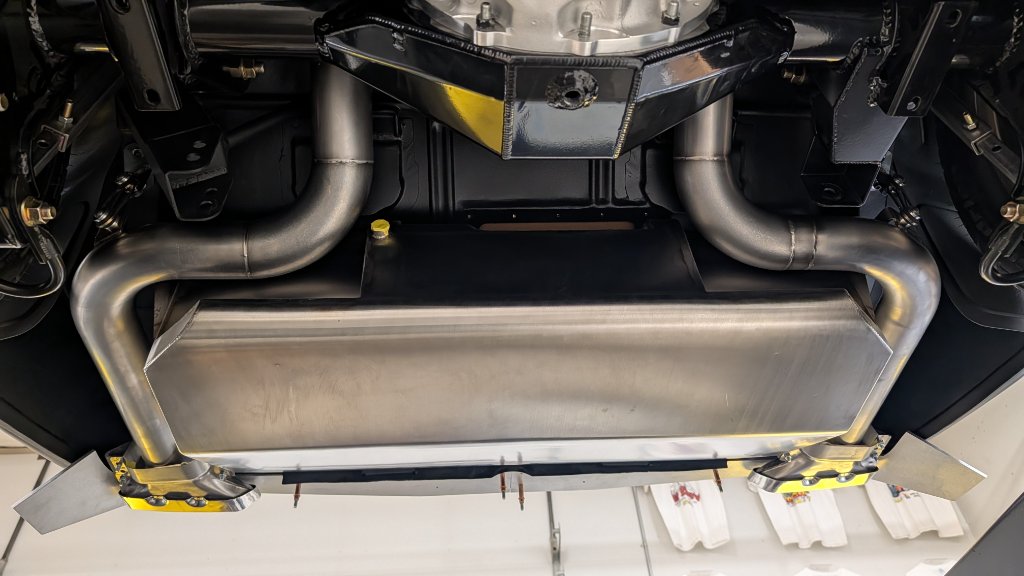
99% finished with the exhaust, still working out how I'm going to connect or not connect to the exhaust tips. Again, more skilled help from one of Kenny's guys! I wouldn't pick up the torch around here! So much fun going to "work" everyday.
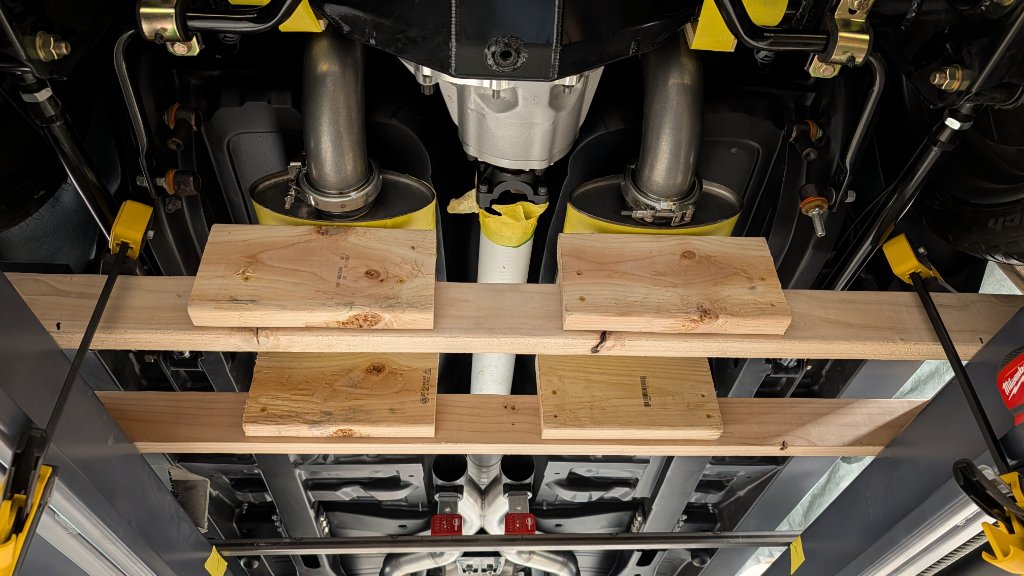
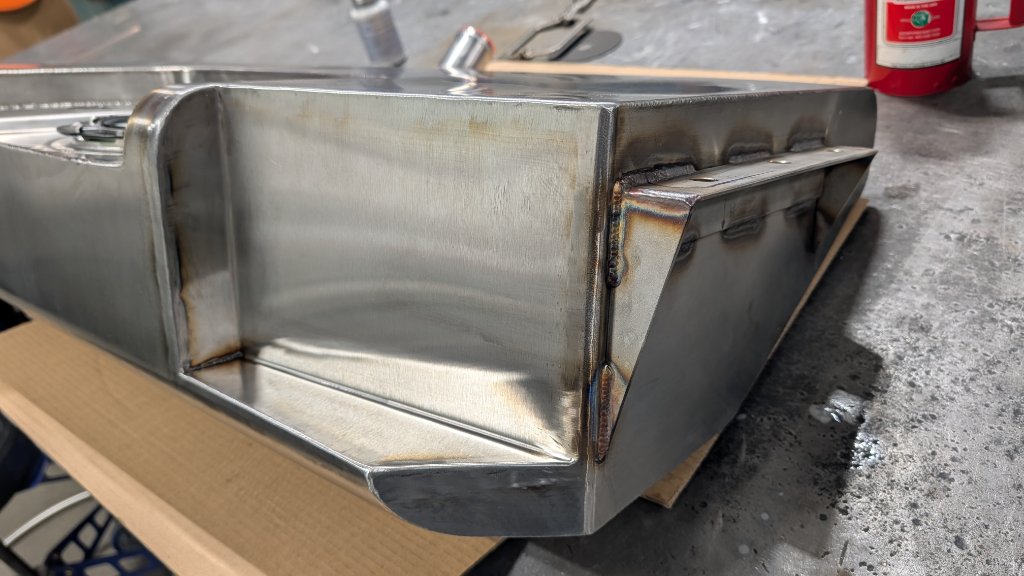
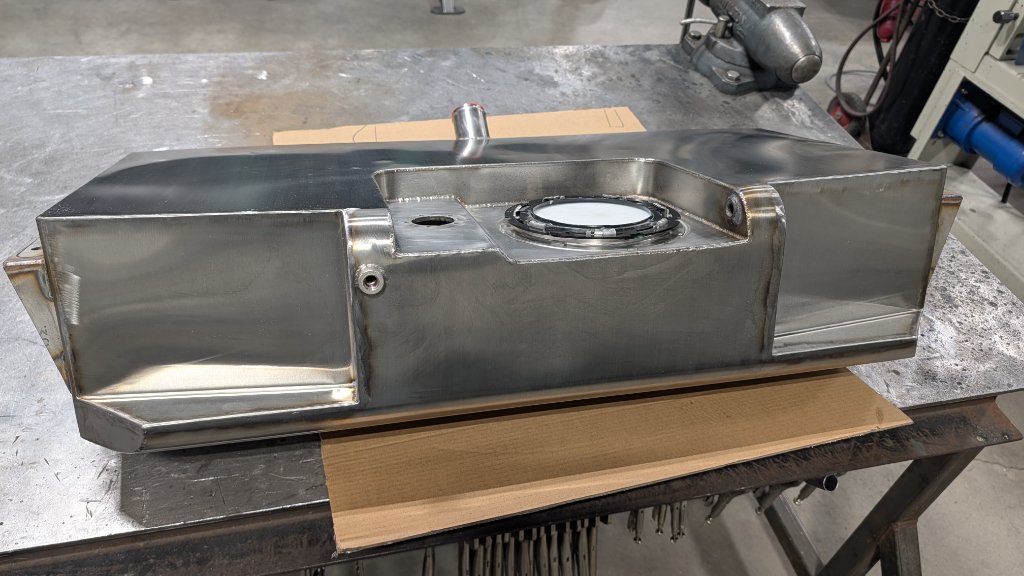
Gas tank needed significant notching.
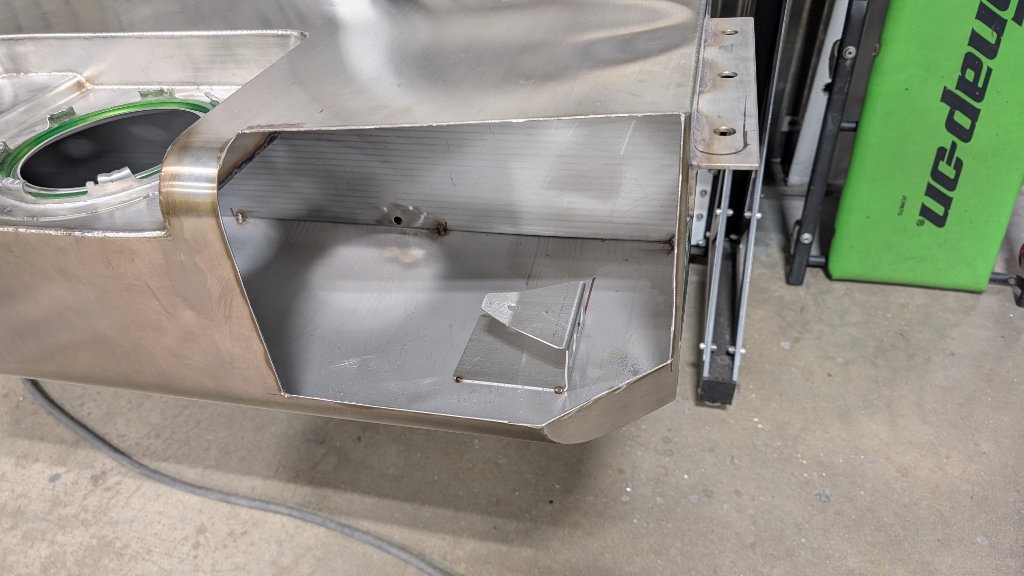
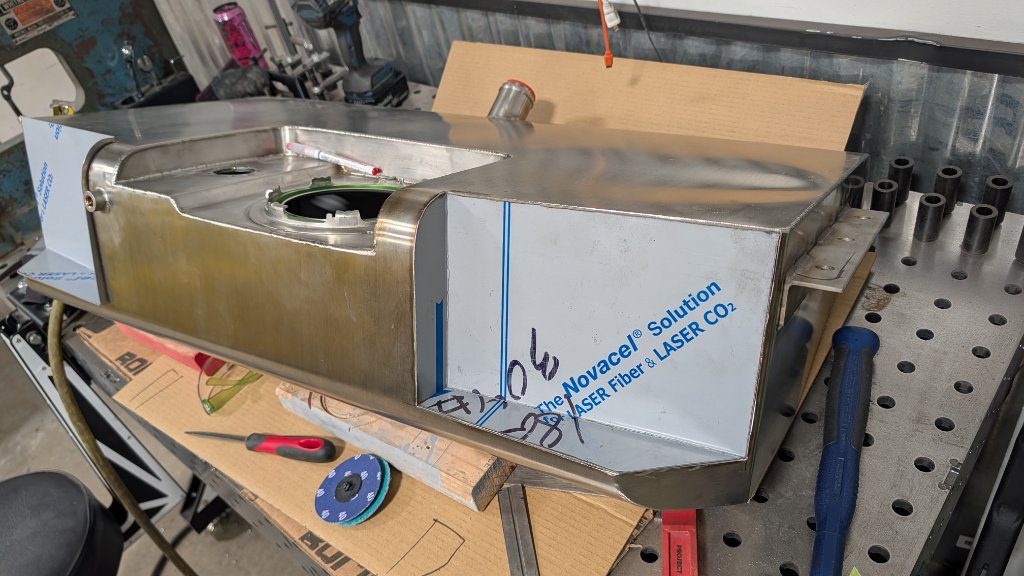
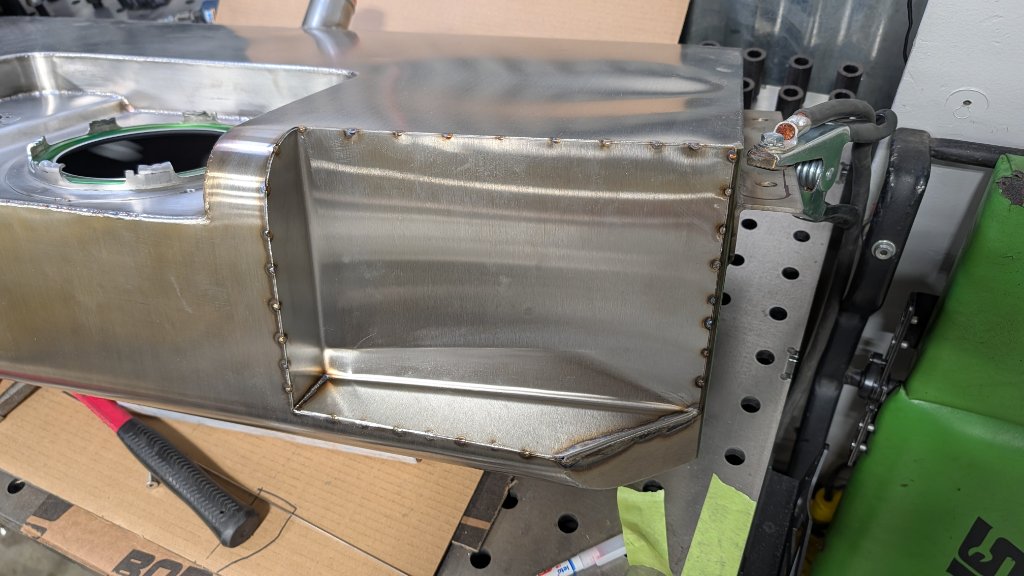 Added some bracing to support the tank mounts that I did long ago.

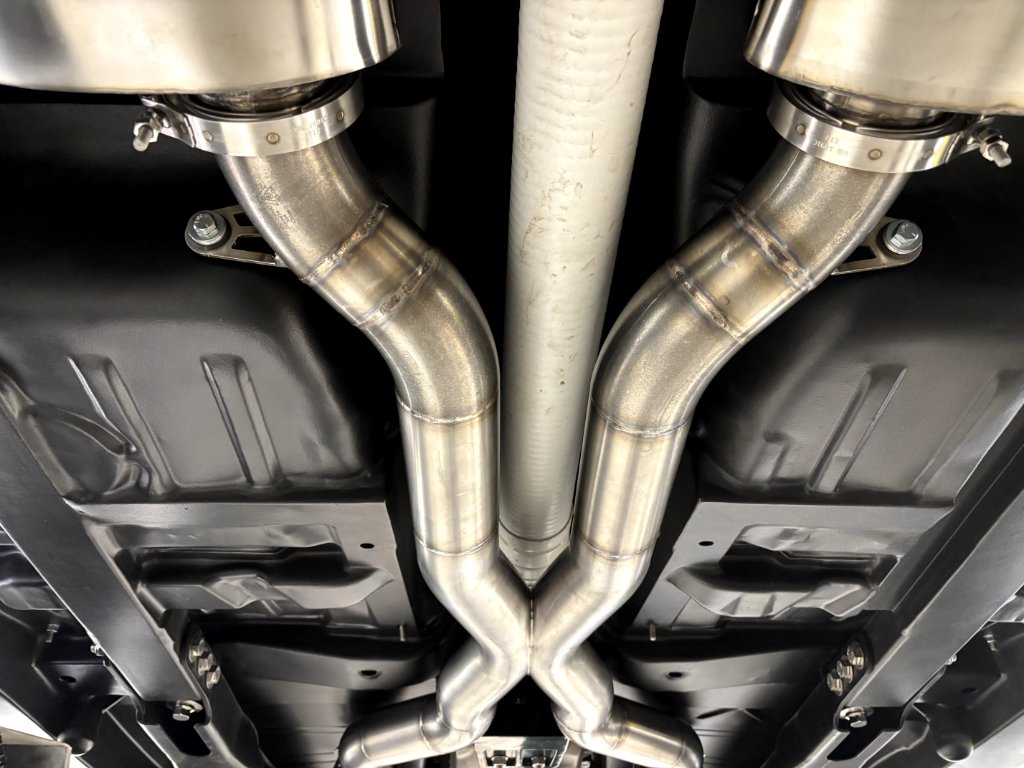
 I know it looks real close, it is! Only about 1/4" but I'm going to wrap the entire exhaust so it should be fine.
Once I finish the aluminum surround/side skirt around the exhaust tips (for sure it won't hang down as it is now - just haven't inked it yet), I'll figure out how the exhaust attaches.
|
|
The Following 5 Users Say Thank You to Goosesdad For This Useful Post:
|
|
12-06-2025, 12:32 PM
|
 |
Administrator
|
|
Join Date: Jul 2004
Location: Wilton, CA.
Posts: 13,458
Thanks: 7,634
Thanked 2,329 Times in 1,092 Posts
|
|

|
|
The Following User Says Thank You to camcojb For This Useful Post:
|
|
12-11-2025, 11:05 AM
|
|
Lateral-g Supporting Member
|
|
Join Date: Apr 2015
Posts: 686
Thanks: 1,412
Thanked 858 Times in 349 Posts
|
|
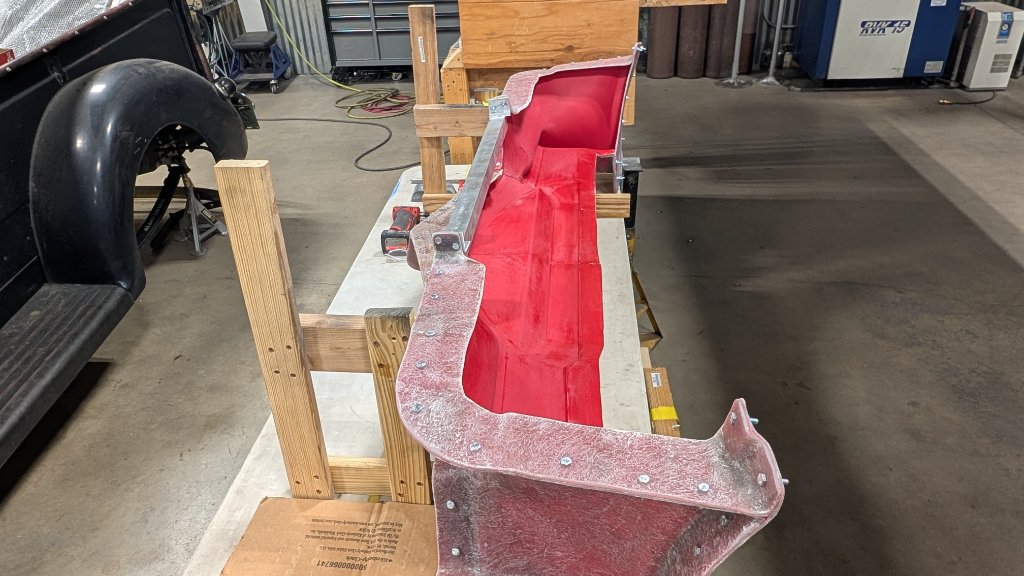
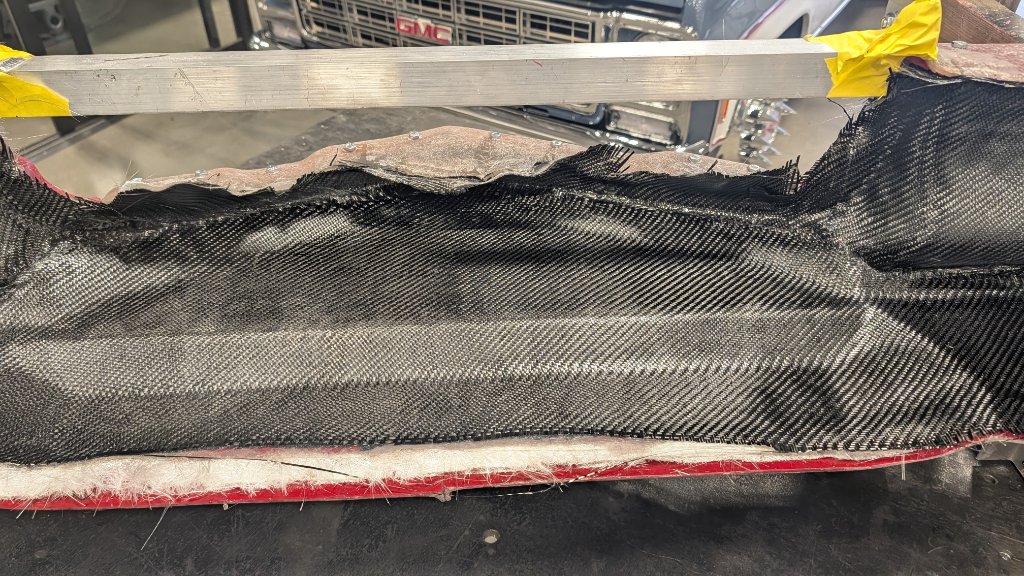
Mold put back together, prepped for laminating the part.
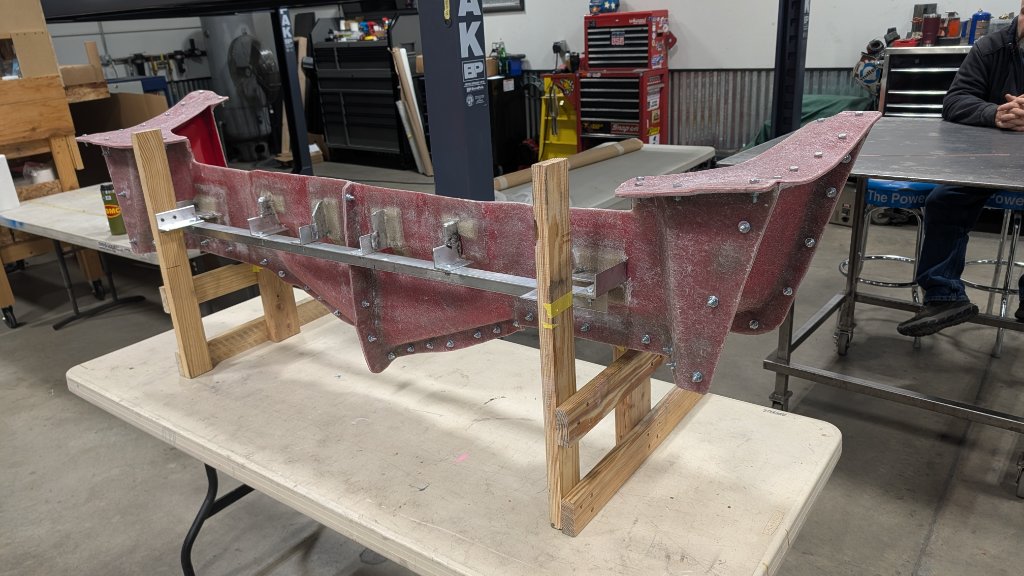 Sprayed PVA Mold Release.
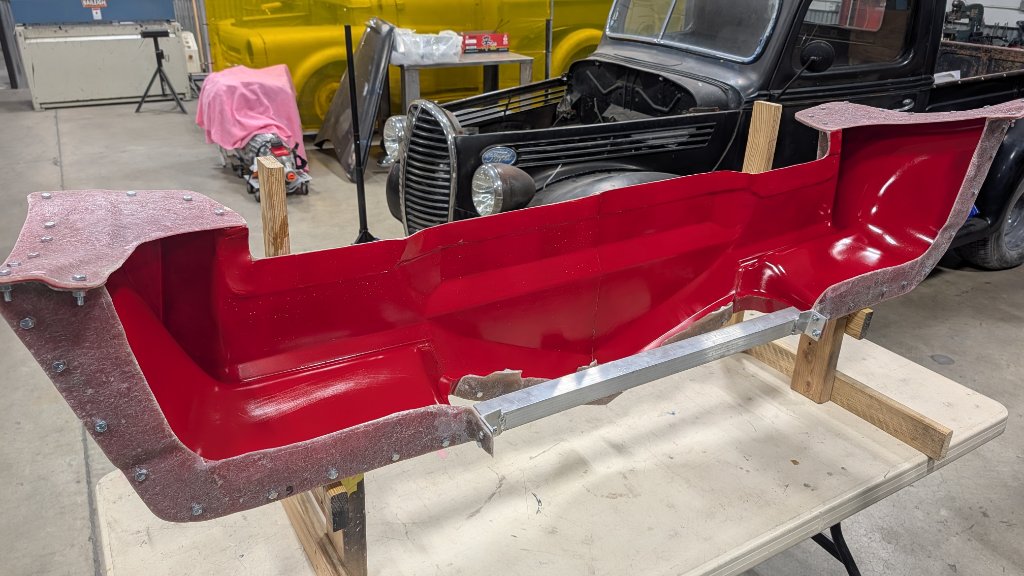 Brushed on the gelcoat. No great way to accurately spray it with this mold, just to many tight areas to insure a consistent layer. Brushing is an OK alternative but will have pin holes. This thing will get body-worked during paint so no worries.
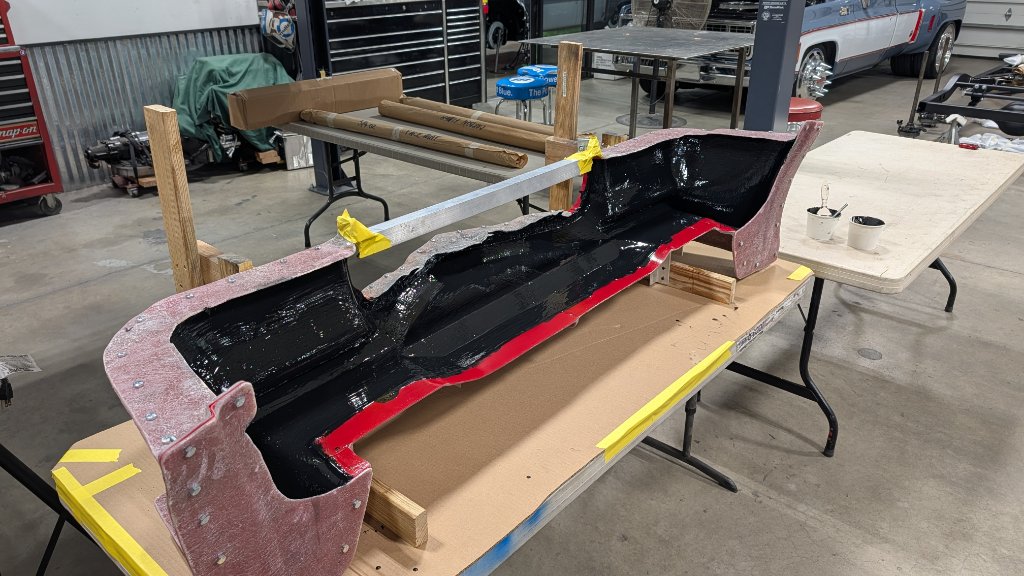 First layer of 3/4oz mat fiberglass and 3/32" glass fibers in the tight corners.
I also added a small piece of 3/8" aluminum in the outer most section for the splitter to bolt up to later. Buried it in with the carbon Will drill and tap. Didn't get pics of that as I was elbows deep in resin.
 Added the carbon.
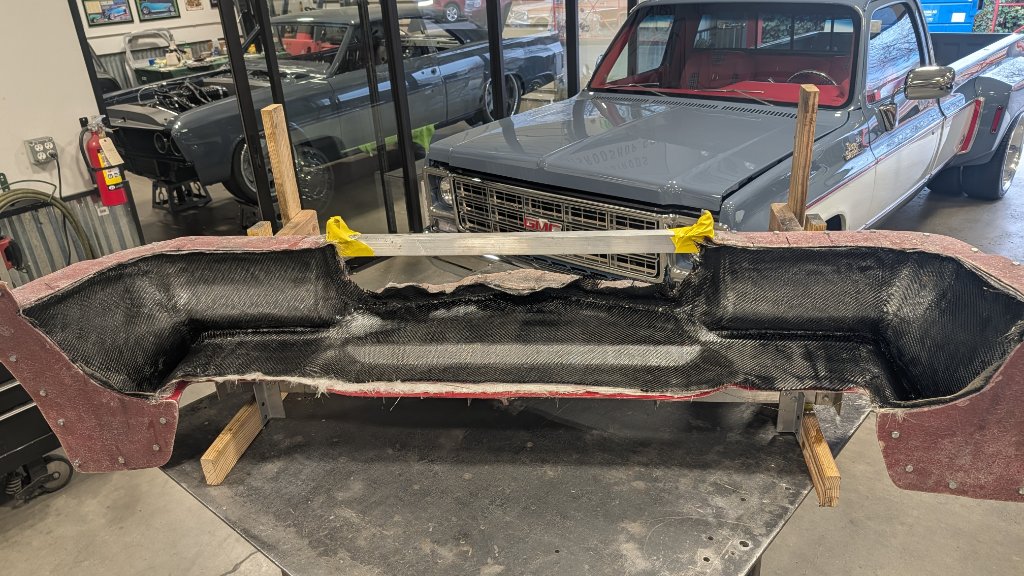
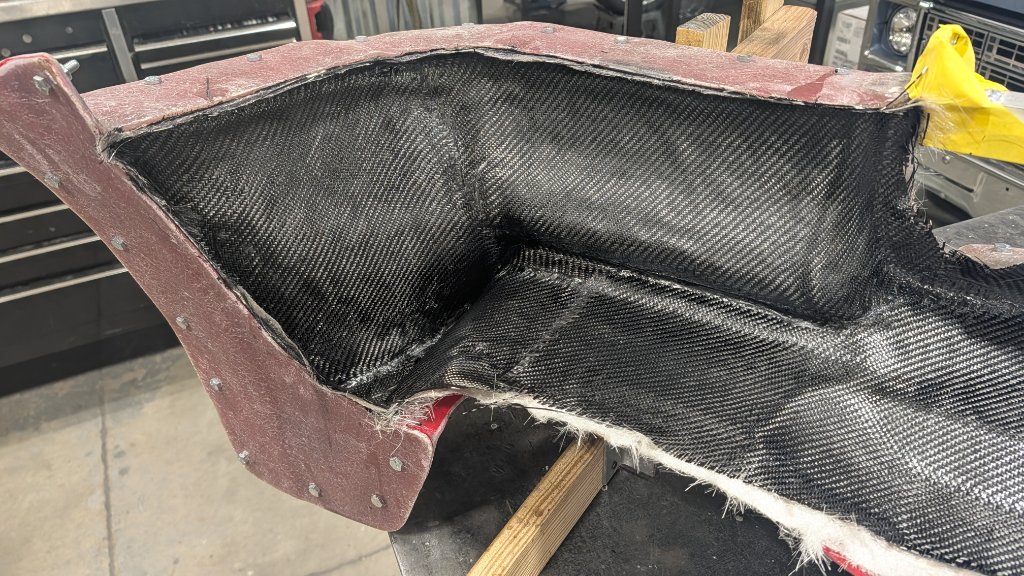 This will sit in the mold for a couple weeks. More to come soon. Hope everyone has a wonderful Christmas and Holiday!!
|
|
The Following 3 Users Say Thank You to Goosesdad For This Useful Post:
|
|
 Posting Rules
|
You may not post new threads
You may not post replies
You may not post attachments
You may not edit your posts
HTML code is Off
|
|
|
All times are GMT -7. The time now is 02:42 PM.
|


 Brian Hobaugh SCCA National Tour June 2014
 First Hemi 'Cuda Convertible Ever Built
 Short clips: Goodguys Pleasanton autocross and pit videos


 It's like a ball of yarn unwinding, that has no end... Author DKz Garage

 Linear Mode
