...

Go Back   Lateral-g Forums > Lateral-G Open Discussions > Project Updates
User Name
Password


Reply
 
Thread Tools Display Modes
  #91  
Old 06-14-2014, 06:30 AM
onelapduster onelapduster is offline
Senior Member
 
Join Date: Dec 2010
Posts: 141
Thanks: 0
Thanked 1 Time in 1 Post
Default

As long as your using stock lower control arms, the CV sway bar will bolt to the frame. Center up the bar mounts, drill the holes and mount it up. Just make sure the links are vertical.
Reply With Quote
  #92  
Old 06-15-2014, 07:52 PM
hackster's Avatar
hackster hackster is offline
Senior Member
 
Join Date: Oct 2013
Posts: 342
Thanks: 55
Thanked 81 Times in 47 Posts
Default

Quote:
Originally Posted by onelapduster View Post
As long as your using stock lower control arms, the CV sway bar will bolt to the frame. Center up the bar mounts, drill the holes and mount it up. Just make sure the links are vertical.

Yeah I have seen a few others do this before, Going for the aftermarket bar so I can have it powdercoated and nicer bushings as well as a bigger bar for better handling. Stock Lower Control arms, so we should be solid.

So these showed up Friday afternoon and hung out in my office all weekend along with a bunch of stuff from LMC Truck.

Headliner, seat slider knob and the wrong brake pedal pad.....I think it was my fault though.


But these are pretty sweet.

I have been sick for the last three days, battling some nasty ass cold but really hope to get some time to get all this stuff installed this week once I am feeling better. Having the truck not at ride height is just bothering me.

I heard From Aaron that the hood and door panels got some paint on them last week, they were waiting for them to harden up a little bit before bringing them over to install and align the hood and frontend.

Sean
Reply With Quote
  #93  
Old 06-16-2014, 08:32 PM
hackster's Avatar
hackster hackster is offline
Senior Member
 
Join Date: Oct 2013
Posts: 342
Thanks: 55
Thanked 81 Times in 47 Posts
Default

Still feeling like crap but I did manage an hour or so this evening out in the garage.

Got the headliner installed, looks ok. Its Gray just like the factory would be. I did not think I liked it at first but its growing on me now. Keeps the top of the cab a little lighter than if it was black.


After a lot of screwing around with the side mirror, its finally back on the truck. The actual Mirror portion still needs a little bit of work but Ill deal with that later down the road once its at least driven under its own power.

New rubber, new screws and here it is all mounted up. Looks alright, still not super happy but I think it will work.


I am trying to get tires figured out at this point but at a little bit of a stand still. I am running 8.5's up front and 10.5's in the rear and need them to be a fairly short sidewall, 20's are big.

What are your recommended tire sizes?

Sean
Reply With Quote
  #94  
Old 06-17-2014, 08:58 PM
hackster's Avatar
hackster hackster is offline
Senior Member
 
Join Date: Oct 2013
Posts: 342
Thanks: 55
Thanked 81 Times in 47 Posts
Default

Stopped by Aarons place and chatted with him and Chris for a little bit after work. Hood is about finished up and door panels are all done so I brought those home tonight. We are going to fit up the frontend and get the hood on Thursday night. Will be the first time seeing the truck all together since August of last year.

Got one door buttoned up tonight, somehow I managed to misplace one of the window cranks....So passenger side still needs one of those but panels are on and the inner latch releases and arm rests are in.

Doors are a little stark but I think they are very fitting for the look I am shooting for.....very clean stockish appearing from the outside looking in. Wish I had a different shifter, I might get the aluminum cover and lever powdercoated black to blend in with the floor better.


Sean
Reply With Quote
  #95  
Old 06-18-2014, 05:35 AM
jarhead's Avatar
jarhead jarhead is offline
Senior Member
 
Join Date: Dec 2011
Location: Colorado, in a van down by the river
Posts: 1,269
Thanks: 951
Thanked 305 Times in 179 Posts
Default

Looks good Sean, I miss mine, of course it wasn't this cool, just the same body.
__________________
joe
Semper Fi

My 68 Torino
Reply With Quote
  #96  
Old 06-18-2014, 07:41 AM
OBeer-WAN-Kenobi's Avatar
OBeer-WAN-Kenobi OBeer-WAN-Kenobi is offline
Senior Member
 
Join Date: Jun 2013
Location: Wisconsin
Posts: 384
Thanks: 0
Thanked 1 Time in 1 Post
Default

Looking Good!

Personally, I'd go with a different color (black) for the door cards. They are going to be really hard to keep clean and it's just a bit too much white IMHO. Even painting the outer edge (where the screws go through) black might do the trick to break it up a little.
__________________
'69 RS Camaro
'99 SWB Silverado LS "Beater"
'01 GMC Sierra 2500HD LQ4 (Turbo build)
'04 GMC Sierra 2500HD 4X4


My '69 Camaro Build Thread
Reply With Quote
  #97  
Old 06-18-2014, 08:58 AM
hackster's Avatar
hackster hackster is offline
Senior Member
 
Join Date: Oct 2013
Posts: 342
Thanks: 55
Thanked 81 Times in 47 Posts
Default

Quote:
Originally Posted by OBeer-WAN-Kenobi View Post
Looking Good!

Personally, I'd go with a different color (black) for the door cards. They are going to be really hard to keep clean and it's just a bit too much white IMHO. Even painting the outer edge (where the screws go through) black might do the trick to break it up a little.
I can get Black Plastic door cards later down the road if I choose to. This is how the truck came from the factory though, White painted door cards so that is what it is getting for this time around.

It is a lot of white, but looks really clean and I like that. Not too sure I could pull off a black trim around the panel, I think it would give it a bit of a cheesy look, 80's vintage, but I never really thought about it.

This interior is temporary though.

It will get a full custom interior next winter, just running out of time for summer and need it on the road soon.

It will be getting a full Saddle Leather interior setup, buckets, full center console and door panels.
Reply With Quote
  #98  
Old 06-18-2014, 08:56 PM
hackster's Avatar
hackster hackster is offline
Senior Member
 
Join Date: Oct 2013
Posts: 342
Thanks: 55
Thanked 81 Times in 47 Posts
Default

Coilovers got installed tonight and kind of adjusted. Already looks and feels better than the stock crap. Pretty easy install too. Mike Naake put a great front setup together.


Steady progress, little bits every night.

Tomorrow is hood and align front sheetmetal with painter and a little bit of wiring.

Got a laundry list of stuff to order now, Exhaust being the big thing.

Sean
Reply With Quote
  #99  
Old 06-19-2014, 06:53 AM
OBeer-WAN-Kenobi's Avatar
OBeer-WAN-Kenobi OBeer-WAN-Kenobi is offline
Senior Member
 
Join Date: Jun 2013
Location: Wisconsin
Posts: 384
Thanks: 0
Thanked 1 Time in 1 Post
Default

Quote:
Originally Posted by hackster View Post
...
Steady progress, little bits every night.
...
That's how it get's done! A while back I was working on my project mostly on the weekends because I didn't really feel like doing anything at night after work. Then I realized how much time I was wasting when I was trying to get everything done on the weekends. Not to mention finding problems and having to wait for a new part to be delivered or something.

When I started working on it a little bit whenever I had the chance, stuff started moving along much more quickly.
__________________
'69 RS Camaro
'99 SWB Silverado LS "Beater"
'01 GMC Sierra 2500HD LQ4 (Turbo build)
'04 GMC Sierra 2500HD 4X4


My '69 Camaro Build Thread
Reply With Quote
  #100  
Old 06-19-2014, 09:55 PM
hackster's Avatar
hackster hackster is offline
Senior Member
 
Join Date: Oct 2013
Posts: 342
Thanks: 55
Thanked 81 Times in 47 Posts
Default

I totally agree. Usually I spend a whole day on the weekend just getting parts together so I can keep working.

Speaking of little bits.

I managed to finish up the rest of the wiring in the engine bay, all loomed landed grommeted and ran into the cabin.

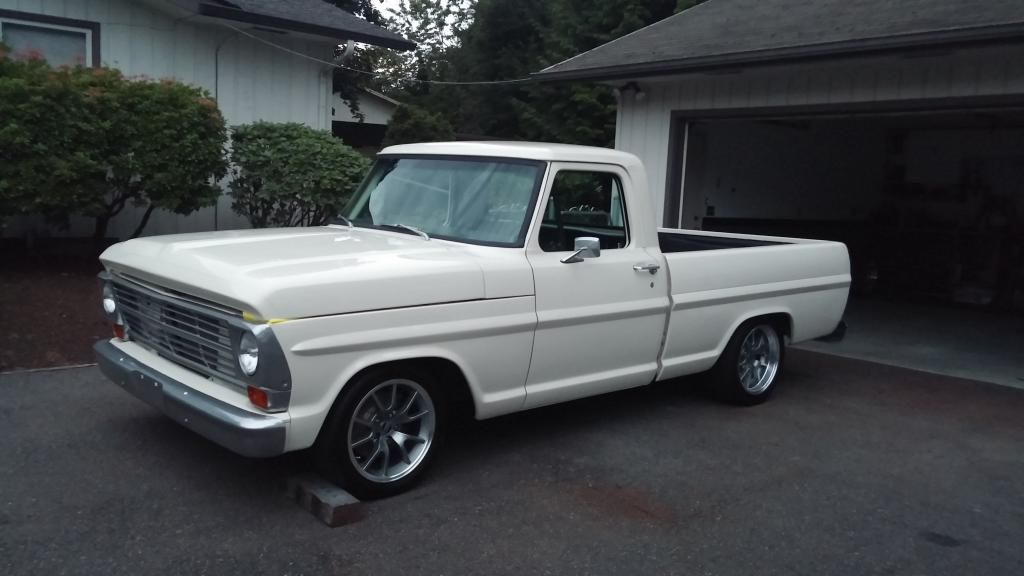
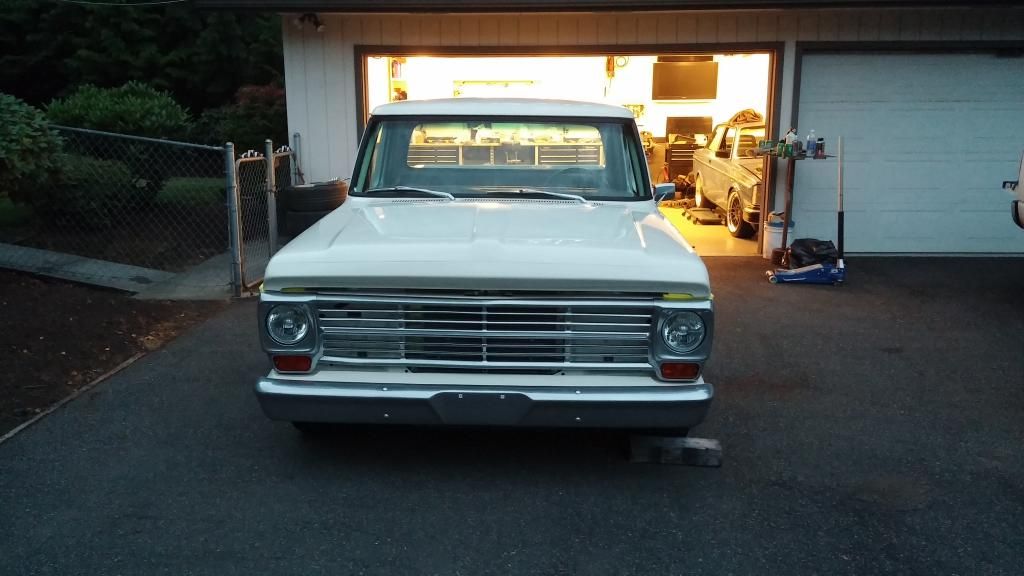
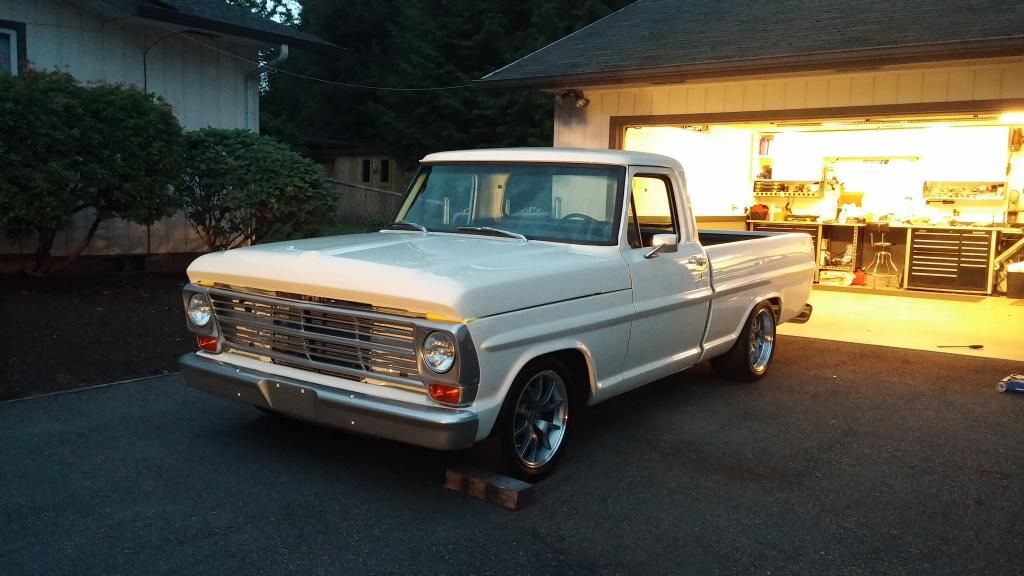
Aaron and Chris showed up and got right to it. We got the hood on and rough aligned and then went to work on shimming up the core support. Once it was at the right height, we squared it all up and got the hood final aligned, hood latch installed and done.

Thanks again to those guys at Southbound Customs!!

I have only seen this thing one time all complete, but it looked nothing like this. The hood totally changed what this thing looks like.


Also managed to get the right window cranks on the truck. The ones from LMC sucked.

I picked up fluids for it today. I am going to try and make a darn good push this weekend and hope to maybe try and start it in the next week or so.

Thanks for following along.

Sean
Reply With Quote
Reply


Posting Rules
You may not post new threads
You may not post replies
You may not post attachments
You may not edit your posts

BB code is On
Smilies are On
[IMG] code is On
HTML code is Off

Forum Jump


All times are GMT -7. The time now is 01:16 PM.


Powered by vBulletin® Version 3.8.11
Copyright ©2000 - 2025, vBulletin Solutions Inc.
Copyright Lateral-g.net