...

Go Back   Lateral-g Forums > Lateral-G Open Discussions > Project Updates
User Name
Password


Reply
 
Thread Tools Display Modes
  #31  
Old 05-16-2012, 08:52 PM
Cris@JCG's Avatar
Cris@JCG Cris@JCG is offline
Senior Member
 
Join Date: Apr 2009
Location: Oxnard, CA
Posts: 1,915
Thanks: 0
Thanked 4 Times in 4 Posts
Default

Here are some updates for this week... I made the decision today to go LS on the test car.. It is the bulk of the work we do @ JCG...


__________________
Cris Gonzalez
Reply With Quote
  #32  
Old 05-16-2012, 09:10 PM
Flash68's Avatar
Flash68 Flash68 is offline
Moderator
 
Join Date: Sep 2005
Location: NorCal
Posts: 9,180
Thanks: 58
Thanked 158 Times in 104 Posts
Default

Quote:
Originally Posted by Gonzo View Post
I made the decision today to go LS on the test car..
BOOOOOOOOO!!! Rich and I are not happy about that.
__________________
2004 NASA AIX Mustang LS2 #14
1964 Lincoln Continental
2014 4 tap Keezer
Reply With Quote
  #33  
Old 05-16-2012, 09:10 PM
DEIGuy38's Avatar
DEIGuy38 DEIGuy38 is offline
Senior Member
 
Join Date: Apr 2006
Location: Northern California
Posts: 460
Thanks: 0
Thanked 2 Times in 2 Posts
Default

Chris, you guys do great work and come up with some trick pieces.

One observation was on your subframe and rear clip the seams on the steel are in random places, not all to the inside or outside. If someone were to buy one of your subframes and just wanted to paint and install the seams would be noticeable. Alot of grinding and bodywork would be needed to hide the seams. I would just put all of the seams to the inside, may cost you a little more tubing but in the end I think look better. Just my .02
Attached Images
 
__________________
Guy

68 Camaro, LS1 T56, DSE Speed Kit 2, DSE Quadralink, DSE Mini Tub, Forgelines, Vintage Air, Dakota Digital, GM Tilt Column, Corbeau Seats
2012 Dodge 3500 4x4 6.7L Diesel CCSB

Last edited by DEIGuy38; 05-16-2012 at 09:13 PM.
Reply With Quote
  #34  
Old 05-18-2012, 07:39 AM
Cris@JCG's Avatar
Cris@JCG Cris@JCG is offline
Senior Member
 
Join Date: Apr 2009
Location: Oxnard, CA
Posts: 1,915
Thanks: 0
Thanked 4 Times in 4 Posts
Default

Yeah! But guys need to get out of the stone ages! While your @ it .. bring Todd in from the dark side!


Quote:
Originally Posted by Flash68 View Post
BOOOOOOOOO!!! Rich and I are not happy about that.
That was a detail that got by on me with a few others.. but this is not a car that will have alot of detail.. It is my test car.. The front sub has been a pain to fabricate... We are looking at ways to optimize for the others I need to build...

Quote:
Originally Posted by DEIGuy38 View Post
Chris, you guys do great work and come up with some trick pieces.

One observation was on your subframe and rear clip the seams on the steel are in random places, not all to the inside or outside. If someone were to buy one of your subframes and just wanted to paint and install the seams would be noticeable. Alot of grinding and bodywork would be needed to hide the seams. I would just put all of the seams to the inside, may cost you a little more tubing but in the end I think look better. Just my .02
__________________
Cris Gonzalez
Reply With Quote
  #35  
Old 07-03-2012, 07:38 PM
Cris@JCG's Avatar
Cris@JCG Cris@JCG is offline
Senior Member
 
Join Date: Apr 2009
Location: Oxnard, CA
Posts: 1,915
Thanks: 0
Thanked 4 Times in 4 Posts
Default

Well my first prototype sub-frame has been a challenge… This why we build prototypes so that we can catch the things that will work & need to be modified..
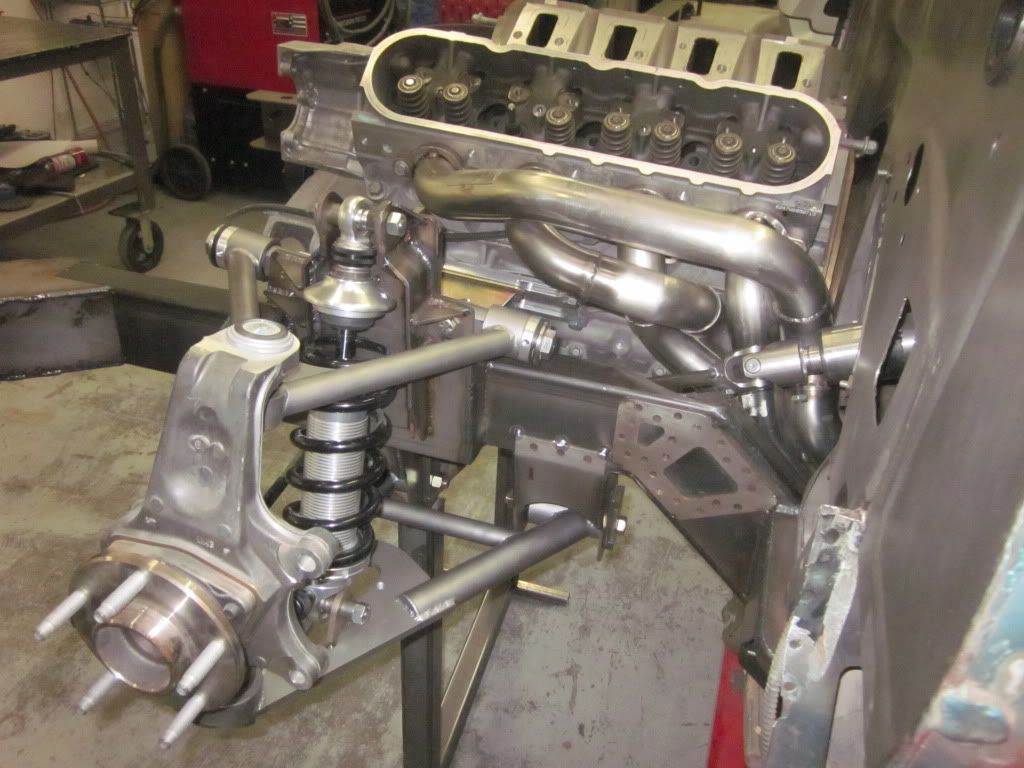
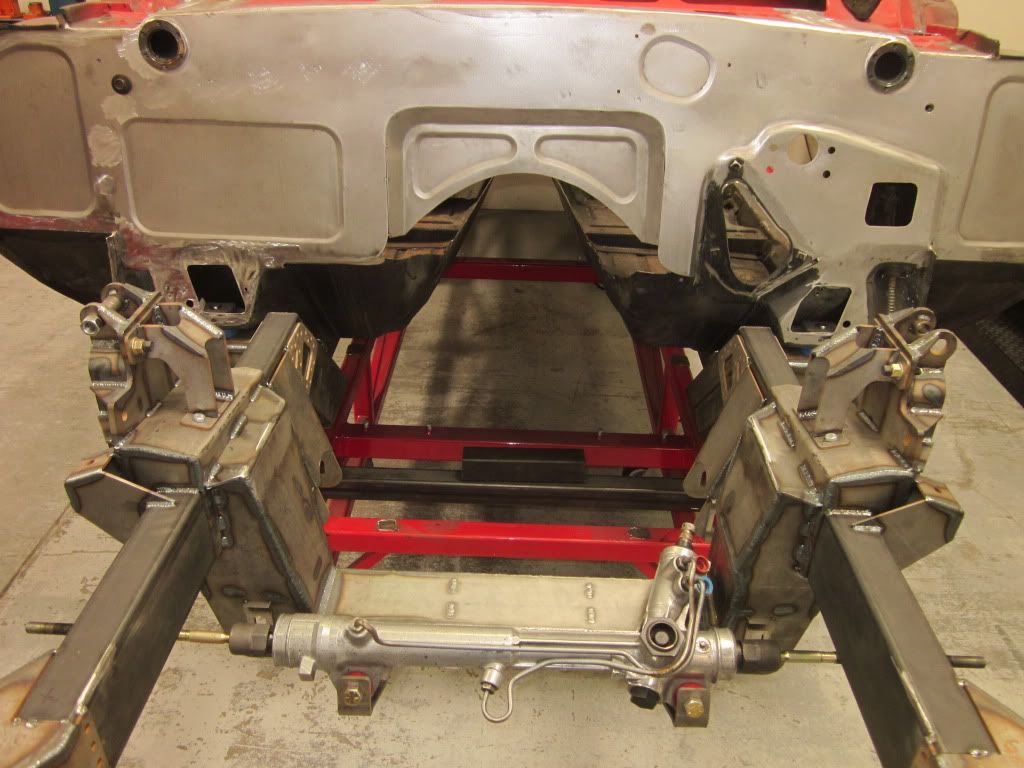
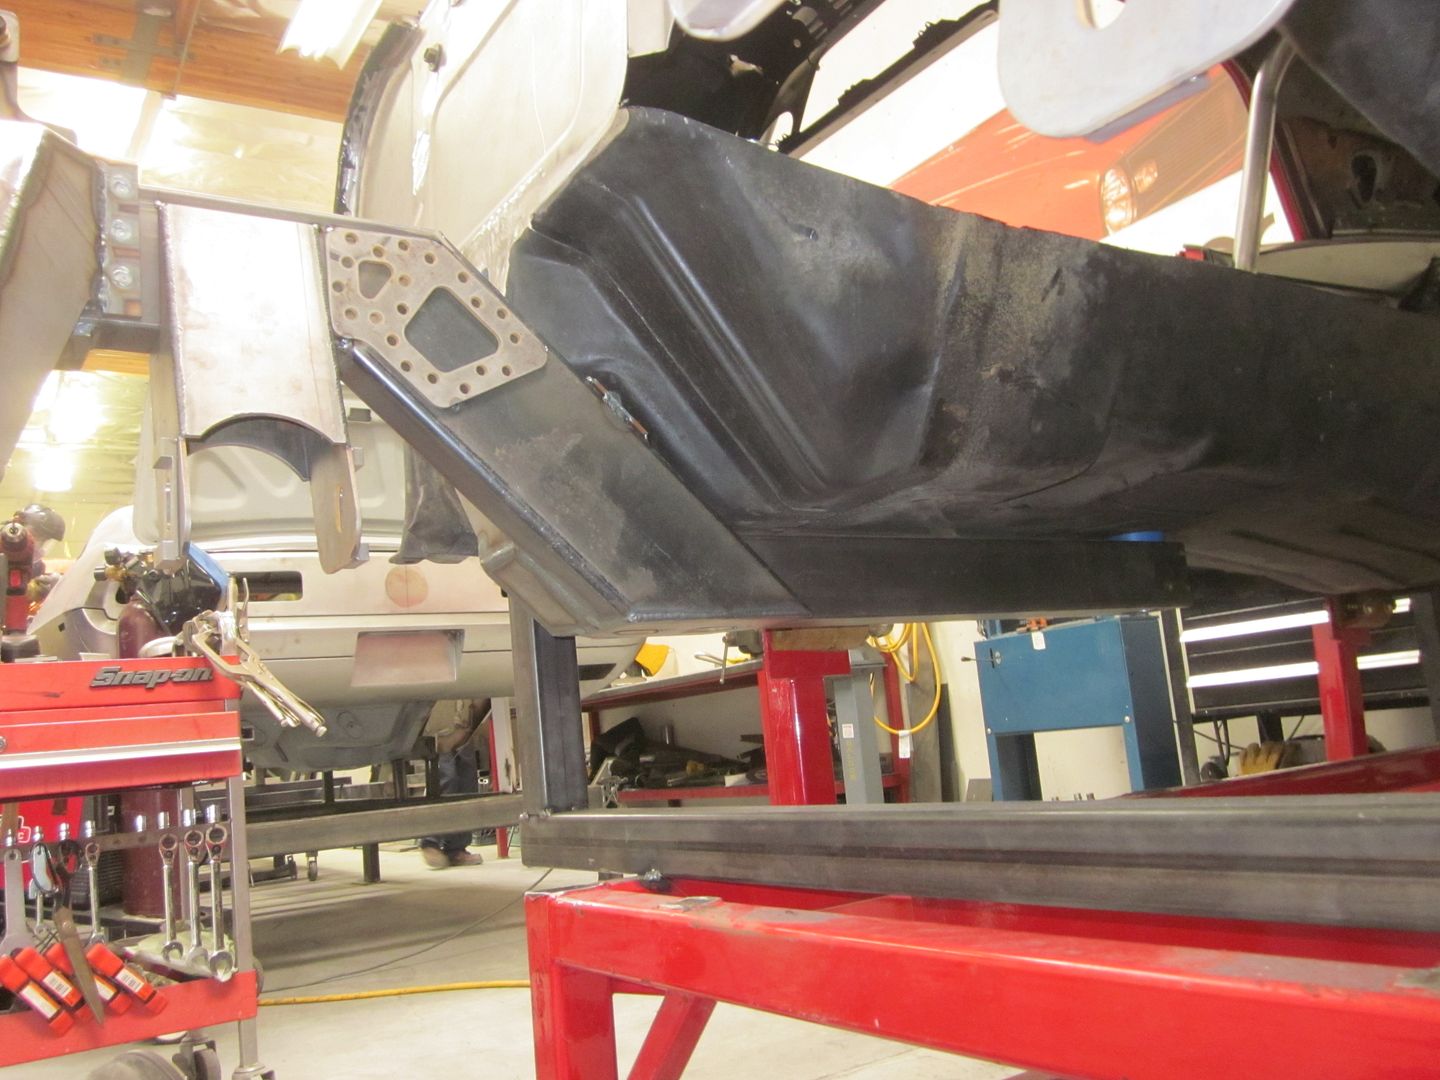
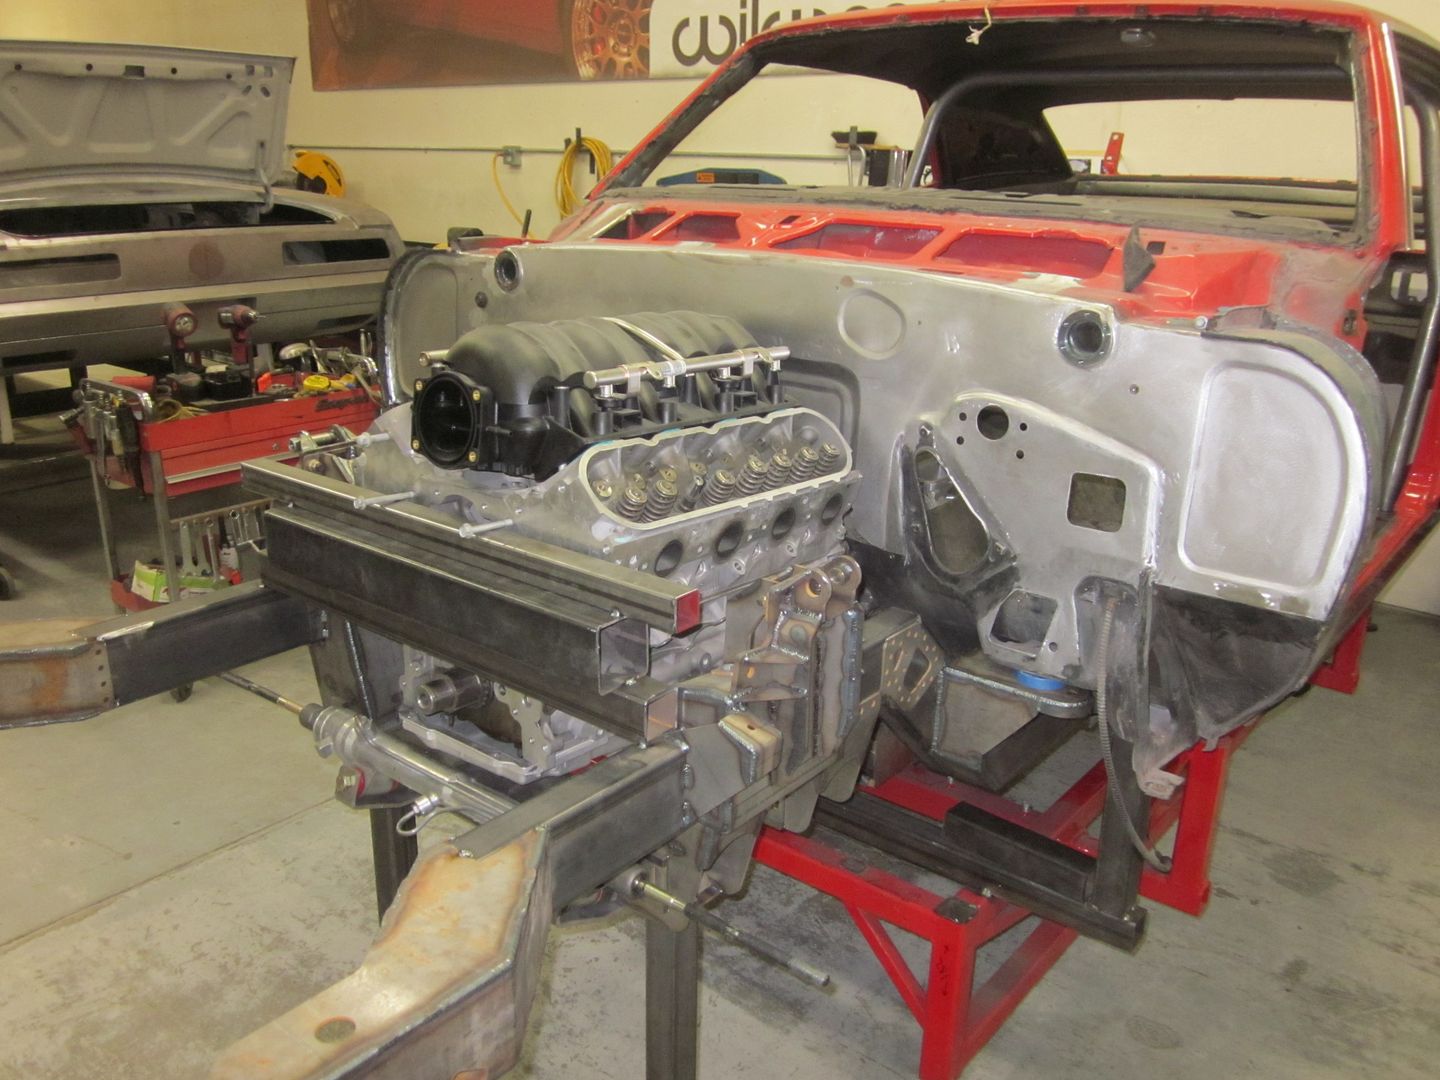
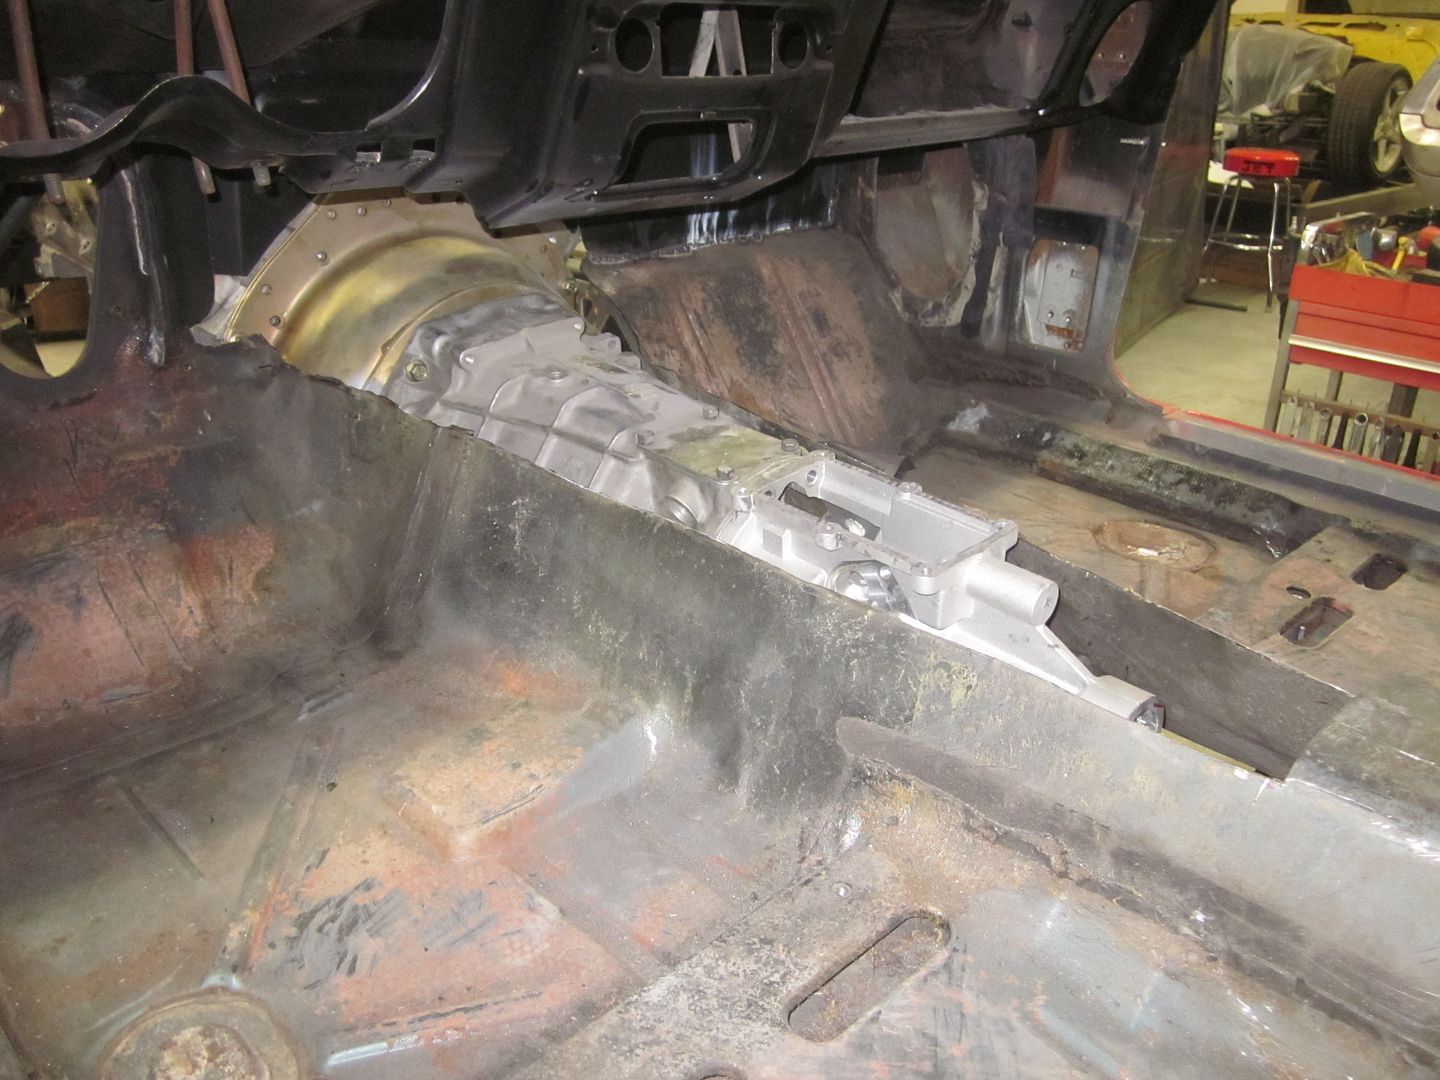
The first thing that was a issue was the steering column that did not have the clearance we needed.. then the frame rails were too narrow to build headers.. then we needed to build engine mounts… then have clearance for accessory drive system…

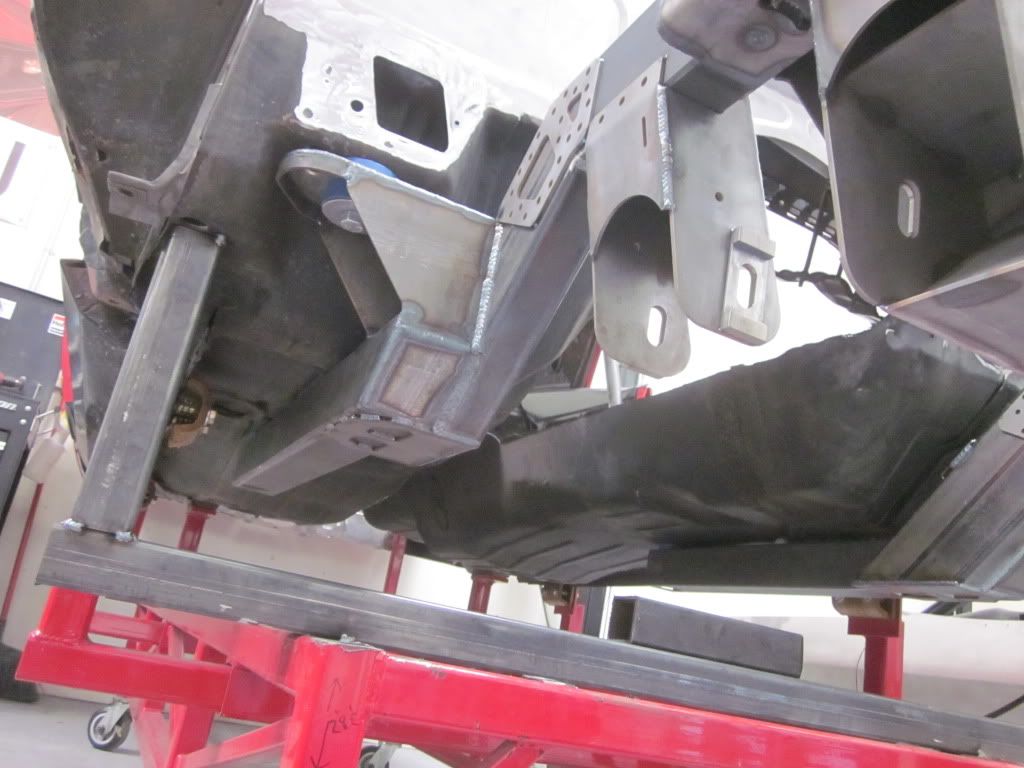
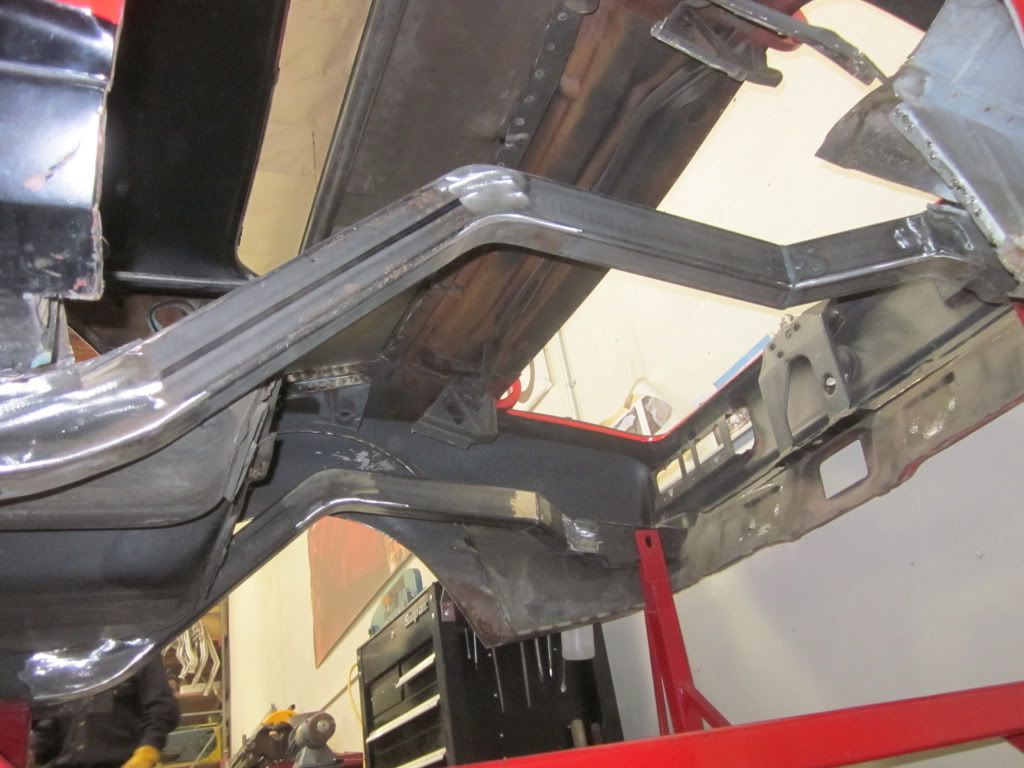
So plan B.. We redesigned the frame rails to clear all the problems that we were having… It will use 2010 Camaro accessory drive, more friendly for clearances on the steering shaft & headers, & plus it will be fabricated frame rails for optimization of building the frame rails… 
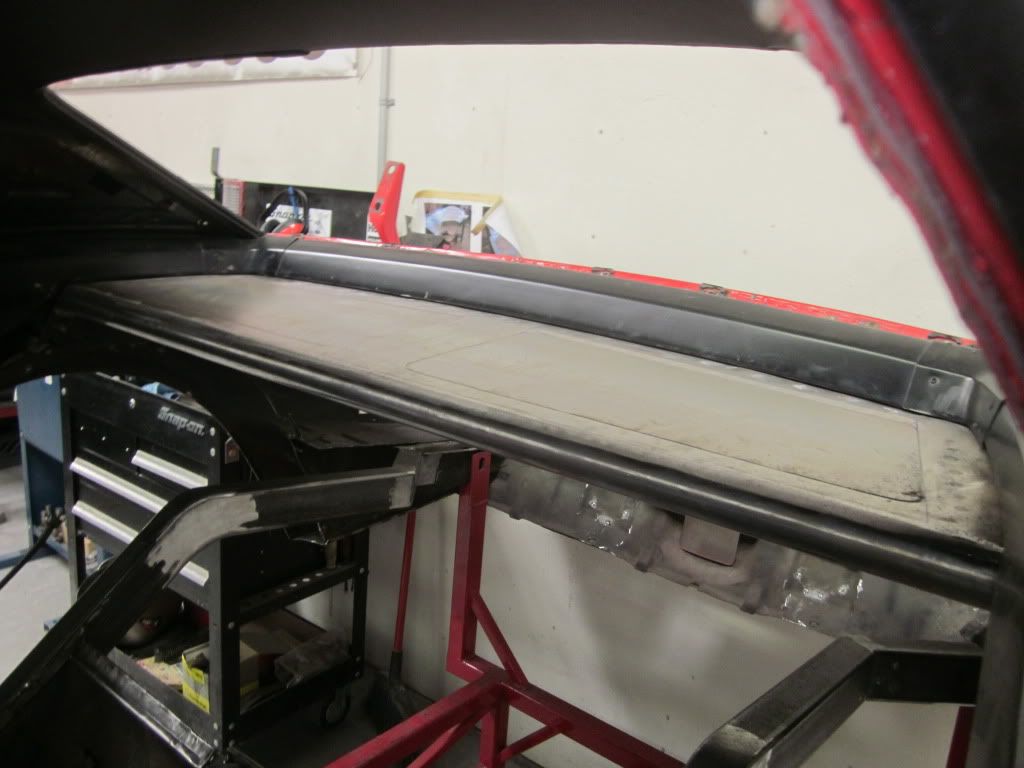
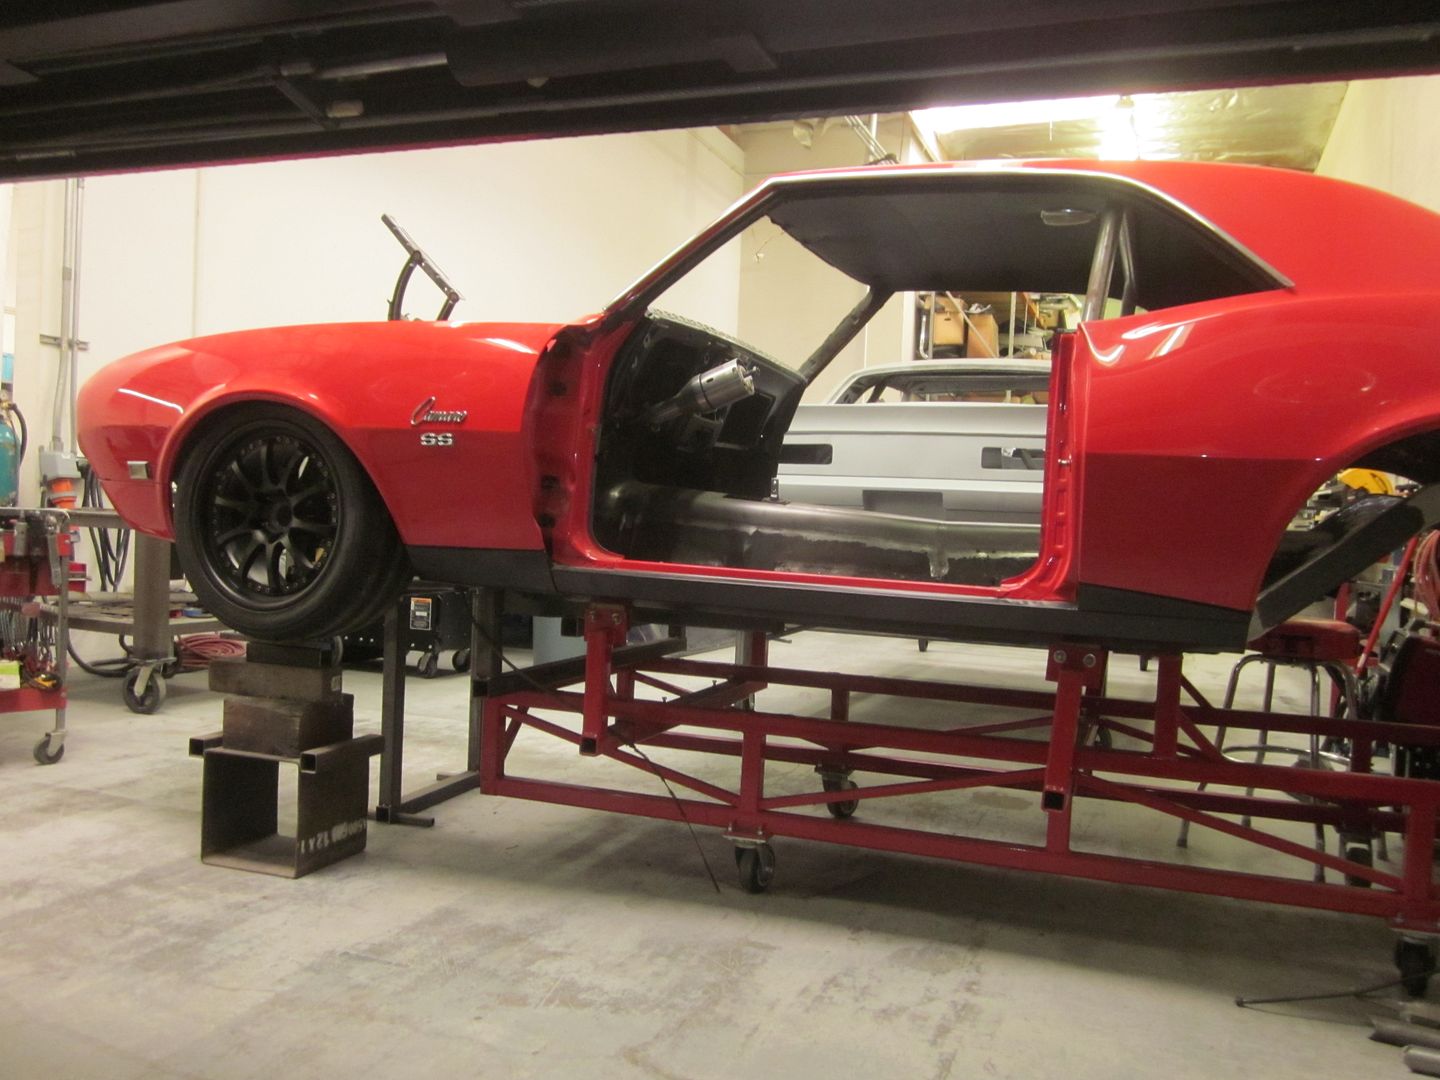
In the mean time we have modified the first chassis so it can still be used for test purposes & the we finally built the control arms.. We will have Rev 2 of the chassis in a few weeks..


__________________
Cris Gonzalez
Reply With Quote
  #36  
Old 07-04-2012, 08:13 AM
Jr's Avatar
Jr Jr is offline
Senior Member
 
Join Date: Sep 2005
Location: so cal
Posts: 1,772
Thanks: 0
Thanked 0 Times in 0 Posts
Default

Your pictures look great. What size is that front tire?
Reply With Quote
  #37  
Old 07-04-2012, 09:58 AM
cencalc6 cencalc6 is offline
Senior Member
 
Join Date: Nov 2010
Location: Fresno Ca
Posts: 562
Thanks: 0
Thanked 0 Times in 0 Posts
Default

Looking really nice Chris
Reply With Quote
  #38  
Old 07-04-2012, 10:33 AM
tones2SS's Avatar
tones2SS tones2SS is offline
Lateral-g Supporting Member
 
Join Date: Sep 2006
Location: Massachusetts
Posts: 8,176
Thanks: 0
Thanked 6 Times in 5 Posts
Default

Nice updates. Looking really good.
Reply With Quote
  #39  
Old 07-05-2012, 06:00 PM
Cris@JCG's Avatar
Cris@JCG Cris@JCG is offline
Senior Member
 
Join Date: Apr 2009
Location: Oxnard, CA
Posts: 1,915
Thanks: 0
Thanked 4 Times in 4 Posts
Default

305-30-19 
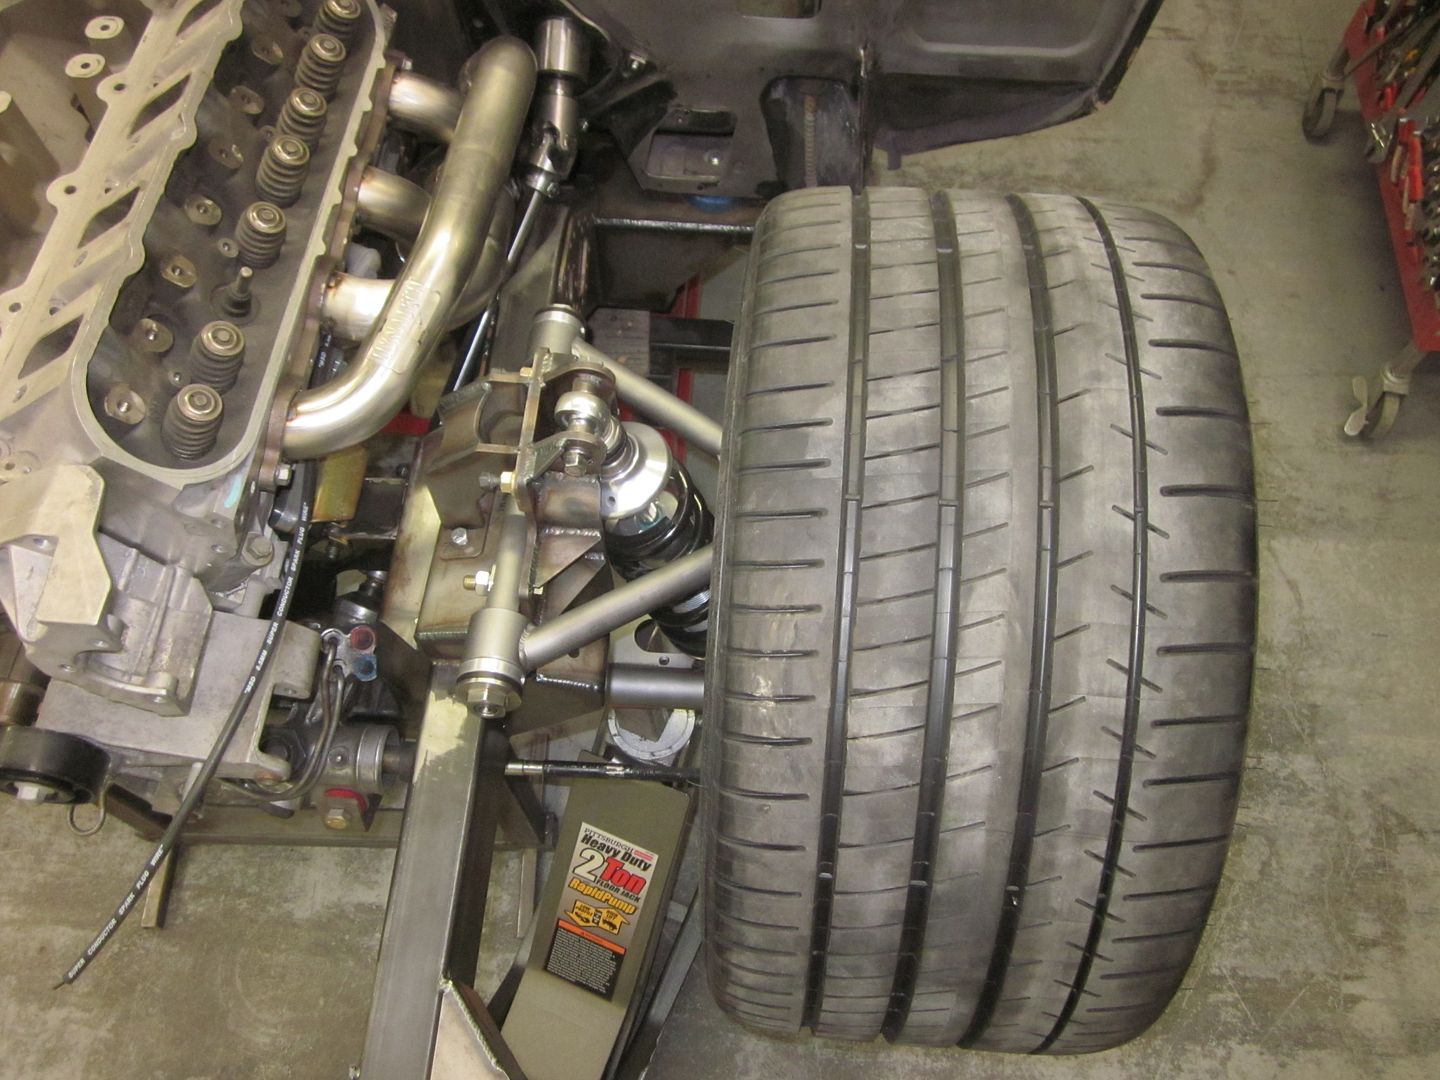
.. I think I can make it work.. if not a 295-35-18 will just be fine..
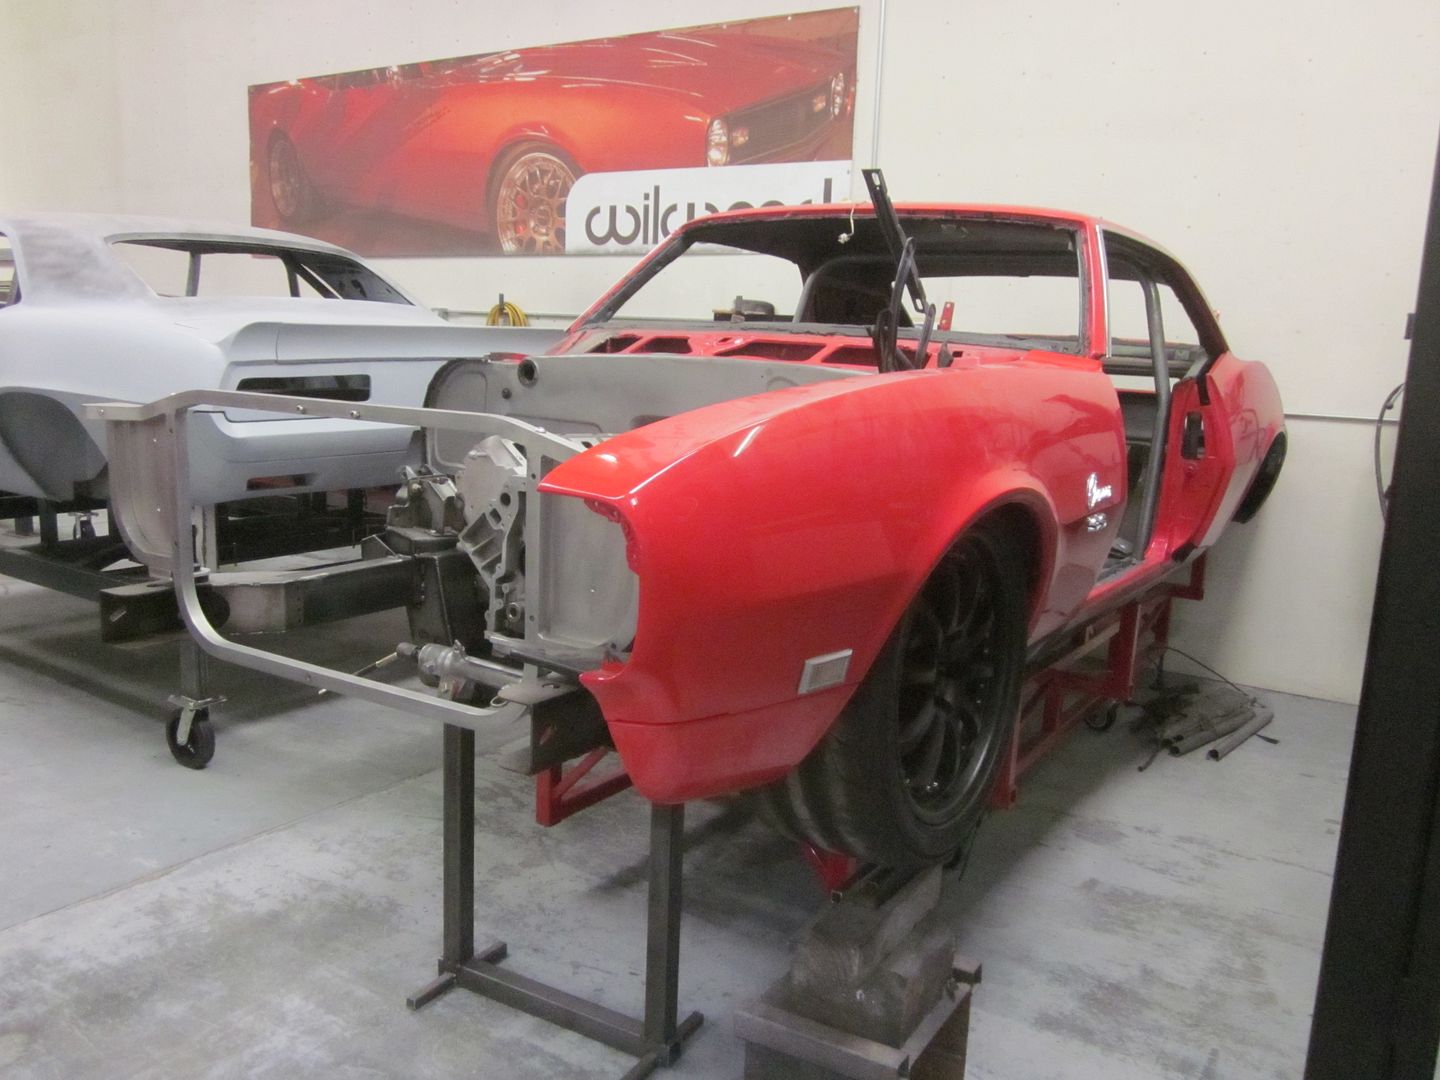

Quote:
Originally Posted by DJW32 View Post
Your pictures look great. What size is that front tire?
Thank you!

Quote:
Originally Posted by cencalc6 View Post
Looking really nice Chris
Quote:
Originally Posted by tones2SS View Post
Nice updates. Looking really good.
__________________
Cris Gonzalez
Reply With Quote
  #40  
Old 07-10-2012, 09:10 AM
Cris@JCG's Avatar
Cris@JCG Cris@JCG is offline
Senior Member
 
Join Date: Apr 2009
Location: Oxnard, CA
Posts: 1,915
Thanks: 0
Thanked 4 Times in 4 Posts
Default

We got around to mounting some front sheetmetal to confirm that all measuremnts were good.. plus check the ride height & center wheel well opening on center of fender... The front tire is a 295-35-18 on 18x10.. Just need to modify the inner well torwards the fender mount for clearance.. We automatically built -1 camber into the lower control arm.. Currently running -3 camber & 5 deg on caster..


__________________
Cris Gonzalez
Reply With Quote
Reply


Posting Rules
You may not post new threads
You may not post replies
You may not post attachments
You may not edit your posts

BB code is On
Smilies are On
[IMG] code is On
HTML code is Off

Forum Jump


All times are GMT -7. The time now is 06:40 PM.


Powered by vBulletin® Version 3.8.11
Copyright ©2000 - 2025, vBulletin Solutions Inc.
Copyright Lateral-g.net