...

Go Back   Lateral-g Forums > Lateral-G Open Discussions > Open Discussion
User Name
Password


Reply
 
Thread Tools Display Modes
  #31  
Old 12-29-2012, 10:40 AM
Nathan Moreno Nathan Moreno is offline
Junior Member
 
Join Date: Dec 2012
Posts: 19
Thanks: 0
Thanked 0 Times in 0 Posts
Default

Hey guys Nathan here. As some of you might know, I'm the oldest of Al's three boys. What you might not know is I'm also the best looking, LOL. I hope my brothers don't read this.

First off, I just want to say I love this site and understand my first love is muscle cars. I've been a lurker here for a long time and have learned a lot from everyone. The other thing I've notice is all the folks here are TOP SHELF! So when I say thanks for the props, it means a lot to me coming from this community. I really appreciate it!!!!

At my Dad's suggestion, I created an account and hope I can contribute to the group.

I might start a build thread in the project section if thats OK. I know as a Gen 5 Camaro, it's outside Lateral-g's norm. Being we are all car guys, I think you guys would still appreciate the work I'm putting into it. Plus some of the stuff is relevant as it's an LS platform with Tremec trans. So you could say it would be more of an idea thread than anything else.

Maybe I'll call the thread "Braking the Lateral-G mold II", Hope you don't mind Brent, LOL

In the meantime, here is a quick background on the project. I've named the car "G5R". The G5 representing 5th gen and the R for racing. The theme is a racy, mechanical, industrial look while elegant at the same time. Part of my influence is Chris's "Blu Balls" build and Steve's "Bad Penny, Jame's "One Lap", Tenacity, etc, etc, etc,....... My ultimate goal is two fold, to build a decent handling car that I can take to the track with the attention to details you'd normally don't see in these cars.


Thanks again for the great site and more importantly, the great community of car guys,

Nathan


Quote:
Originally Posted by garickman View Post
Do you have any pics before it was assembled after the parts were powder coated?
Garickman, here are some before and after..........


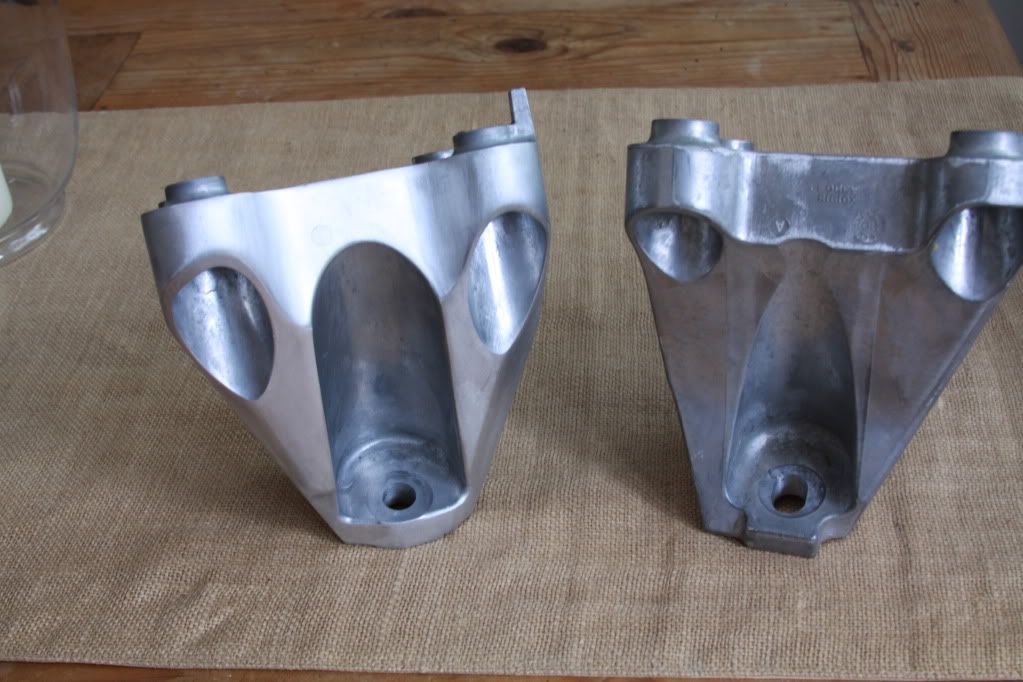
Before I had any of the pieces powder coated, I removed any casting seams, insignia, etc....

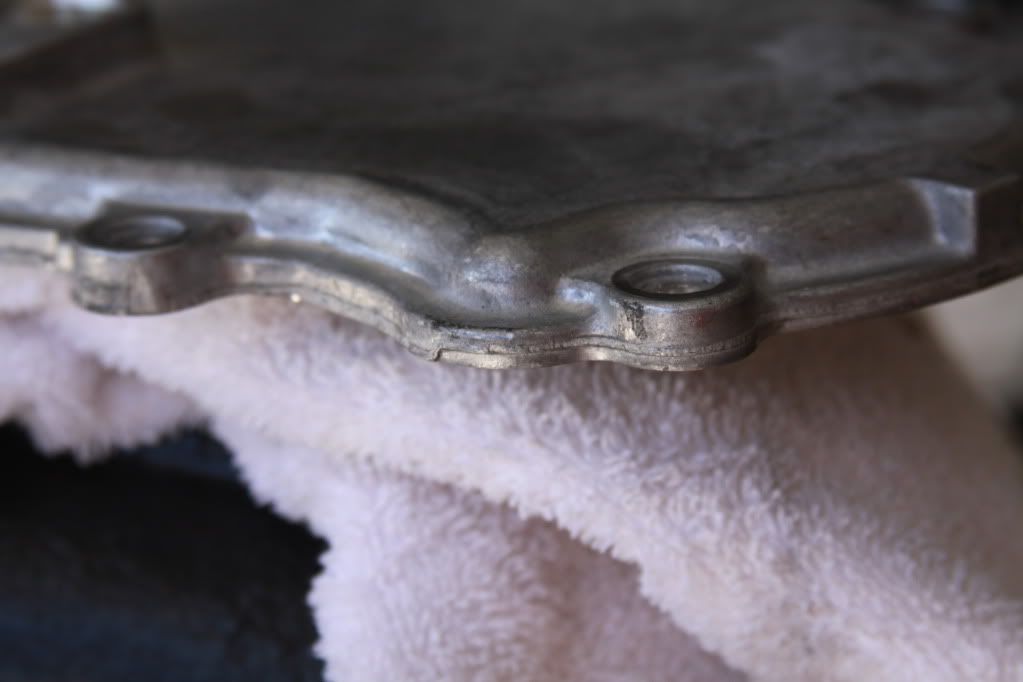
These are the factory motor mounts which look kinda cool for OEM. The one on the right is the before any sanding


[IMG]http://i1231.photobucket.com/albums/ee508/AL7319

This is the before on the power steering bracket, kinda rough. By the way, these brackets are is $13 at GM.

/006-13.jpg[/IMG]

I tried a couple of different approaches before I settled on powder coating. this was a brush look.


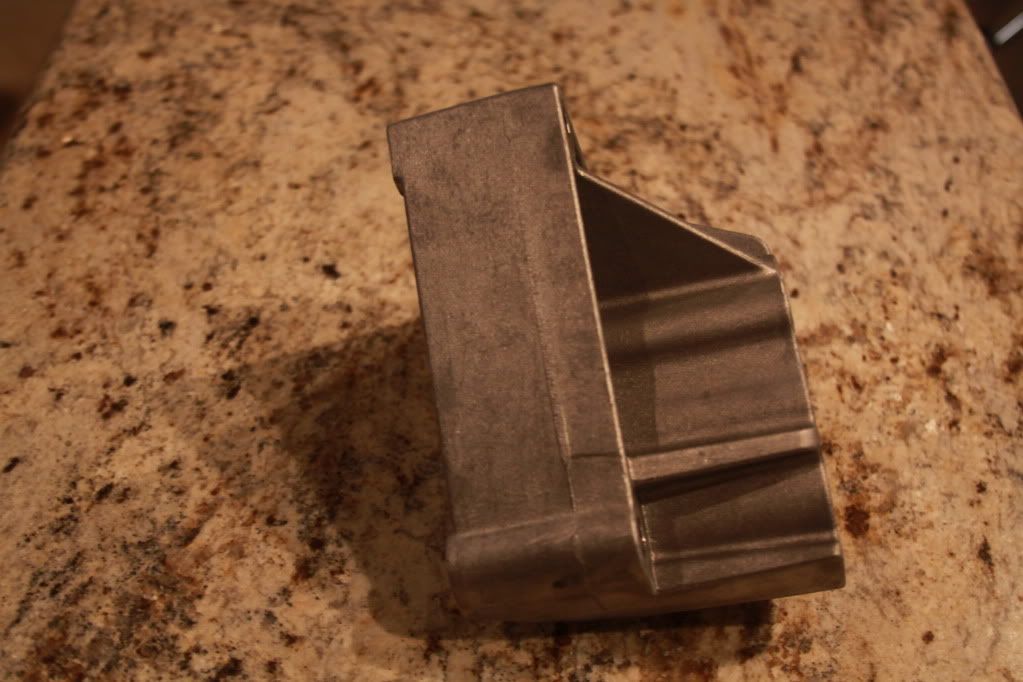
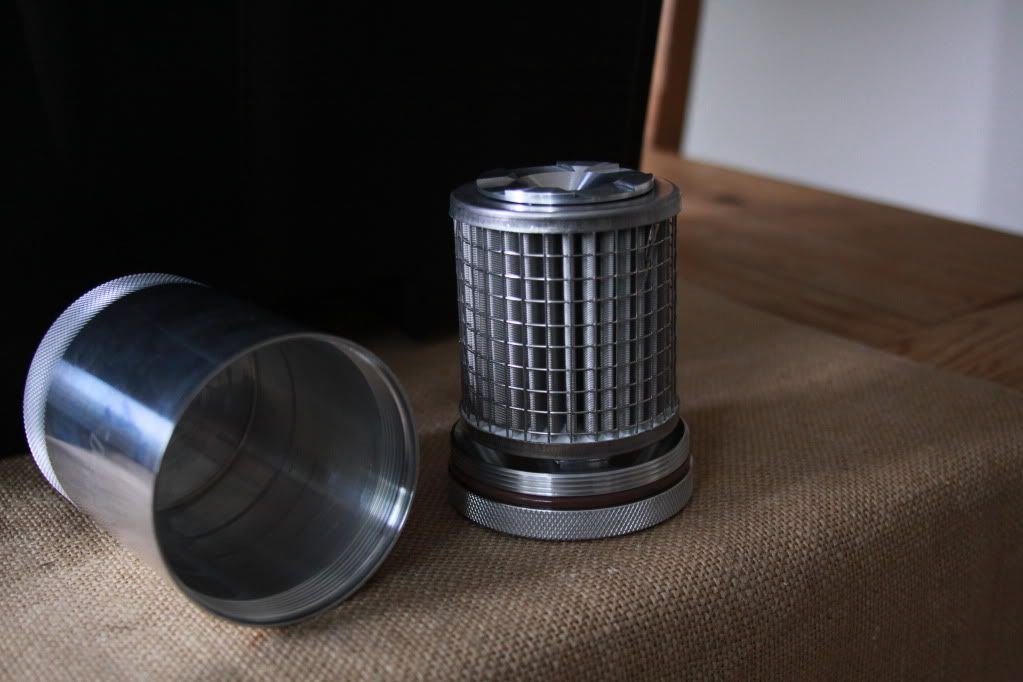
Here is a before of the oil cooler. By the way, I'm not going to use this cooler as I'm replacing it with a remote system. I will post pictures later of the parts I'm using. Some of you guys might be able to incorporate them in your projects.


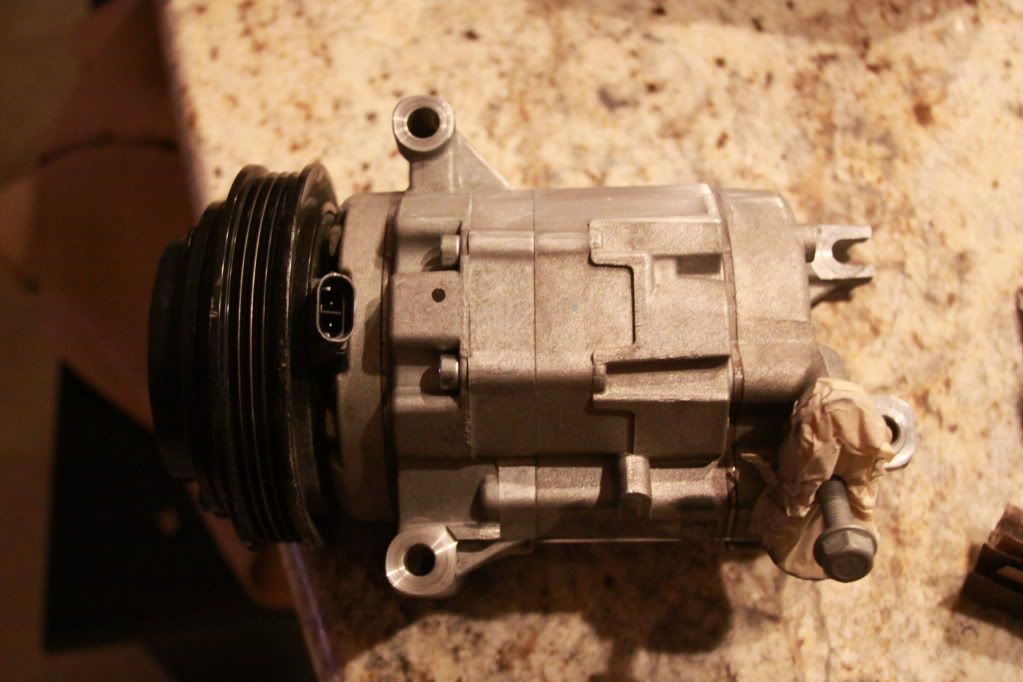
Here a before of the AC compressor


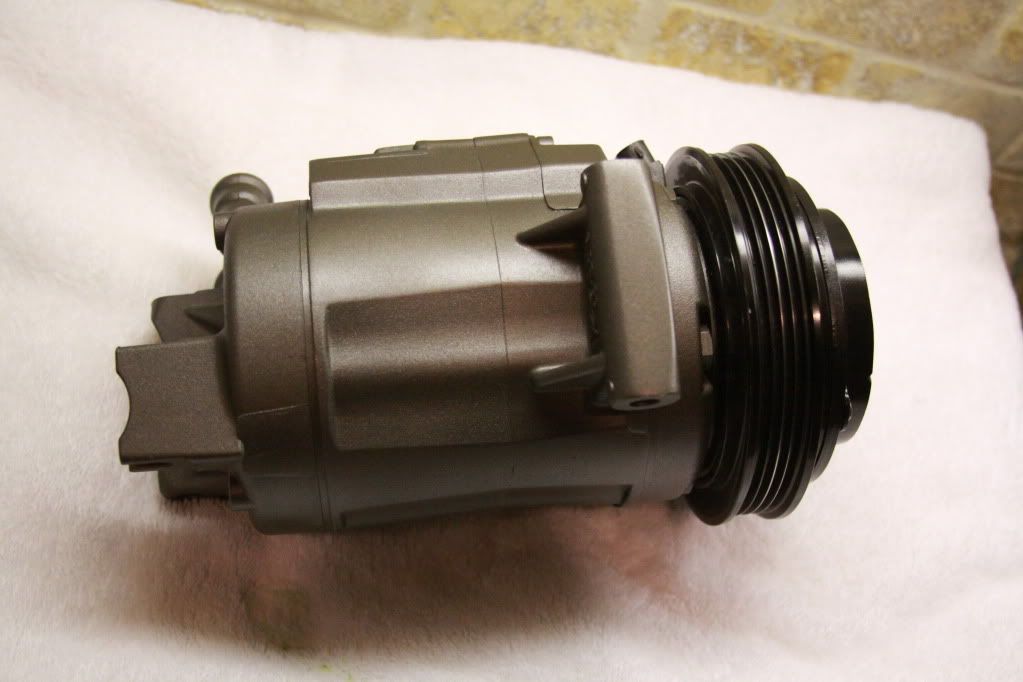
And an after..... In this picture, I used a spray can color called "cast iron gray". It was a pretty color but had to much bronze for the pallet I'm going with. I painted all the accessories in a BMW color called "Frozen gray". It's basically a gunmetal with a flat clear.


Here are the rest of the accessories in the "cast iron gray"


Quote:
Originally Posted by MarkM66 View Post
Looks great! Are all the accessory mounts from a 5th gen Camaro?

Yes

Also, why is there a belt on the w/p if it's electric?
Quote:
Originally Posted by HEEP View Post
Has anyone found part numbers for these brackets? I'm wondering if factory setup like this is available.

Yes, you can get them from the dealer. All three are less than $100

HEEP
Quote:
Originally Posted by HEEP View Post
I found this link to the brackets. I'm guessing that the reservoir for the power steering has been removed and you are using a separate one. Can you get me this information?

Yes, I'm using a remote reservoir tank from Lee's Power Steering. It has cooling fins built into it. I will post pics later

Thanks,
HEEP
I will post a lot more pictures and answer the other questions I didn't get to later.

Last edited by Nathan Moreno; 02-16-2013 at 10:20 PM.
Reply With Quote
  #32  
Old 12-29-2012, 10:53 AM
INTMD8's Avatar
INTMD8 INTMD8 is offline
Senior Member
 
Join Date: Mar 2010
Posts: 376
Thanks: 1
Thanked 7 Times in 2 Posts
Default

WOW! Amazing work, looks awesome
Reply With Quote
  #33  
Old 12-29-2012, 11:53 AM
Ron in SoCal's Avatar
Ron in SoCal Ron in SoCal is offline
Senior Member
 
Join Date: Dec 2009
Posts: 5,044
Thanks: 6
Thanked 9 Times in 6 Posts
Default

Quote:
Originally Posted by INTMD8 View Post
WOW! Amazing work, looks awesome
x2 looks great Nathan! Your Dad raised you right....right down to the humble brotherly competition
__________________
Ron in SoCal
69 Camaro in progress
https://lateral-g.net/forums/showthread.php4?t=31246

Reply With Quote
  #34  
Old 12-29-2012, 12:13 PM
Bsinclair Bsinclair is offline
Member
 
Join Date: Jul 2012
Posts: 96
Thanks: 0
Thanked 3 Times in 1 Post
Default

i like the cast iron gray... the brushed finish also looked great but you almost have to continue the theme all the way through the build when you brush finish..
Reply With Quote
  #35  
Old 12-29-2012, 12:42 PM
WSSix WSSix is offline
Lateral-g Supporting Member
 
Join Date: Nov 2008
Location: Dunwoody, GA
Posts: 6,554
Thanks: 1,423
Thanked 827 Times in 625 Posts
Default

Welcome Nathan. You did a great job on the motor. The detail is amazing. When you have time, make a project thread for the car too. I know I'd like to see it.
__________________
Trey

Current rides: 2000 BMW 540i/6 and 86 C10.

Former ride: 1979 Trans Am WS6: LT1/T56, Kore 3 C5/6 brakes, BMW 18in rims
Reply With Quote
  #36  
Old 12-29-2012, 01:27 PM
badmatt's Avatar
badmatt badmatt is offline
Senior Member
 
Join Date: Oct 2007
Location: winnipeg
Posts: 725
Thanks: 0
Thanked 0 Times in 0 Posts
Default

I like the frugal use of the stock components for the accessory drive... Goes to show that people do not need to spend 2300 bucks on a tru-track or system of that matter.

Looks great Nathan!
__________________
97 Sonoma "NERA": Pile O Sh*t. Literally.
Reply With Quote
  #37  
Old 12-29-2012, 05:11 PM
Sieg's Avatar
Sieg Sieg is offline
Moderator
 
Join Date: Dec 2010
Location: Pacific Northwet
Posts: 8,034
Thanks: 33
Thanked 101 Times in 41 Posts
Default

Welcome Nathan - Very much appreciate the practicality and tasteful attention to detail you're applying to the project.
Reply With Quote
  #38  
Old 12-29-2012, 05:41 PM
waynieZ's Avatar
waynieZ waynieZ is offline
Lateral-g Supporting Member
 
Join Date: Oct 2006
Location: Ma
Posts: 8,491
Thanks: 939
Thanked 342 Times in 231 Posts
Default

Nice job, it looks amazing.
__________________
_Wayne________

___________________________________
https://lateral-g.net/forums/show...ghlight=FNQUIK
Reply With Quote
  #39  
Old 12-29-2012, 05:52 PM
Rick D's Avatar
Rick D Rick D is offline
Senior Member
 
Join Date: Jun 2005
Location: Third Rock From the Sun!! 😃
Posts: 3,437
Thanks: 0
Thanked 2 Times in 2 Posts
Default

Very nice work Nathan Love the detail. And yes please start a build thread!!!!
__________________
Rick

[SIGPIC]https://neversaynever0304.files.wordpress.com/2014/07/you-didnt-see-anything.gif[/SIGPIC]
Reply With Quote
  #40  
Old 12-29-2012, 06:48 PM
Nathan Moreno Nathan Moreno is offline
Junior Member
 
Join Date: Dec 2012
Posts: 19
Thanks: 0
Thanked 0 Times in 0 Posts
Default

Thanks guys! I appreciate suggesting I do a build thread being it's not a early gen.

Here is some of the work I did on the cylinder heads before sending the to Lingenfelter for a head job.......... somehow that doesn't sound right, LOL

You can see the difference between the two.


If you'll notice, the bolt hole on the right has been flatten while the one on the left still remains to be done.


This pictures shows were the holes on the front passenger side cylinder head welded in and the face was re-mild to get a cleaned machine look.


Before I powder coated anything, I made sure to clean of all casting seams and imperfections.


Before:


After:


Done:


This is a "Turn One" high performance power steering pump in it's natural state.

Before:


After:


Here is one of the oil filter I'm using. It's from Pure Power. I say one because I'm also running a second XRP filter on one of the oil lines going to the cooler.


Last edited by Nathan Moreno; 12-29-2012 at 06:58 PM.
Reply With Quote
Reply


Posting Rules
You may not post new threads
You may not post replies
You may not post attachments
You may not edit your posts

BB code is On
Smilies are On
[IMG] code is On
HTML code is Off

Forum Jump


All times are GMT -7. The time now is 08:52 AM.


Powered by vBulletin® Version 3.8.11
Copyright ©2000 - 2025, vBulletin Solutions Inc.
Copyright Lateral-g.net