...

Go Back   Lateral-g Forums > Lateral-G Open Discussions > Project Updates
User Name
Password


Reply
 
Thread Tools Display Modes
  #71  
Old 02-16-2011, 10:17 PM
takid455 takid455 is offline
Senior Member
 
Join Date: Feb 2007
Posts: 252
Thanks: 0
Thanked 5 Times in 5 Posts
Default

Quote:
Originally Posted by waynieZ View Post
The paint looks beautiful. Don't you love it when your hard work pays you back ten fold. Nice work.
What a feeling that is. Nice to step back and take in your accomplished efforts. Dont look too long at one spot though as you may decide to change it or modify it creating more work.


Assembled the door internals sans glass as that is coming. Going with a nice smoke tint as opposed to the stock green tint. Accomplished a bunch of little odds and ends and man do they take up time. Even more so when new parts are ‘direct fit’. Old leafs (Rancho Challenger GT III) were replaces w/ Comp leafs from Pro Touring Fbody. Not only had the old leaf’s arch increased due to the exposed heat from powder coating, they are a little ‘soft’ for the front spring rate and car’s power. The new leafs were not much more than rearching the Ranchos and have an increased spring rate. Left the shackles loose for now to allow for settling and prevent binding. Car sits a little high in the rear at the moment, but it did settle about 0.5” since they were installed. Not concerned yet. Will wait till after more items are installed and some miles are put on the new suspension.

Finished up the brakes and installed the good wheels. This car is taking shape and looking good. Have a list of odds and ends to do in the next few days. Mainly waiting to finalize interior fabric colors and finalize art work(hood bird and lettering). At that point, I can redye the interior and installed the rest of the sheet metal.


Reply With Quote
  #72  
Old 02-24-2011, 09:27 PM
takid455 takid455 is offline
Senior Member
 
Join Date: Feb 2007
Posts: 252
Thanks: 0
Thanked 5 Times in 5 Posts
Default

Completed a bunch of little things. Reworked the inner wheel wells to provide tire clearance. while cutting is the easy way, I decided to do some metal working w/ hammer and dolly. About 3hrs/ side, but they cam out nice and I dont have to worry about road debris in the engine bay. Also modified the front of the wheel wells and radiator support for the brake cooling hose. I didn't like the brake lines from the m/c so new ones were bent. I'll be ordering some new glass and start searching for GM T top weatherstripping. The ones I have are better for a driver and the Metro seal has issues. Once I get the rad support and wheel wells back from powdercoating, I 'll spend some more time on the car. I need to catch up on other jobs in the meantime.

Coming close to finalizing a design w/ the airbrush artist as well as interior color arrangement. I'll be glad to have these 2 major things done out of the way as they are holding things up. If I want to drive the car any distance this season, I need to plenty of time to work out the bugs.
Reply With Quote
  #73  
Old 05-22-2011, 10:36 PM
takid455 takid455 is offline
Senior Member
 
Join Date: Feb 2007
Posts: 252
Thanks: 0
Thanked 5 Times in 5 Posts
Default

After clearing over the lettering, sanding and buffing, the front end was ready to be assembled. Had some help aligning the fenders. Even though they were test fit, they did not fit perfectly into place at first. While the radiator support is a different one then used for fitting, that didn’t seem to be the issue. After some time and carefully caressing the fender into place, success was achieved. I do have a clearance issue w/ the inner wheel well that can be massaged rather easily. Happens with design changes in the later stages of the build. At the end of the day, it looks like a car again. Just need to align the hood. The hood will then be removed and sent to the artist for the bird.

Interior is stated to be completed this week or so. Glass will probably go in shortly.

Spoiler


Honeycomb fender vents


Straight & gapped


Beak


Reply With Quote
  #74  
Old 10-31-2011, 07:31 PM
takid455 takid455 is offline
Senior Member
 
Join Date: Feb 2007
Posts: 252
Thanks: 0
Thanked 5 Times in 5 Posts
Default

Been a while since an update. Car is back at my place. Picked it up early August.

First order was to finish the electrical system which included relays in the window circuit, key fob for door locks and trunk popper, stereo and some misc items. I will need to add relays to the door lock from the auto key fob system as it does not have the power to energize the electromechanical motors. I just got the stereo system and need to lay the wires for that next. I went with CDT for speakers and JL for the amp. That amp cost as much as the speakers and head unit combined. Geez!!!

Made some misc brackets and found some clever solutions for fastening the bumper covers aside from the stock rivets.

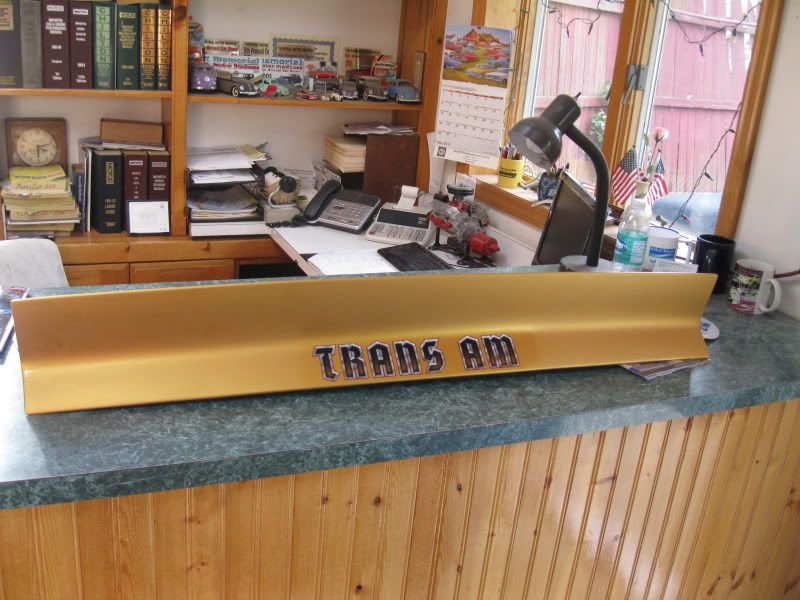
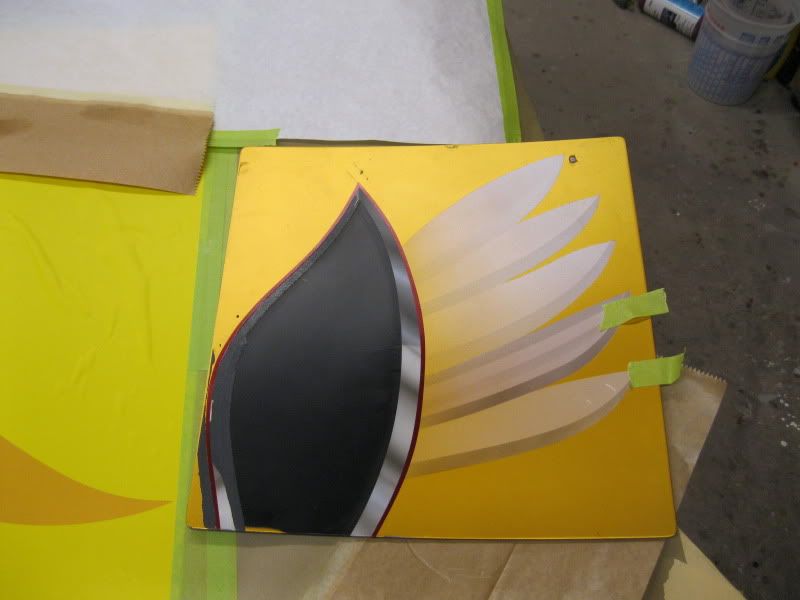
Air brusher has the bird about 1/2 done. There is an area that caught my eye, but will wait unit till it is finished to decide if it needs to be addressed.

Currently redying the interior to black from tan and finishing the stereo layout. One day it will run...at least that it what I keep telling myself.


10/17/11
Got some problem things out of the way finally. Been having trouble w/ dying the interior w/ the humidity along with material issues (paint) and the steering column. Some dry days after months of endless rain yielded good dying results and I tried different products w/ the column and it came out decent. Probably have close to 22 hrs in that bastard. It still may find its way into the river if it continues to piss me off.

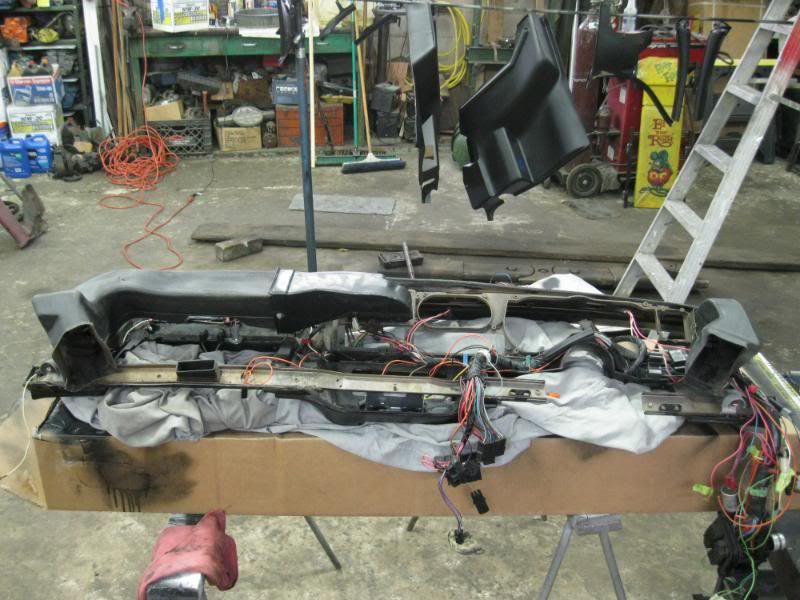
On a happier note, the dash is in place w/ the wiring attached as per factory. Speaker wire is installed awaiting final trimming once speakers are installed. To complete this section of the build I need to accomplish the following:
make holder for dash speakers
run amplifier signal wires
permanently attach dash
Install steering column should it not find its way into the river.
Wire radio (3 wires)
check auto/ remote lock to see if relays are needed. I was informed the Bulldog unit does not have the power to operate the stock locks actuators.

Install interior & stereo components
At that point, I should be pretty much done electrically and most of the interior. Car should fire once again and I can attack the 'little's' to make it drivable.

Time is one of my biggest enemies thus when simple items (rebuild and paint steering column) take way longer than expected for BS reasons, it really irks me. Its all part of the fun of the hobby.

10/31/11
We are up an running again!!!!!

all interior is redyed, steering column resolved, made speaker holder for the front 3" & 1" tweeters. looks like an Owl mask...kinda funny.

Dash is installed along w/ A/C controls. need to finish a few look wiring odds and ends and that will be done. that will be next along with testing all the electrical systems before I button everything up. I am very happy to hear the engine again since I redid a lot of the electrical systems for the ECU and added a bunch of circuit protectors (relays & fuses ). I guess I did a good job.

I'll try to get some pics up. most of my free time is occupied by working on the car.


Much of the items really aren’t going to show well in pictures. Here are some that do.

The F’n column…succeed we did.
Took it apart 10 yrs ago so I started with this…


Everything inside a tilt column


Assembly


Done. Well we’ll just say this is what it looks like done. Had some paint issues which resulted in a tear down and reassembly in brief.


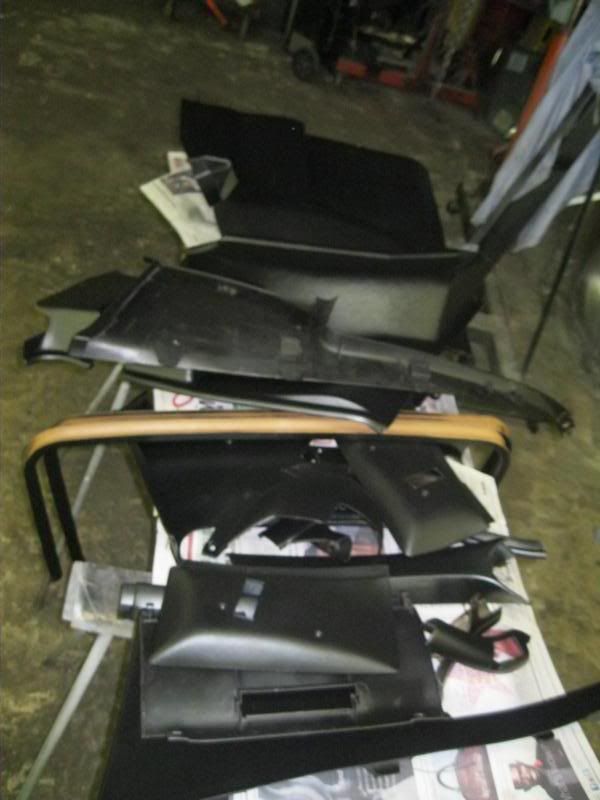
Had some nice tan interior panels, but since the stock tan clashes w/ the exterior color, I switched to black. Redyed black parts


Since the stock speaker bracket is good for a 10 x 4, it was not adequate for the new 3” & 1” component setup. So we start with these things…


Add some welding, grinding and paint to make this… Looks like and Owl face.. hooo hooo


The middle air duct and Right speaker were to tight so we take these…
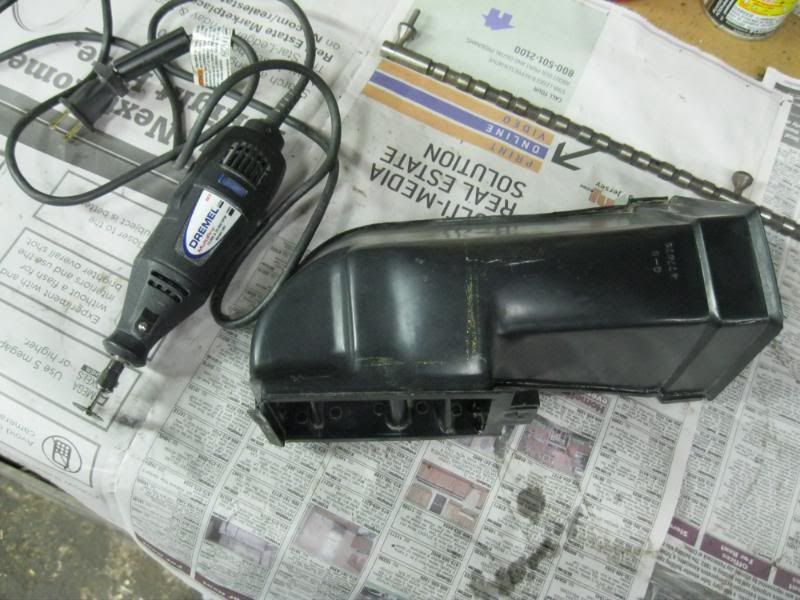


Add some of this
Reply With Quote
  #75  
Old 10-31-2011, 07:32 PM
takid455 takid455 is offline
Senior Member
 
Join Date: Feb 2007
Posts: 252
Thanks: 0
Thanked 5 Times in 5 Posts
Default

To make a mess like this


No more interference. I could have taken more time to make it look pretty, but since there is no way to see it once installed, this will be fine and function.

Wired backside of dash


All the above installed


Need to tidy up a few minor things, finished stereo system and test electrical circuits then the interior goes in.

Teaser of interior
Reply With Quote
  #76  
Old 11-04-2011, 07:05 PM
WSSix WSSix is offline
Lateral-g Supporting Member
 
Join Date: Nov 2008
Location: Dunwoody, GA
Posts: 6,603
Thanks: 1,683
Thanked 901 Times in 670 Posts
Default

Very nice! I'm not sure how I missed your May update but I did. The car looks fantastic. Good luck finishing it up.
__________________
Trey

Current rides: 2001 BMW 540iT soon to be manual swapped and 86 C10.

Former ride: 1979 Trans Am WS6: LT1/T56, Kore 3 C5/6 brakes, BMW 18in rims

00 BMW 540i/6: Suspension, wheels, and ACS bits.
Reply With Quote
  #77  
Old 11-06-2011, 11:20 AM
rlpj68 rlpj68 is offline
Junior Member
 
Join Date: Jul 2010
Location: spartanburg,sc
Posts: 5
Thanks: 0
Thanked 0 Times in 0 Posts
Default 79 Shell

TAKID, you said you had a solid 79 t-top shell, was wondering if you still had it, price, and location, and if you still wanted to sell it. I have a 78 and there is plenty of rust work that i am having to do since it has been sitting for a long time and starting with a good shell would be a time saver, Thanks
Reply With Quote
  #78  
Old 12-16-2011, 06:02 AM
onelapduster onelapduster is offline
Senior Member
 
Join Date: Dec 2010
Posts: 141
Thanks: 0
Thanked 1 Time in 1 Post
Default

Another gold T/A, love these cars when they are not black. Have the rest of the interior been put in?
Reply With Quote
  #79  
Old 12-16-2011, 06:18 AM
Bakaruda's Avatar
Bakaruda Bakaruda is offline
Senior Member
 
Join Date: Apr 2009
Location: Katy, Texas
Posts: 301
Thanks: 22
Thanked 10 Times in 7 Posts
Default

The only 2 years of T/A I like 77/78...Love the car man, I am a Mopar guy thru and thru but I could own one of those.
Reply With Quote
  #80  
Old 01-22-2012, 07:52 PM
takid455 takid455 is offline
Senior Member
 
Join Date: Feb 2007
Posts: 252
Thanks: 0
Thanked 5 Times in 5 Posts
Default

Took a break from the car as another project took priority. Gathers some need items during that period. Cracked the valve and lit the burner just before the holidays and turned the flame up. The bulk of work has been with the electrical and stereo systems. Painted and designed some other items along with picking up the interior and will be picking up the hood from the artist tomorrow (1/23/12).

Electrical:
Mainly testing and trouble shooting all the systems on the car prior to concealing them. Most have been good, others such as the automatic locks (Bulldog) have been a PITA. All is good except for the lock function which does not seem to be getting able power. I even have the system relayed. Moved on as I can access it later. While testing , the pass window motor it not quite up to par, and will be replaced. Wired up the console switches for various functions and well as the voltage reducer for the Cable X. That’s about it there.

Stereo
Installed all components and now have some bumpin in my trunk. WOOT!! CDT speakers have very crisp , clear sound. Making a tray/ mount for the amp and x-overs in the truck and having a sub box made to fit the floor.

Glass
Custom Smoke tinted glass installed. Looks sweet

Interior
Picked up interior which is ready to be installed

Body
Air brusher has finally finished the bird . cant wait to see it finished.
Grilles installed, moldings painted, stuff

Suspension
I have been rather torn whether to allow the hubs to stick through the wheels or make custom hub caps. I know of a solution, but wasn’t 100% tested until recently. At least on 2nd gens w/o being ‘rigged’. While not cheap, I picked up a set of ATS spindles for a 2nd gen and will order t eh steering arms and now I have resolved the ugly hub issue. Costly, but its something that bothered me.


Test panel for feathers


Big progress to follow in the next few weeks.
Reply With Quote
Reply


Posting Rules
You may not post new threads
You may not post replies
You may not post attachments
You may not edit your posts

BB code is On
Smilies are On
[IMG] code is On
HTML code is Off

Forum Jump


All times are GMT -7. The time now is 04:53 PM.


Powered by vBulletin® Version 3.8.11
Copyright ©2000 - 2026, vBulletin Solutions Inc.
Copyright Lateral-g.net