|
|

02-04-2013, 01:08 PM
|
 |
Member
|
|
Join Date: Aug 2011
Location: Georgia
Posts: 78
Thanks: 0
Thanked 0 Times in 0 Posts
|
|
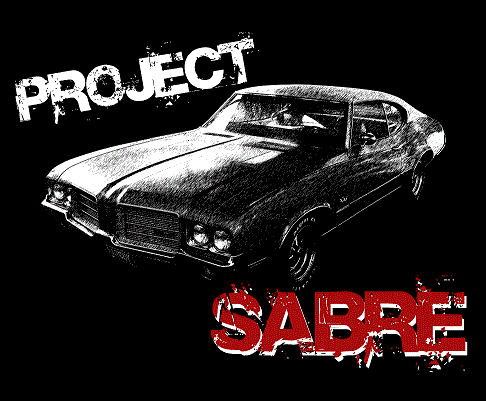
 Project Sabre, a 1971 Oldsmobile Cutlass S
Some of you may have been following the other thread about my car, Project Sabre. Due to some changes, I thought it would be best to start my own thread. The car is back at my house and I will be assembling it here. The paint and bodywork is being done by a friend, and I'll give updates on that shortly.
As a recap, here is the basis of the project:
EDIT: HERE ARE THE COMPLETED RENDERINGS!!! THANKS TO JASON RUSHFORTH!
We wanted to take a moment to introduce our future shop car and Autocross machine, called Project Sabre. The base of the project is a 1971 Oldsmobile Cutlass 'S'. We will be swapping in LS motor, manual transmission, chassis upgrades, custom brakes, Rushforth Wheels along with a slew of other killer upgrades.
The goals for this project are a platform to display our products in use, that we can also use competitively at the autocross tracks. But the main goal for this project is to build a very streetable and usable Pro-Touring Muscle Car that anyone can replicate with a little planning and elbow grease. This will not be an overpowered, overpriced car that spends all of its time at shows and on trailers. It is meant to be driven, and driven hard!
We will be documenting the entire build from start to finish, so that everyone can see exactly what we used and why.
You can see our project site and updates here:
www.projectsabre.com
Safety though will be of top importance. Brakes, suspension, belts, and other items are being chosen for safety AND performance, not just because they look neat.
__________________
Sparky@RnDFabrication
www.RnDFabrication.com
From mild to wild, we help your project stand out from the rest!
|
02-04-2013, 01:20 PM
|
|
Member
|
|
Join Date: Aug 2011
Location: Georgia
Posts: 78
Thanks: 0
Thanked 0 Times in 0 Posts
|
|
I recently received and installed the Modo Innovations pedal covers, and MAN ARE THEY COOL! Took about 15 minutes to mark and drill the pedals and install. The raised studs will make sure my shoes get wicked grip around the twisties.
We purchased an LQ4 from ebay from a dismantler up north. They shipped it down, and it was torn down, and is now at a friend's shop to be rebuilt. The previous shop painted over some rust / scale / debris and over the deck surface without being masked / taped off, so we would have to strip it all down to do it right. At that point, it made more sense to go through it with new bearings / rings and the like. We also bought an LS1 intake which we'll be installing, which helps get rid of that large monstrosity of a truck intake!
In the next 4-6 weeks, we will get the engine back and will do a final install in the chassis along with the transmission and headers. The exhaust will be a Borla universal stainless system.
The gauges are from New Vintage USA, and they created a panel that bolts directly in place on the Cutlass dash, and accepts their gauges.
__________________
Sparky@RnDFabrication
www.RnDFabrication.com
From mild to wild, we help your project stand out from the rest!
|
02-04-2013, 01:35 PM
|
|
Member
|
|
Join Date: Aug 2011
Location: Georgia
Posts: 78
Thanks: 0
Thanked 0 Times in 0 Posts
|
|
For the transmission, we are using a rebuilt T56 that I bought, along with a Diamond Stage 2 clutch kit.
The wheels are from Rushforth ( www.rushforthwheels.com), and are my favorite part of the car! The 6 spoke design is just awesome with this body, and it's something nobody else around here will have. The color match idea was his, and I dig it. He also provided the rendering for the car as well ( www.jasonrushforth.com).
The motor mounts and trans mount are from BRP, and are made to be a bolt-in set with no modifications required.
For the accessory drive, that is from Kwik Performance. They also included one of their new pumps that is an upgrade for the LSx conversions, and is meant for autocrossing. We get to be the test subject for that setup.
For the climate control, we were also the test bed for Vintage Air's new Gen IV kit, made specifically for the '70-'72 Cutlass. Especially in hot Georgia summers, we'll be VERY happy to have this kit installed!
__________________
Sparky@RnDFabrication
www.RnDFabrication.com
From mild to wild, we help your project stand out from the rest!
|
02-04-2013, 01:56 PM
|
|
Member
|
|
Join Date: Aug 2011
Location: Georgia
Posts: 78
Thanks: 0
Thanked 0 Times in 0 Posts
|
|
For the ECM and harness, we sent those to Jim at Jim's Performance. He does a great job stripping out what isn't needed, labeling every single wire, and putting in relays and ports that I do need. I could to it myself, but he's a known producer and does great work. His fee is well worth what he does, and I don't have to hassle with wiring (and that is worth a lot more than he charges!). He's also modifying the PCM. Both will be done for $550, and it'll be right the first time.
The engine will be getting ARP head studs as well as a polished bolt kit rather than reusing most of the stock hardware.
For the engine, we upgraded to one of comps cams and lifters along with pushrods. We want to keep the engine reasonable as most of the driving this car will see will be on the autocross so we wanted to have more power, but not go crazy.
The disc brakes up front are Z51 Corvette units, and we selected those as they are large, yet inexpensive and can be found at most parts stores should we need some when attending events. The brackets are Kore3's. The hubs had to be turned down to fit the rotors (drum brake hubs left over from a '67 Camaro disc swap), and the brakes were mocked up with the new KORE3 brackets, GM abutments, and a new C6 J52 (Z51) brake rotor and remanufactured C5 Corvette caliper.
The rear axle is an 8.8 out of a ford explorer. It comes with discs, 31 spline shafts, 4.10 ratio and a factory limited slip. They are able to handle a ton more power than we're throwing down, and we can use it in stock width (only about 1/4" off from factory). We are keeping the ford bolt pattern in the back so that we can buy used axle shafts from the bone yard if needed, and won't have to worry about any custom work before installing. The only change (other than mounting) is to use a rear cover with integral girdle. That will put pressure on the main caps and keep them from deflecting under hard use.
__________________
Sparky@RnDFabrication
www.RnDFabrication.com
From mild to wild, we help your project stand out from the rest!
|
02-04-2013, 02:27 PM
|
|
Member
|
|
Join Date: Aug 2011
Location: Georgia
Posts: 78
Thanks: 0
Thanked 0 Times in 0 Posts
|
|
We ordered the MGW shifter for our T56! Between that, the hydraulic lines and the Tilton Master, along with the Diamond Stage 2 clutch, we should be slamming through the gears. We also had a custom shift knob made that has Sabre written on it.
The headers are 1 7/8 long tubes by BRP.
Oh, for the rolling stock, we're running 19x10 fronts with 275 / 30 tires, and 20x10 rears with 305 / 25 tires. The wheels are Rushforth 6-shooters with gold powder coated centers and polished hoops. I can't get over how great the stance is with the RideTech Complete Coilover Conversion! This car has a completely new attitude, and it's MEAN!
For the bushings, I bought a Chevelle Poly Bushing set.
Another update: the Schroth Racing Rallye 4 ASM Harnesses arrived
We also updated the website Gallery section with pictures bringing us up to date, here:
http://www.projectsabre.com/Gallery.html
__________________
Sparky@RnDFabrication
www.RnDFabrication.com
From mild to wild, we help your project stand out from the rest!
|
02-04-2013, 02:41 PM
|
|
Member
|
|
Join Date: Aug 2011
Location: Georgia
Posts: 78
Thanks: 0
Thanked 0 Times in 0 Posts
|
|
Also, we took advantage of the Matt's Classic Bowtie's sale on Morris Classic Concepts 3pt seat belts (saved almost $100 over Summit Racing's price)! I was going to buy them after the car was on the road, but couldn't pass up saving $100. I will use the MCC's for regular street use and to / from events, and then use the Schroth Rallye 4's for race weekends.
I ordered Hankook Ventus V12 Evo K110's based on their reviews, ratings, knowing a few people that have used them, and the price point. I got DT to price-match Summit Racing's prices (killer deal), and after it was all said and done, it saved another $300 over what I was going to pay. Thankfully, that money is now needed for some other parts that we didn't put in the budget, that are now required.
The body does look great, but in all honesty there is a ton of work that was in it before it got to the epoxy stage. And, there is going to be about 3 weeks of 8 hours a day in the body work (and that is before paint), and that still won't be a perfect show car job (for those that are wondering). When cutting and welding metal, it can still tweak even a little which requires body work on the tail end. And, even though the car was described as all original, never been wrecked, we've found a few places where there were some hidden minor dents, which of course, take extra body work. But, the car was still the best of the bunch after months of searching, and was a great price for what i got. There was a good bit of bodywork to correct sheet metal that was warped during welding / filling holes.
The good part is that the car is in the best hands I could imagine have working on a car. Our body guy is one of the best in the business, and has an amazing eye for detail. He looks for the things I would never think to look for or ask about. I feel lucky to have the car in such capable hands.
The chassis was coated at Procryo in Cumming ,GA. They did a great job on it, and we're happy. The only problem is it was scratched by another place when it was outside our care, so we'll have to fix it.
I also received the gauge package and new ABS overlay for the cluster from New Vintage, and HOLY COW they look cool! We are using a 6-gauge cluster, with tach and speedo in the center, and then oil / batt / volts / gas split on each side. In the dead center, we had them set us up with one of their killer indicator panels, that has turn signals on either end, and warning lights for check-engine, overheating, low oil, and brights. I'll get pictures up in the next day or so. The best part is that you don't have to hack up your dash to install them. You simply take the original plastic cluster housing out (unbolts from the dash), remove the factory gauges, and use a dremel to trim the original so that the new overlay will fit. Then use epoxy to secure it in place. Takes all of about 30 minutes from start to finish (plus wiring, but that is beside the point).
__________________
Sparky@RnDFabrication
www.RnDFabrication.com
From mild to wild, we help your project stand out from the rest!
|
02-04-2013, 02:57 PM
|
|
Member
|
|
Join Date: Aug 2011
Location: Georgia
Posts: 78
Thanks: 0
Thanked 0 Times in 0 Posts
|
|
I also ordered a front end bolt kit from Tamraz on ebay, along with a 10pc seal kit. All the seals are from MetroMMP, and are their Softseal style. I also had to buy a rubber bumper kit (hood bumpers, hood to fender bumpers, door bumpers, trunk bumper, etc) as mine were all shot.
Also, another update: I ordered the brake cooling ducts and flanges from Jegs. I checked several places, and they had the best price, were in stock, and had free shipping to boot. Those arrived and we'll be running them once the body is back on.
__________________
Sparky@RnDFabrication
www.RnDFabrication.com
From mild to wild, we help your project stand out from the rest!
|
02-04-2013, 03:07 PM
|
|
Member
|
|
Join Date: Aug 2011
Location: Georgia
Posts: 78
Thanks: 0
Thanked 0 Times in 0 Posts
|
|
I also got word from Digi-Tails: they have the prototype panels on-hand, and they are populating them with parts and programming them with the appropriate software. They are shooting to have picture and videos tomorrow. Once everything looks good the production panels will begin. Can't wait to get them! (UPDATE: we now have the first production units on-hand, and will be installing once the body is back at our place.
The seat mounts are going to be redone, as they currently are just tack welded and don't have any supports or tie-ins to the structure. The body guy is tackling that as well as the floor pans.
Brakelines: the hardlines are a kit from inline tube, and are stainless. The rear line won't be used, as I'll have to make something myself for the Explorer axle.
I will be uploading pictures in a little bit.
__________________
Sparky@RnDFabrication
www.RnDFabrication.com
From mild to wild, we help your project stand out from the rest!
|
02-04-2013, 08:43 PM
|
 |
Lateral-g Supporting Member
|
|
Join Date: Oct 2006
Location: Ma
Posts: 8,491
Thanks: 939
Thanked 342 Times in 231 Posts
|
|
Nice project. You've got a lot of nice stuff going on it.
|
02-04-2013, 08:48 PM
|
|
Member
|
|
Join Date: Aug 2011
Location: Georgia
Posts: 78
Thanks: 0
Thanked 0 Times in 0 Posts
|
|
thanks. It's been about a 23 year dream coming to fruition. The goal is to have it on the road by late spring, hopefully sooner (a year after the original deadline) 
__________________
Sparky@RnDFabrication
www.RnDFabrication.com
From mild to wild, we help your project stand out from the rest!
|
 Posting Rules
|
You may not post new threads
You may not post replies
You may not post attachments
You may not edit your posts
HTML code is Off
|
|
|
All times are GMT -7. The time now is 02:30 AM.
|


 Brian Hobaugh SCCA National Tour June 2014
 First Hemi 'Cuda Convertible Ever Built
 Short clips: Goodguys Pleasanton autocross and pit videos


 Linear Mode
