...

Go Back   Lateral-g Forums > Lateral-G Open Discussions > Project Updates
User Name
Password


Reply
 
Thread Tools Display Modes
  #51  
Old 11-14-2011, 08:18 AM
67XR7's Avatar
67XR7 67XR7 is offline
Senior Member
 
Join Date: Nov 2011
Location: Sf, Bay Area
Posts: 394
Thanks: 5
Thanked 15 Times in 10 Posts
Default

looks great so far!
Reply With Quote
  #52  
Old 11-26-2011, 01:47 PM
GPR's Avatar
GPR GPR is offline
Senior Member
 
Join Date: Jan 2010
Location: Port Richey Fl
Posts: 660
Thanks: 0
Thanked 12 Times in 11 Posts
Default

It is hard to tell in this picture but the nose is to wide at the top so I cut off both sides


Another problem is the bottom brackets hung down over an 1" from the frame rail so I cut them off and bolted them to the frame


Next I used fiberglass mat and resin to reattach. When this sets up I will take it off and add more to the other side.


__________________
Rusty Gillis
Gillis Performance Restorations
Port Richey Fl
www.gillisrestorations.com
Reply With Quote
  #53  
Old 12-06-2011, 01:16 PM
GPR's Avatar
GPR GPR is offline
Senior Member
 
Join Date: Jan 2010
Location: Port Richey Fl
Posts: 660
Thanks: 0
Thanked 12 Times in 11 Posts
Default

I got a package today from UPS and I was surprised to find these in the box. I can't wait to install these great looking hinges.

__________________
Rusty Gillis
Gillis Performance Restorations
Port Richey Fl
www.gillisrestorations.com
Reply With Quote
  #54  
Old 12-10-2011, 01:04 PM
cjperry81 cjperry81 is offline
Member
 
Join Date: Oct 2011
Posts: 20
Thanks: 0
Thanked 0 Times in 0 Posts
Default

Quote:
Originally Posted by GPR View Post
The headlight buckets were bolted and also bonded with Nortons panel adhesive as were the end caps. The rear valance was welded.
Will the panel adhesive keep the seam from cracking? I am doing a 65 coupe right now and the person I bought the shell from bondo'ed the end caps to the quarters and I havent even started the real body work and the seams are already cracking from their past work. So will that adhesive help that if i take them off and redo them?
Reply With Quote
  #55  
Old 12-10-2011, 01:54 PM
cjperry81 cjperry81 is offline
Member
 
Join Date: Oct 2011
Posts: 20
Thanks: 0
Thanked 0 Times in 0 Posts
Default

Quote:
Originally Posted by GPR View Post
As you can see in this photo the bottom of the deck lid sticks out past the quarter and on the bottom it doesn't line up with the taillight panel


I added material to the back and sanded the front

What type of work did you do with the bumper. Is that a steel bumper that you tucked? Or is that a fiberglass bumper? Do they come tucked if so?
Reply With Quote
  #56  
Old 12-10-2011, 04:04 PM
GPR's Avatar
GPR GPR is offline
Senior Member
 
Join Date: Jan 2010
Location: Port Richey Fl
Posts: 660
Thanks: 0
Thanked 12 Times in 11 Posts
Default

Quote:
Originally Posted by cjperry81 View Post
What type of work did you do with the bumper. Is that a steel bumper that you tucked? Or is that a fiberglass bumper? Do they come tucked if so?
It's fiberglass I cut it in 3 pieces to narrow it than added material on the ends to get it closer to the end caps. The end caps were bonded on with panel adhesive. I did a 1965 Fastback and painted it 4 years ago and no cracks.
__________________
Rusty Gillis
Gillis Performance Restorations
Port Richey Fl
www.gillisrestorations.com
Reply With Quote
  #57  
Old 12-10-2011, 04:05 PM
GPR's Avatar
GPR GPR is offline
Senior Member
 
Join Date: Jan 2010
Location: Port Richey Fl
Posts: 660
Thanks: 0
Thanked 12 Times in 11 Posts
Default

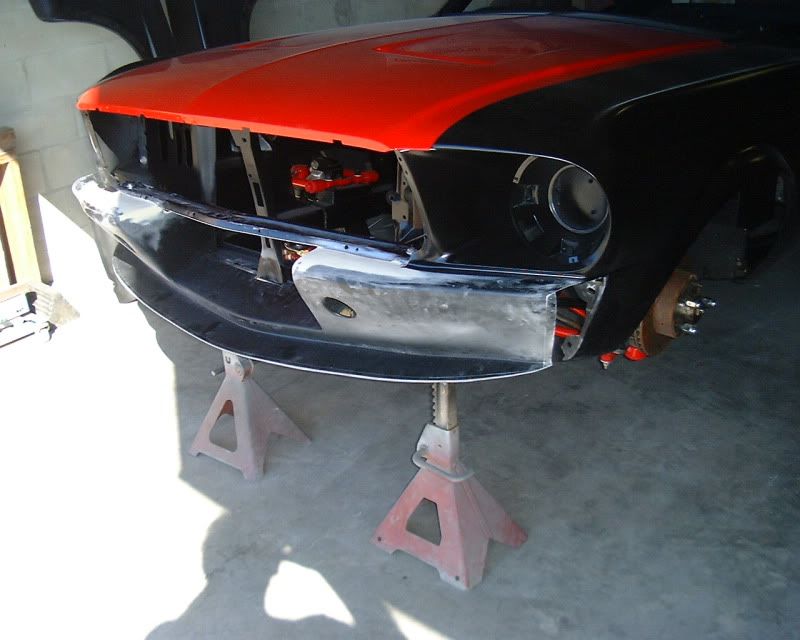
Making new fiberglass ends for the front end.


I taped a piece of aluminum on there for a pattern than added two pieces of fiberglass mat


The next day I carefully removed the aluminum


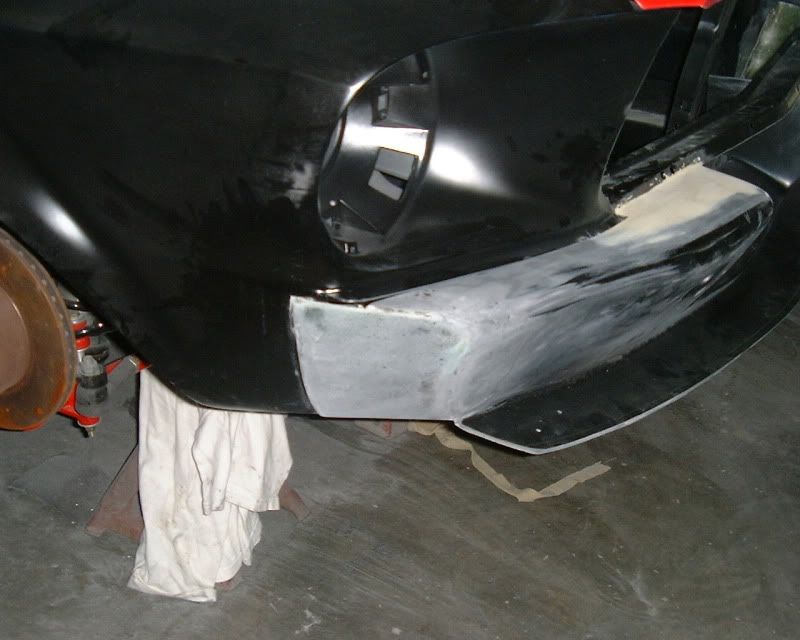
I added more material to the back side than sanded a little and this is the first test fit. It's getting closer to what I want. I still need to reshape the spoiler.


__________________
Rusty Gillis
Gillis Performance Restorations
Port Richey Fl
www.gillisrestorations.com
Reply With Quote
  #58  
Old 12-10-2011, 09:11 PM
waynieZ's Avatar
waynieZ waynieZ is offline
Lateral-g Supporting Member
 
Join Date: Oct 2006
Location: Ma
Posts: 8,491
Thanks: 939
Thanked 342 Times in 231 Posts
Default

Looks good Rusty.
__________________
_Wayne________

___________________________________
https://lateral-g.net/forums/show...ghlight=FNQUIK
Reply With Quote
  #59  
Old 12-11-2011, 02:18 PM
GPR's Avatar
GPR GPR is offline
Senior Member
 
Join Date: Jan 2010
Location: Port Richey Fl
Posts: 660
Thanks: 0
Thanked 12 Times in 11 Posts
Default

I spent today adding fiberglass to the ends of the front end so it will mount to the holes in the fender where the stock valance bolts. It is now held in place with 8 bolts in the original holes.


__________________
Rusty Gillis
Gillis Performance Restorations
Port Richey Fl
www.gillisrestorations.com
Reply With Quote
  #60  
Old 12-11-2011, 03:38 PM
GregWeld's Avatar
GregWeld GregWeld is offline
Lateral-g Supporting Member
 
Join Date: Jul 2005
Location: Scottsdale, AriDzona
Posts: 20,741
Thanks: 504
Thanked 1,080 Times in 388 Posts
Default

Love the build Rusty!

Two questions --

Can you post up a big picture of what appears to be your "old" race car? The one you're using for your Avatar?

Why did you paint the hood and deck lid at this point in the build? I'm not being critical - I was just wondering.

Reply With Quote
Reply


Posting Rules
You may not post new threads
You may not post replies
You may not post attachments
You may not edit your posts

BB code is On
Smilies are On
[IMG] code is On
HTML code is Off

Forum Jump


All times are GMT -7. The time now is 02:41 AM.


Powered by vBulletin® Version 3.8.11
Copyright ©2000 - 2026, vBulletin Solutions Inc.
Copyright Lateral-g.net