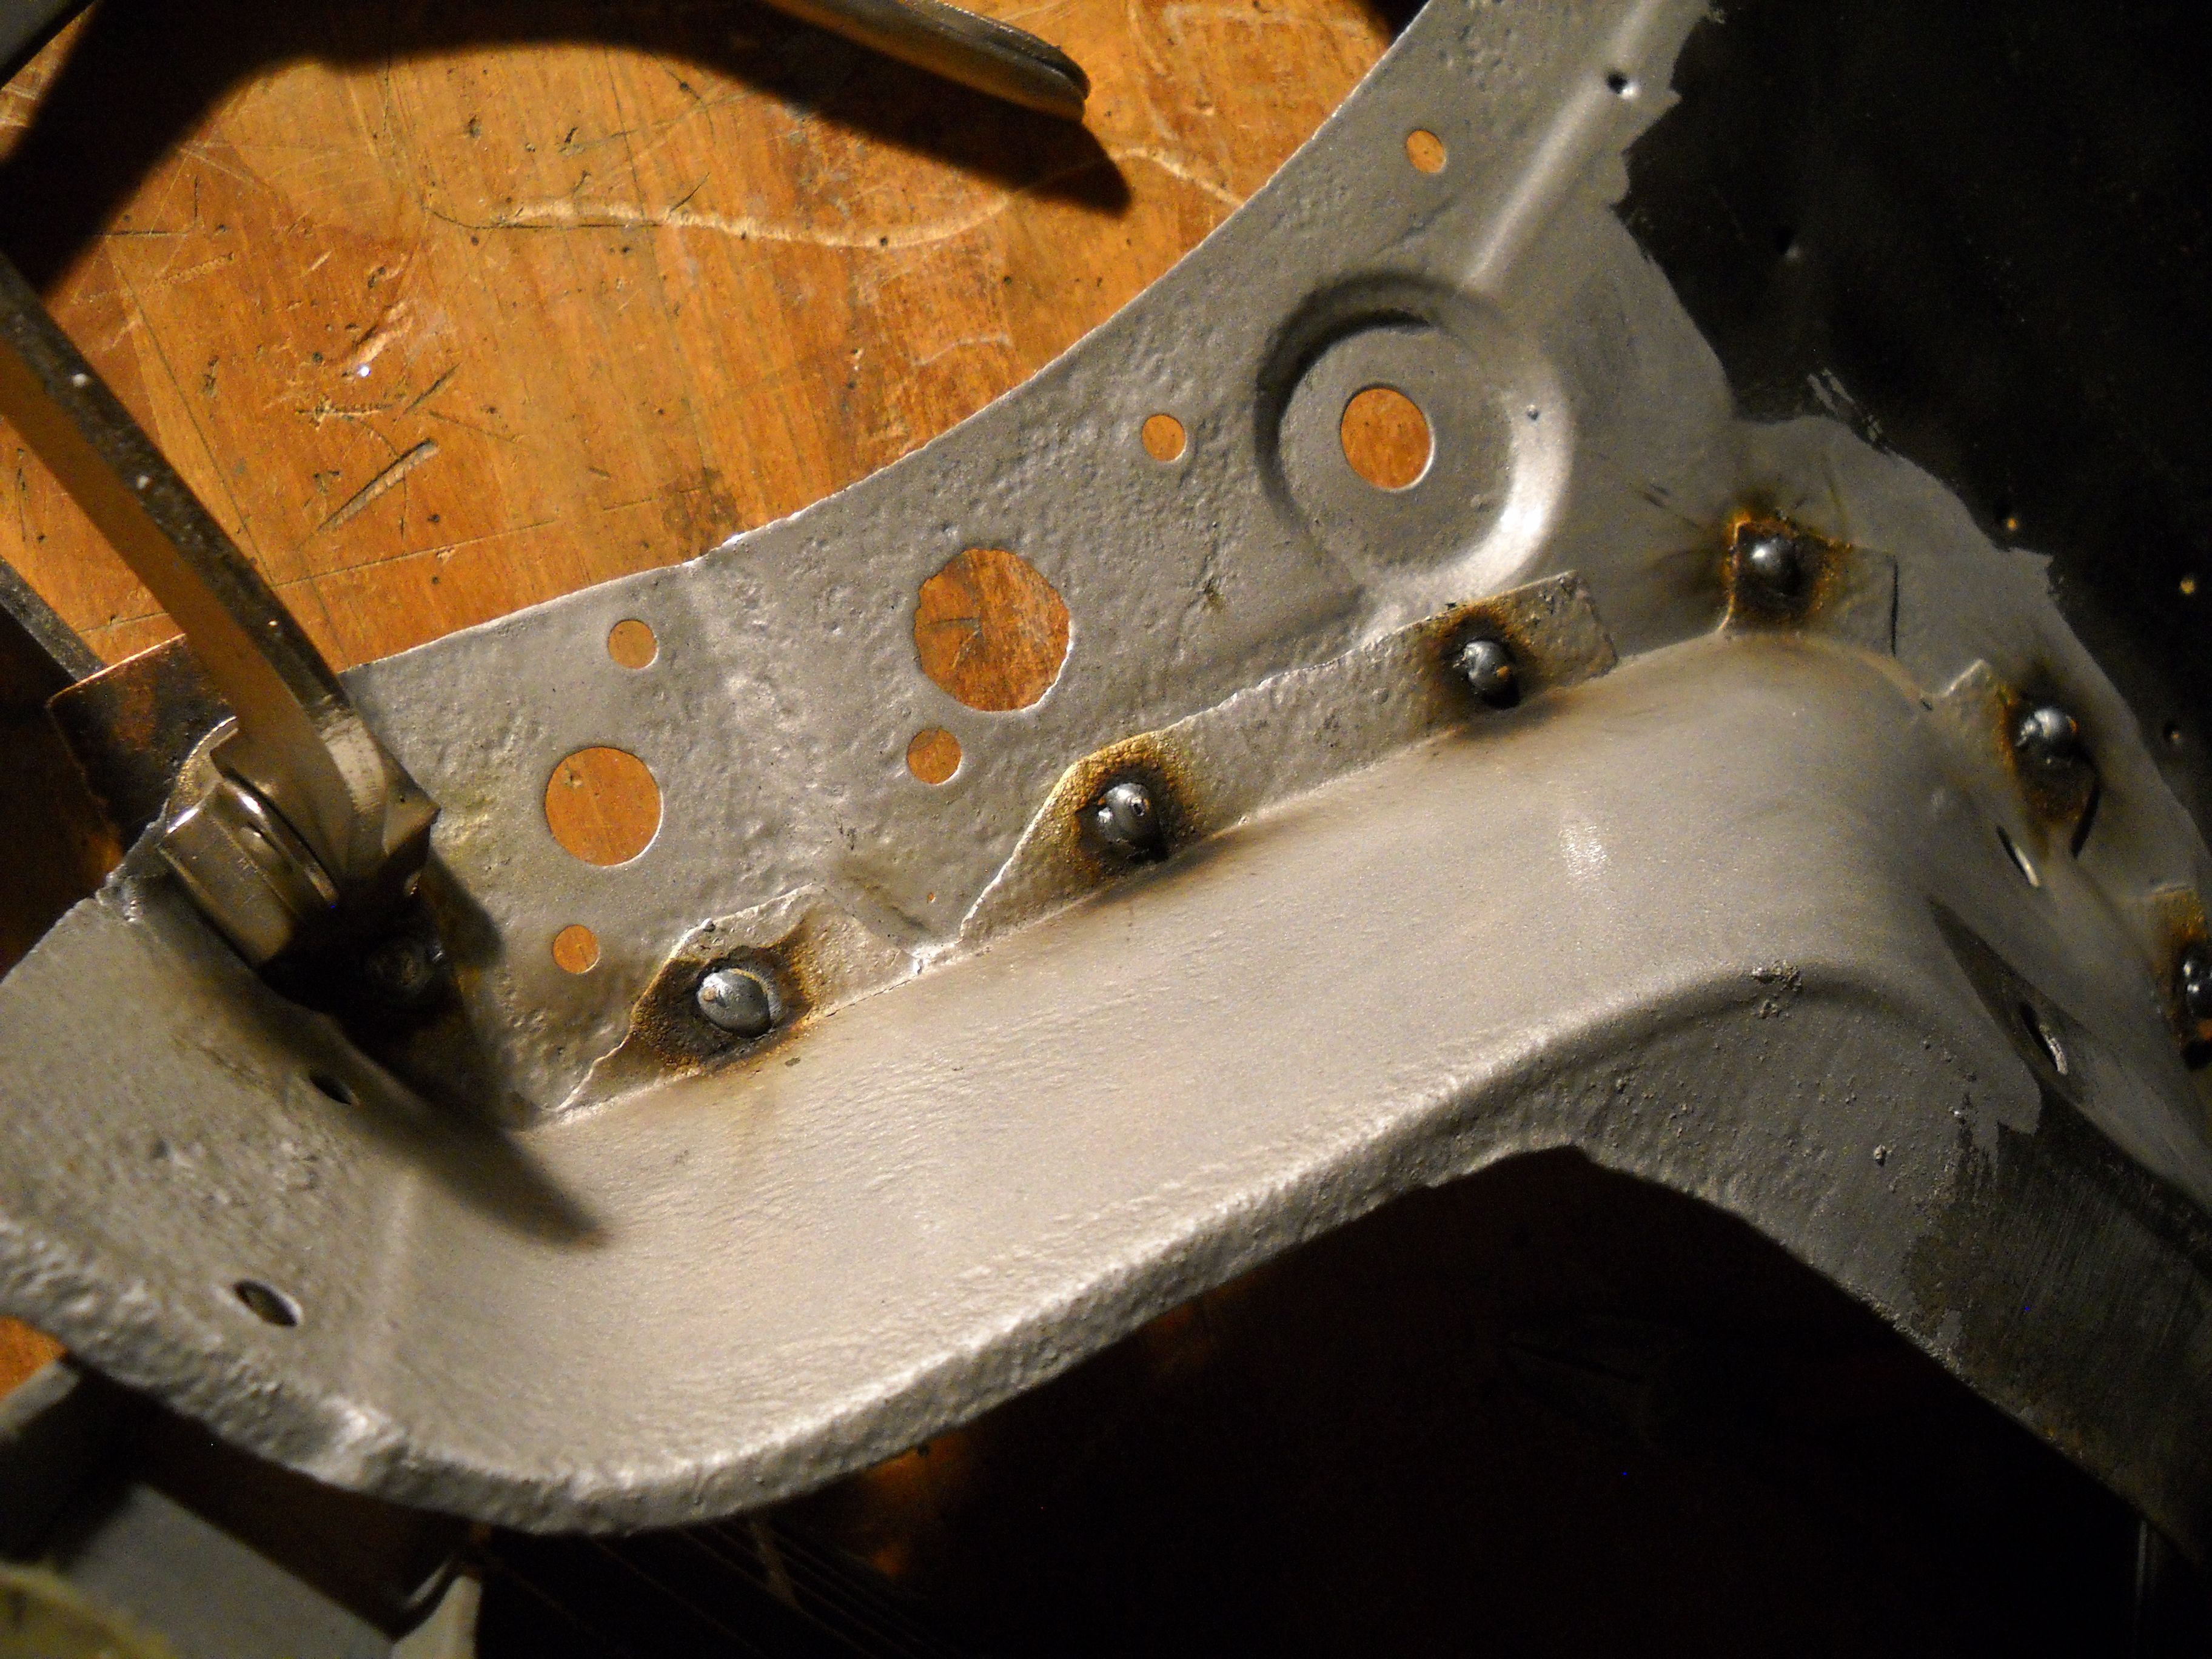
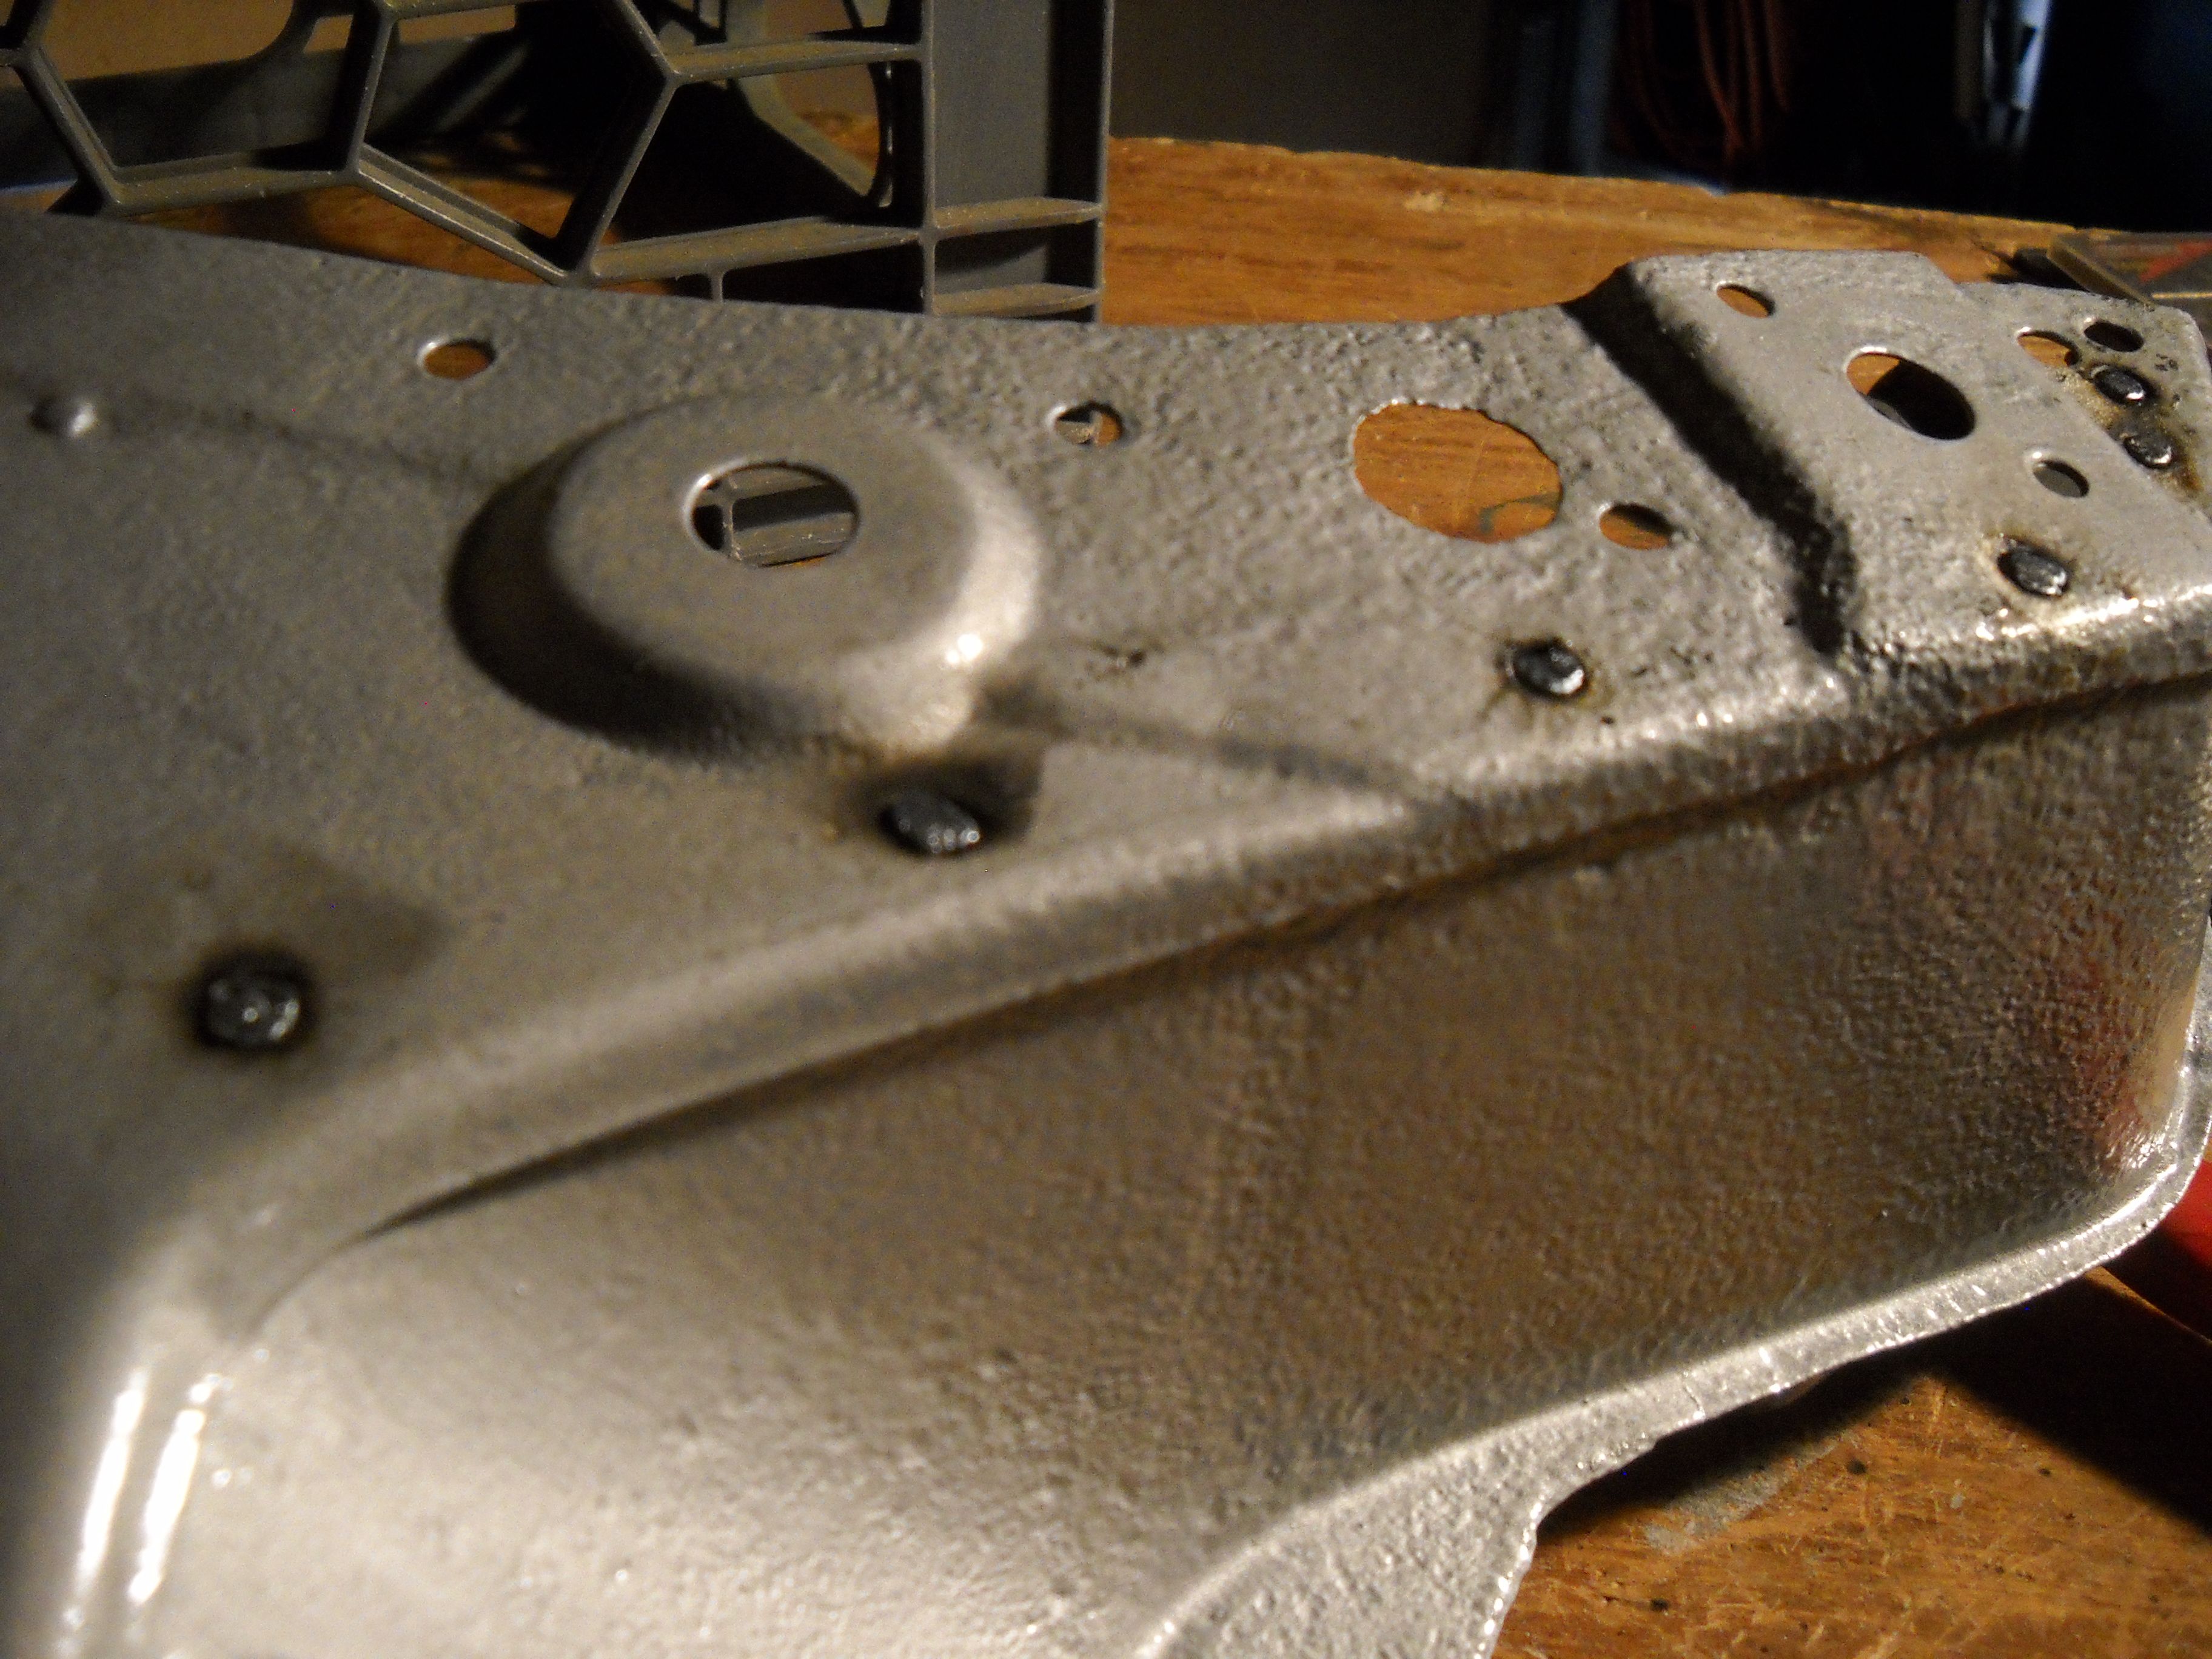
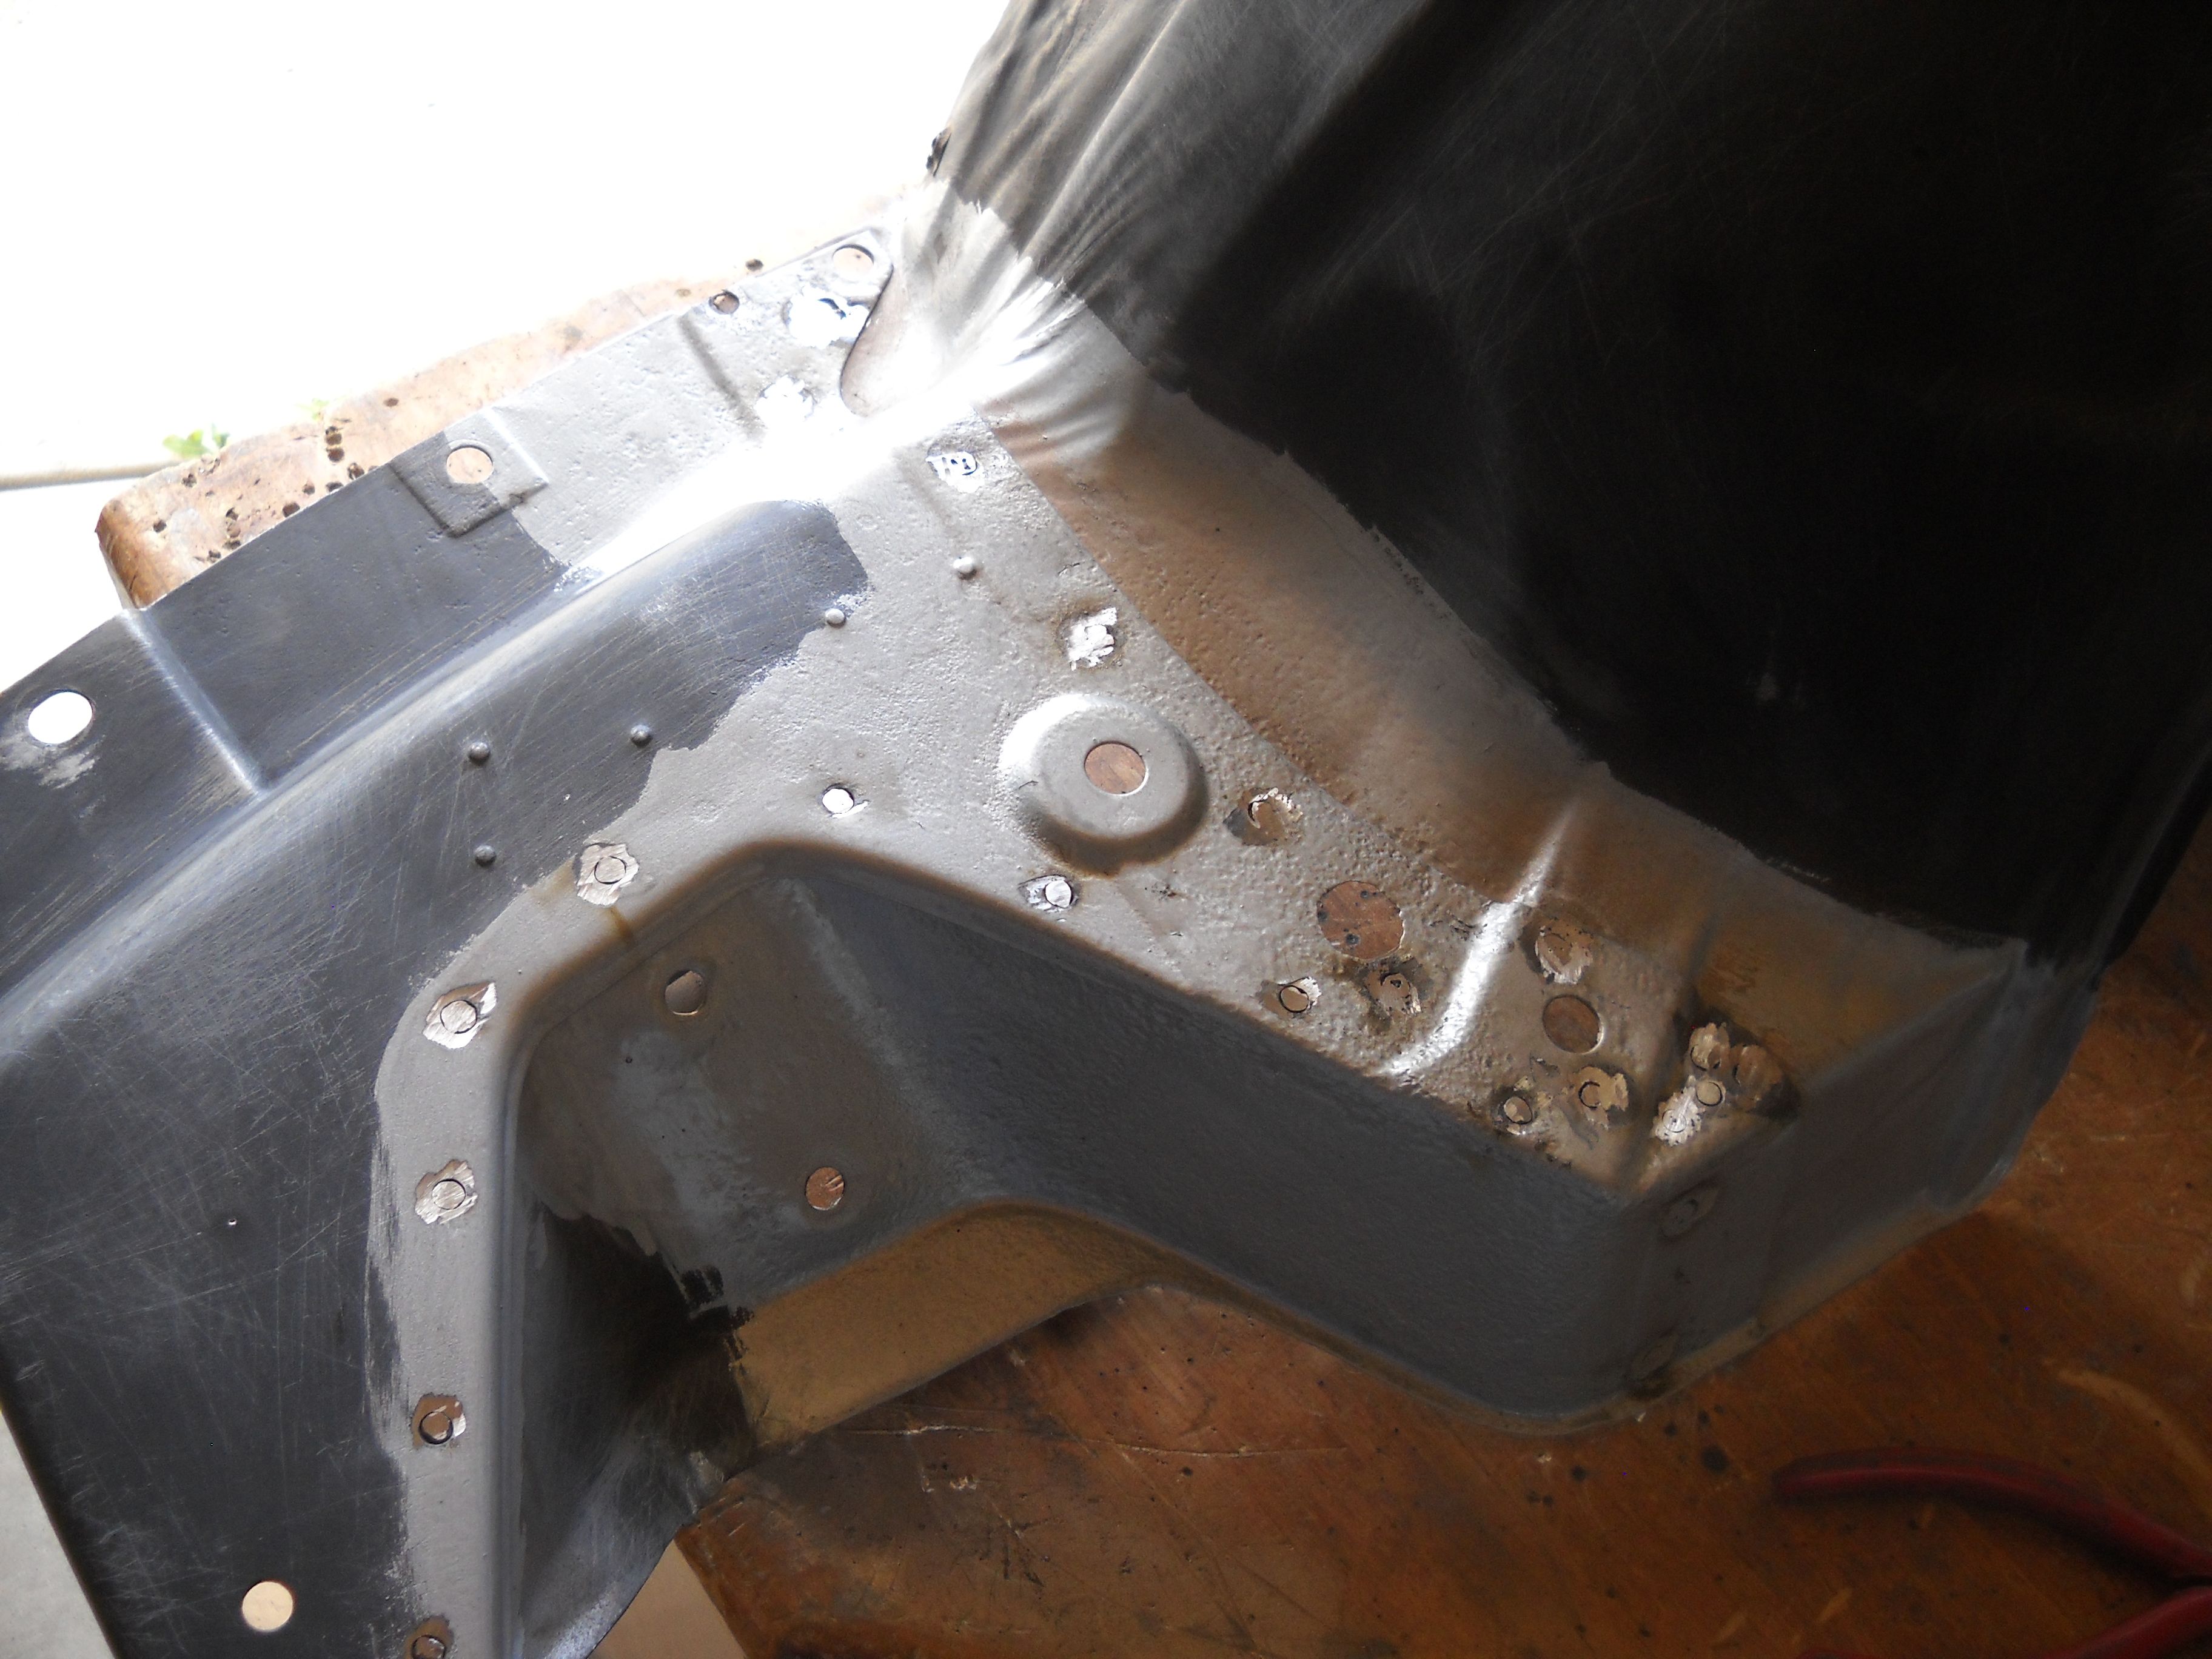
I hate to be the bearer of bad news, but it's better to say something now before you get into structural parts of the car, your welds do not look good

It's hard to tell without being there in person, but the welds either look as if you do not have enough wire speed, not enough gas or the metal isn't cleaned well enough. Also, you ground too much metal away when you ground down the welds. On the photo of the ground welds, you can see you did not get penetration into the surrounding metal. It doesn't look as if you are using the proper technique for rosette welds, as well as the what I mentioned above.


 Brian Hobaugh SCCA National Tour June 2014
 First Hemi 'Cuda Convertible Ever Built
 Short clips: Goodguys Pleasanton autocross and pit videos


 Linear Mode

