...

Go Back   Lateral-g Forums > Lateral-G Open Discussions > Open Discussion
User Name
Password


Reply
 
Thread Tools Display Modes
  #1  
Old 09-15-2015, 09:06 AM
syborg tt's Avatar
syborg tt syborg tt is offline
Lateral-g Supporting Member
 
Join Date: Jun 2005
Posts: 8,425
Thanks: 5,565
Thanked 2,004 Times in 1,079 Posts
Default

Quote:
Originally Posted by waynieZ View Post
Wish I could be there to see it.
Not to worry I will take a bunch of pics
__________________
marty-mj
Is a car ever really done???? It's like a ball of yarn unwinding, that has no end... Author DKz Garage

Projects - Syborg TT 4.3l v6 Mini-Truck, 2nd Chance Camaro & SLP575 Bumble Bee - 4Sale
Reply With Quote
  #2  
Old 09-15-2015, 11:35 AM
waynieZ's Avatar
waynieZ waynieZ is offline
Lateral-g Supporting Member
 
Join Date: Oct 2006
Location: Ma
Posts: 8,491
Thanks: 939
Thanked 342 Times in 231 Posts
Default

Quote:
Originally Posted by syborg tt View Post
Not to worry I will take a bunch of pics
I live Vicariously through your photos!
__________________
_Wayne________

___________________________________
https://lateral-g.net/forums/show...ghlight=FNQUIK
Reply With Quote
  #3  
Old 09-17-2015, 06:55 AM
WSSix WSSix is offline
Lateral-g Supporting Member
 
Join Date: Nov 2008
Location: Dunwoody, GA
Posts: 6,559
Thanks: 1,471
Thanked 833 Times in 629 Posts
Default

x2 really excited to see this car complete, and, Marty, your photos are really appreciated
__________________
Trey

Current rides: 2000 BMW 540i/6 and 86 C10.

Former ride: 1979 Trans Am WS6: LT1/T56, Kore 3 C5/6 brakes, BMW 18in rims
Reply With Quote
  #4  
Old 10-18-2015, 08:01 AM
Al Moreno Al Moreno is offline
Senior Member
 
Join Date: Dec 2004
Posts: 1,502
Thanks: 3
Thanked 1 Time in 1 Post
Default

Quote:
Originally Posted by syborg tt View Post
Not to worry I will take a bunch of pics
Quote:
Originally Posted by waynieZ View Post
I live Vicariously through your photos!
Quote:
Originally Posted by WSSix View Post
x2 really excited to see this car complete, and, Marty, your photos are really appreciated
We hit a snag with the paint. Wont bore you with the details. Hopefully it will be there.


Here are a few pics of the detail work.


Justin figure out a way to installed the hood latches without having the cut out open the bottom side of the hood to access nuts that hold down the Aerocatch like you see in the picture below.


Basically, its a billet bezel that has a tap for the screws to insert into, eliminating the need for nuts. The two studs are mounted to the bezel. they allow you to hold the bezel in place as you bolt the latch into the bezel. Once the bolts are installed, you remove the studs and install the two remaining bolts. The bezel sandwiches the catch without any nuts.


The only thing you'll see from the bottom of the hood is the 1/2" hole for the pin.


Six coats of clear to smooth the bottom before one last coat of satin clear.


Last edited by Al Moreno; 10-18-2015 at 08:52 AM.
Reply With Quote
  #5  
Old 10-18-2015, 08:13 AM
Al Moreno Al Moreno is offline
Senior Member
 
Join Date: Dec 2004
Posts: 1,502
Thanks: 3
Thanked 1 Time in 1 Post
Default

Interior work:

Since the car is now a none AC/radio, the idea was to remove any GM hint that it ever came with these features.

Radio and AC face plate mods: The idea was to clean up the face plate and give it a floating effect.

To give it that effect, the face plate mounting points were cut off.


Next, all the AC and radio control were shaved


Glass the backside and did some rough sanding.


Prep the dash for the floating effect by cutting off the mounting points


To finish the floating effect, we cut off the side bars from the dash sub structure.


Also remove the pieces on the side of the trans tunnel. Now we will be able to finish off the flooring material all the way to the fire wall which I think will give it a much nicer look.


Last edited by Al Moreno; 10-18-2015 at 09:17 AM.
Reply With Quote
  #6  
Old 10-18-2015, 08:42 AM
Al Moreno Al Moreno is offline
Senior Member
 
Join Date: Dec 2004
Posts: 1,502
Thanks: 3
Thanked 1 Time in 1 Post
Default

Interior trunk divider


Door panels have been modified. we removed the storage pocket, speaker grille and continued the panel line to the edge. The AC vent was also filled (Not seen in this picture).


Here is the AC vent on the door panel being filled by plastic welding a piece in.


The dash had over 20 mods at last count.


The speaker and defrost vents have been shaved.


Last edited by Al Moreno; 10-18-2015 at 09:29 AM.
Reply With Quote
  #7  
Old 10-18-2015, 08:50 AM
Al Moreno Al Moreno is offline
Senior Member
 
Join Date: Dec 2004
Posts: 1,502
Thanks: 3
Thanked 1 Time in 1 Post
Default

Roll cage being painted.


Replaced all the GM electronics. The gray box is Racepak's Smartwire which replaces all the fuse box and relays, plus it controls all the body functions. Its a really cool piece. It also cut down your wiring to about half. The red box is a mock up of Racepak’s G2X Data logger. The black box is Holley's Dominator EFI ECU.


Modifying the CF Z28 diffuser with an aluminum tunnel.


Every line was replaced with stainless hard lines


Suspension work:


Made our own end links


All the bolts on the Stop Tech Brakes were nickle plated. The little struts in the pictures are Racepak ride height sensors.


Last edited by Al Moreno; 10-18-2015 at 10:38 AM.
Reply With Quote
  #8  
Old 10-18-2015, 09:30 AM
glassman's Avatar
glassman glassman is offline
Lateral-g Supporting Member
 
Join Date: Apr 2012
Location: Livermore
Posts: 2,466
Thanks: 111
Thanked 84 Times in 62 Posts
Default

Absolutely beautiful!!! I hope you make SEMA too, as i would love to see it in person....re the hood latches, on the 1/2 hole on the underside of the hood, you may need to clearance that a little more to compensate for the angle of the hood hinges (unless A- you are going lift off only or B- your angling the red male "receiving pin".
I had to on my 70, and now its getting redone in c/f as well...
__________________
Mike
Reply With Quote
  #9  
Old 10-18-2015, 10:29 AM
Al Moreno Al Moreno is offline
Senior Member
 
Join Date: Dec 2004
Posts: 1,502
Thanks: 3
Thanked 1 Time in 1 Post
Default

Quote:
Originally Posted by glassman View Post
Absolutely beautiful!!! I hope you make SEMA too, as i would love to see it in person....re the hood latches, on the 1/2 hole on the underside of the hood, you may need to clearance that a little more to compensate for the angle of the hood hinges (unless A- you are going lift off only or B- your angling the red male "receiving pin".
I had to on my 70, and now its getting redone in c/f as well...
Thanks, we hope the clock doesn't run out on us.

As far as the hood pins, there so much though that went into just something that would seem so simple.

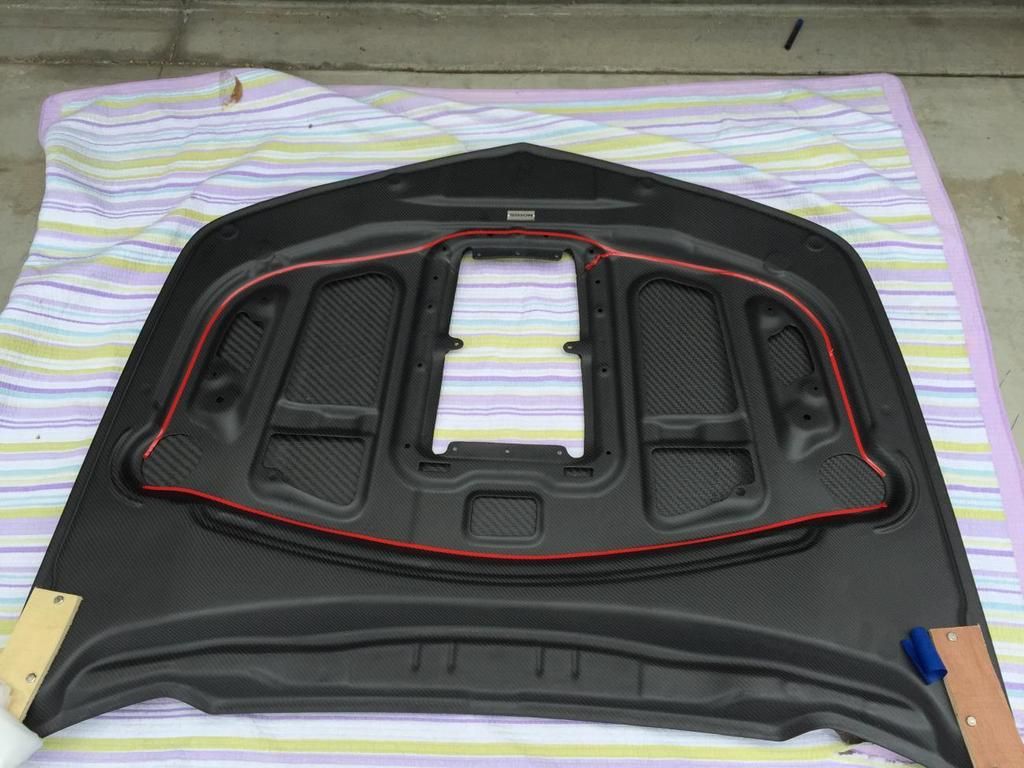
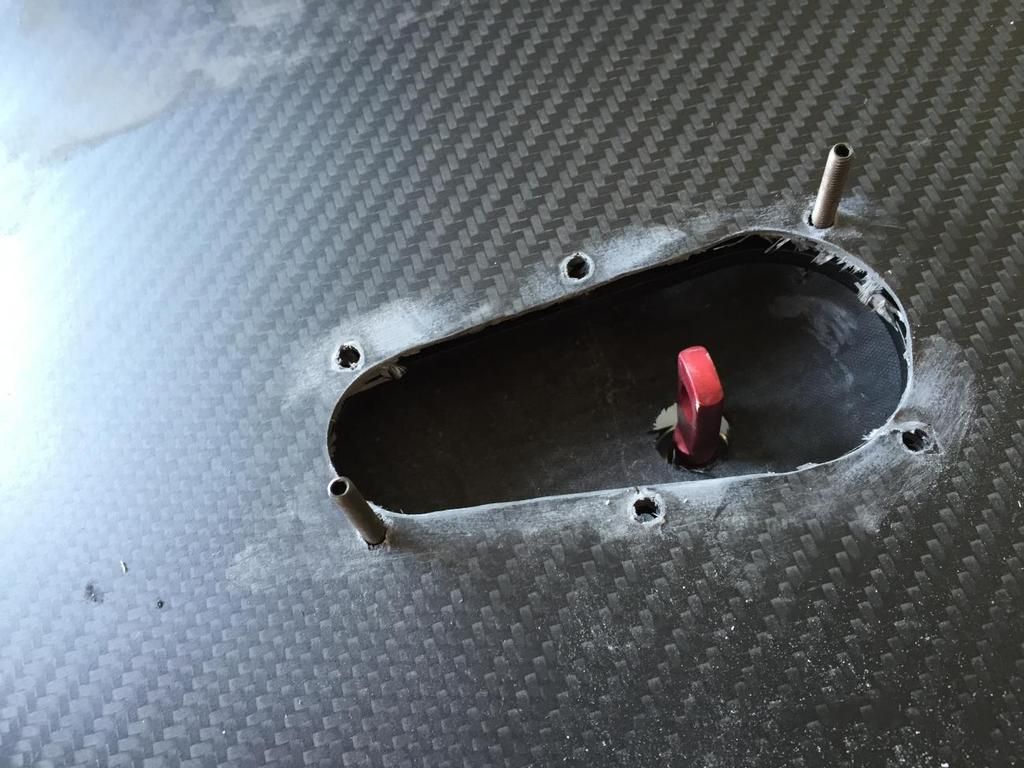
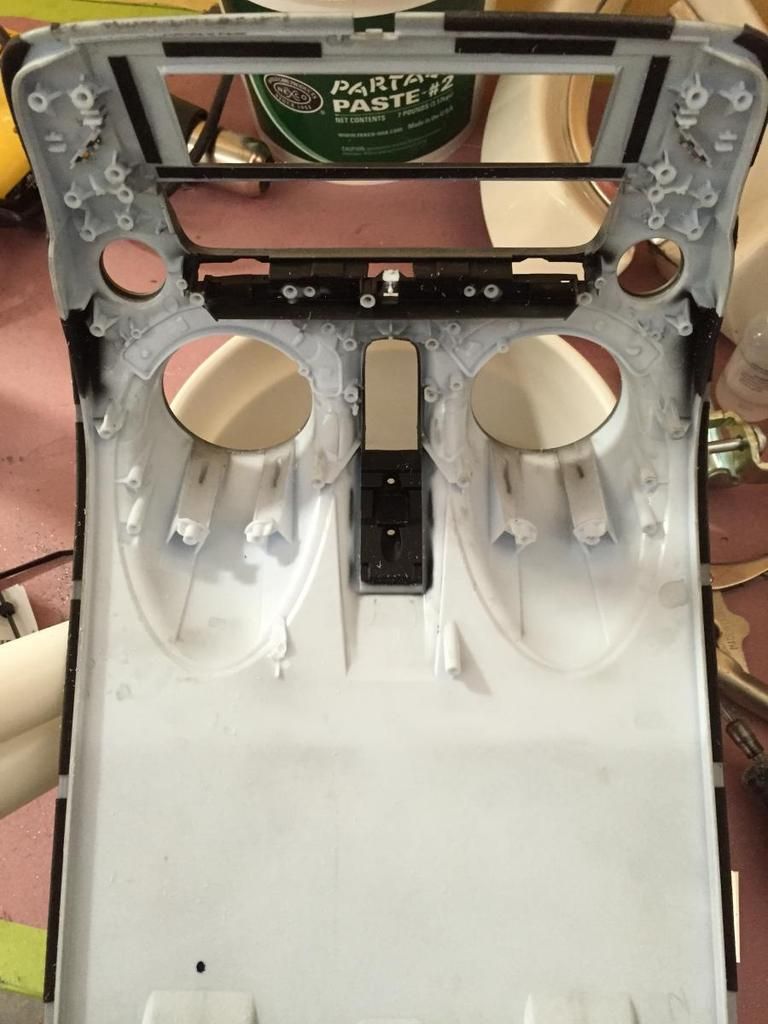
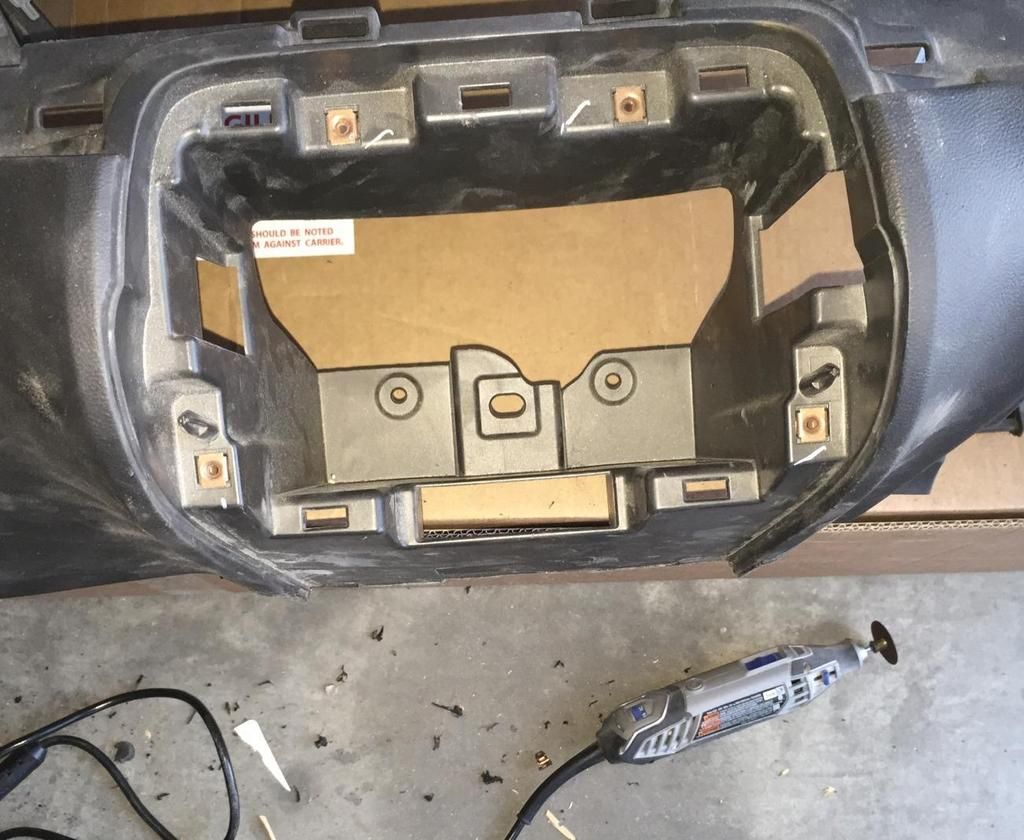
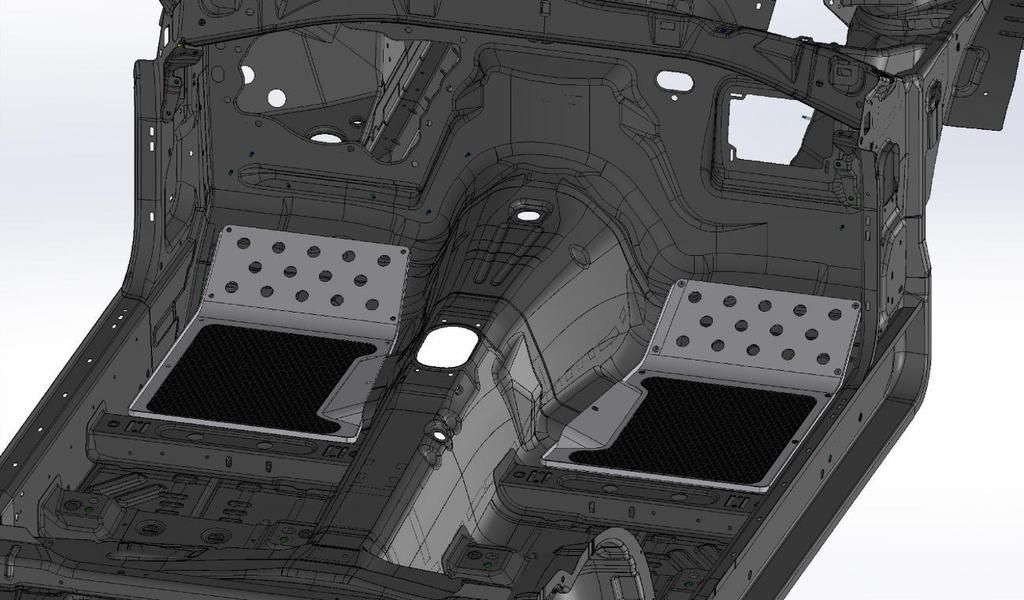
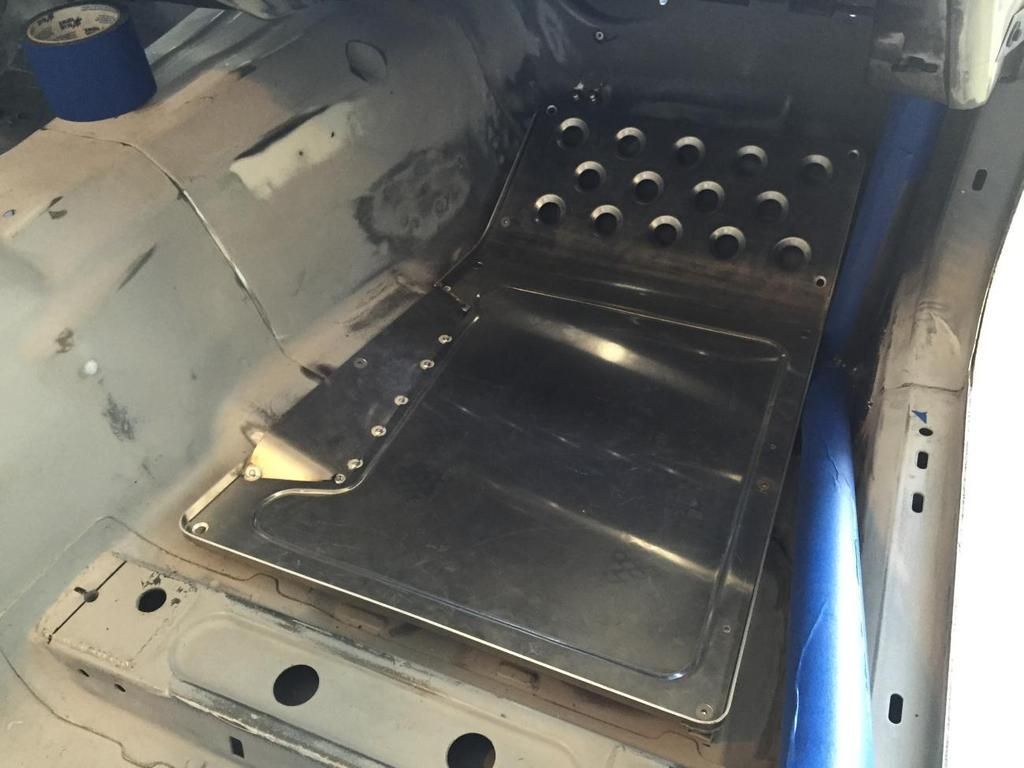
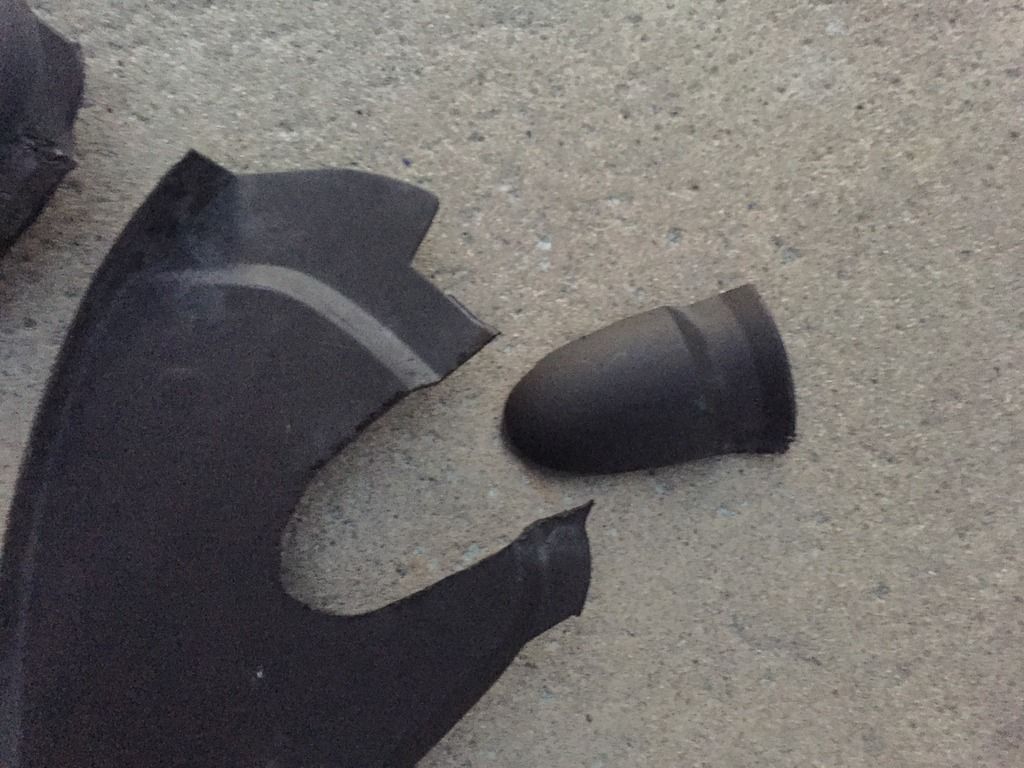
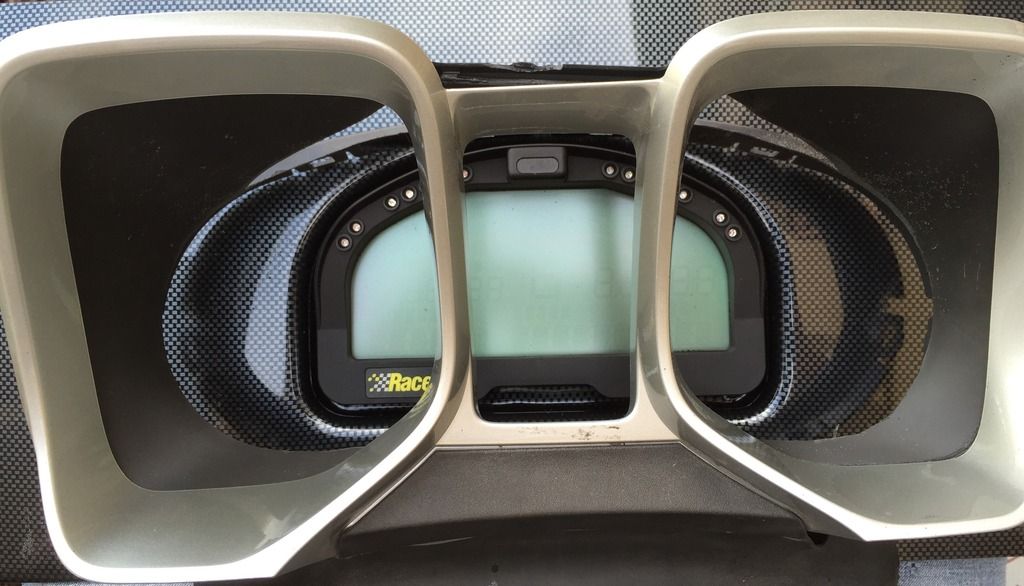
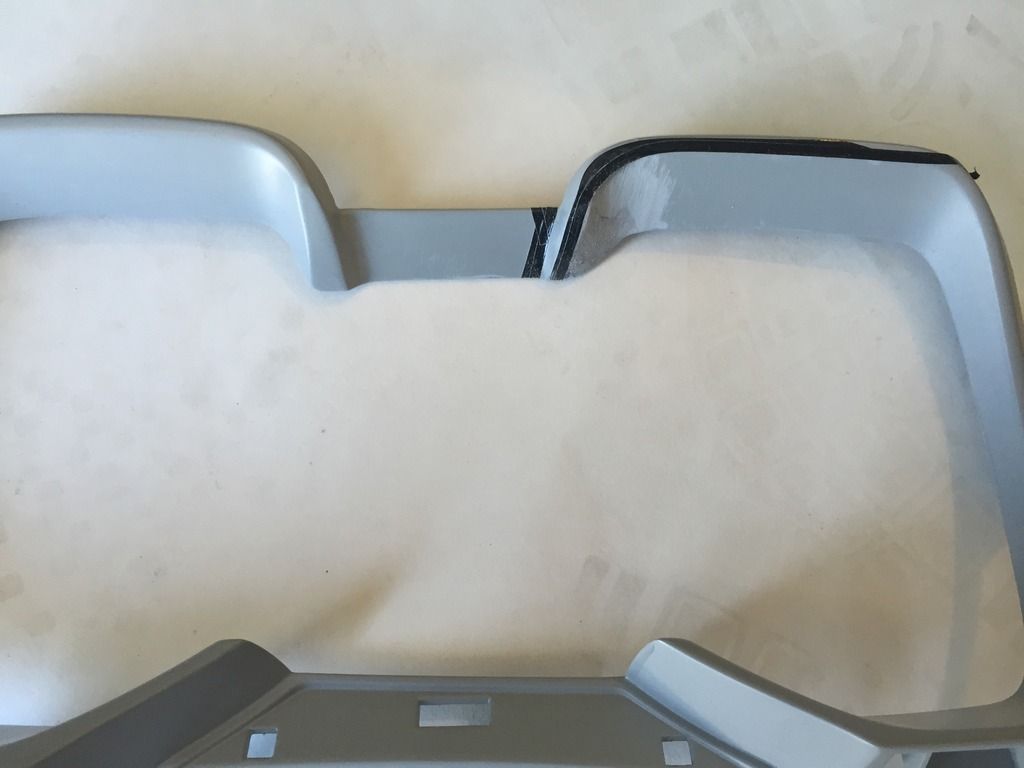
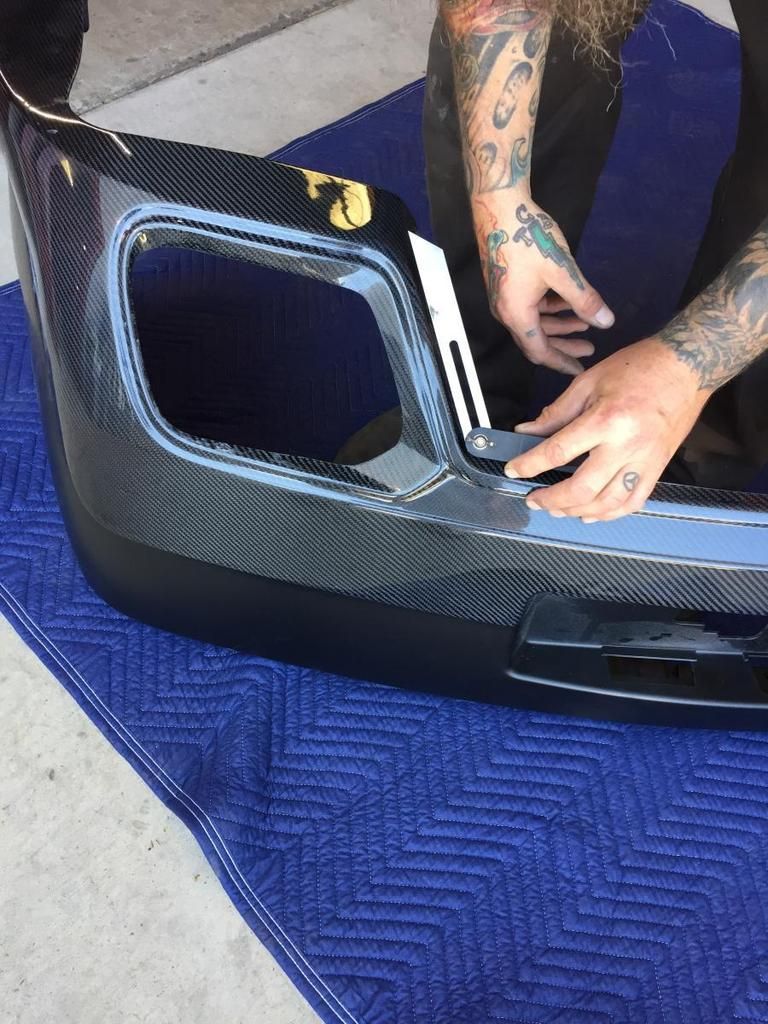
All of the install we've seen, the pin is just mounted on the rad support were the factory rubber bump stop goes. The challenge is it positions the latch to close to the edge of the hood line (See picture below).


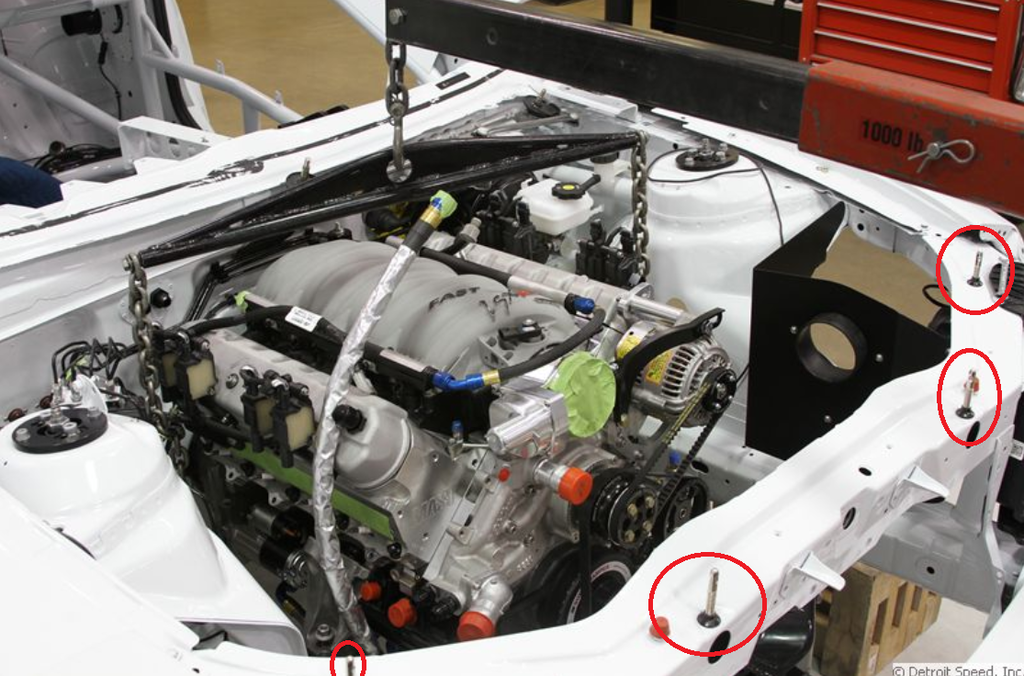
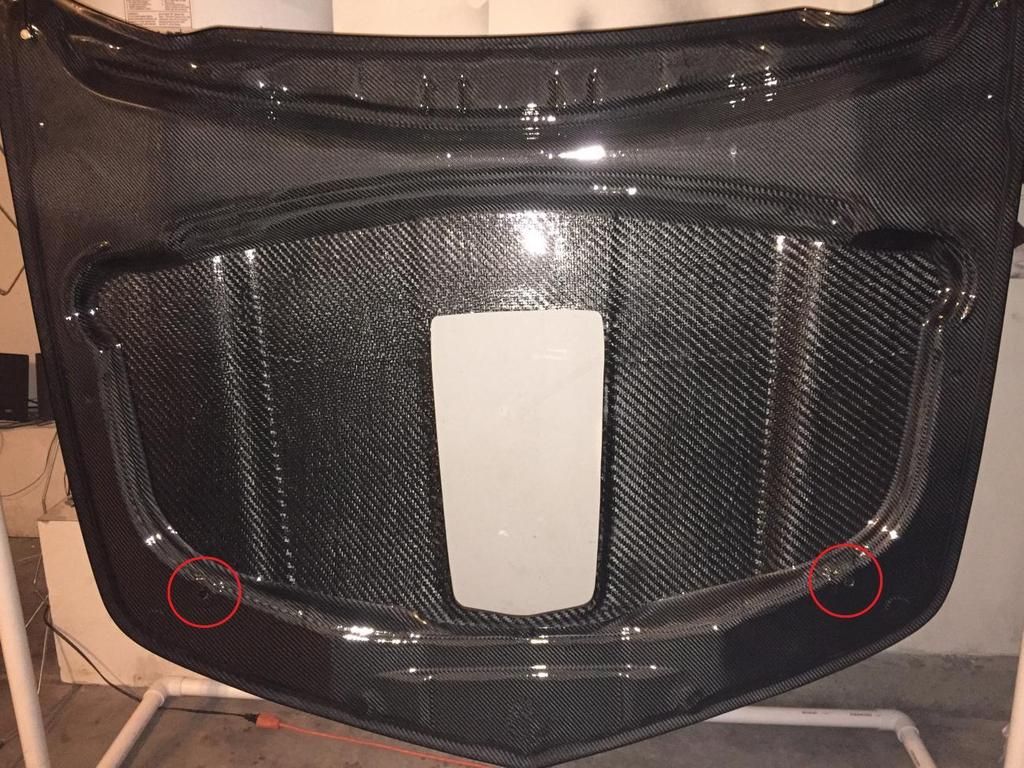
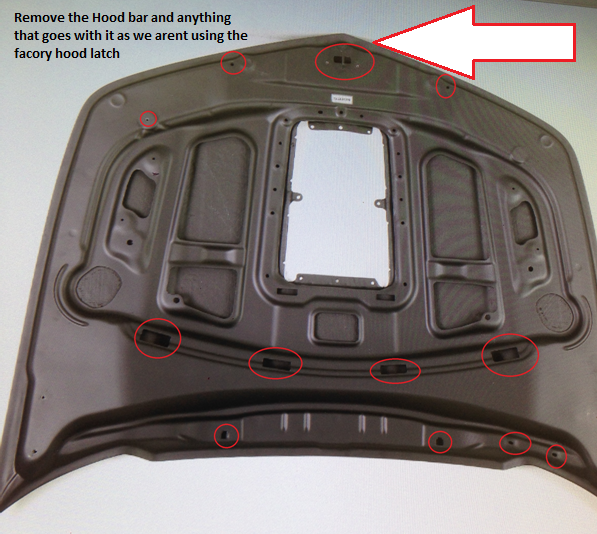
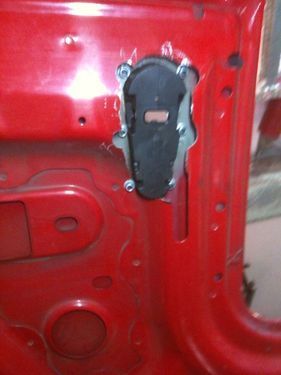
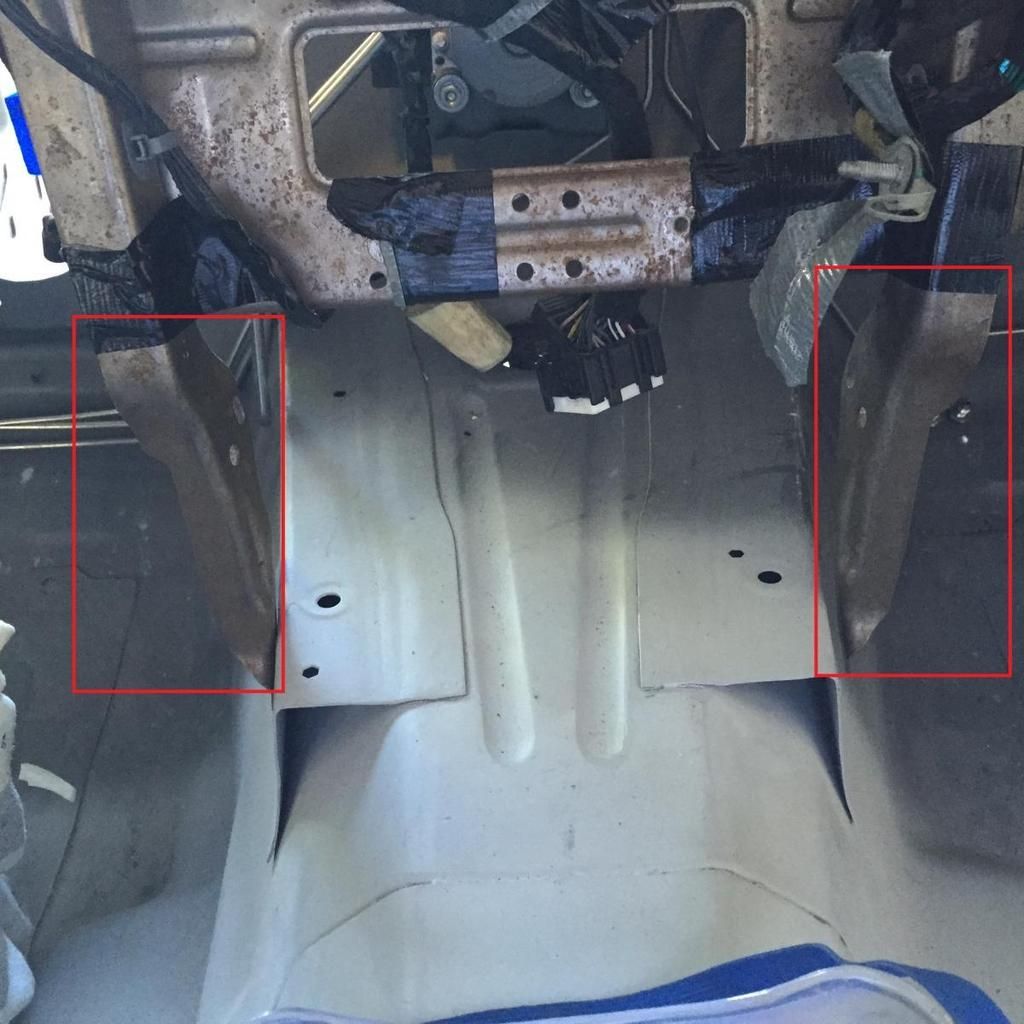
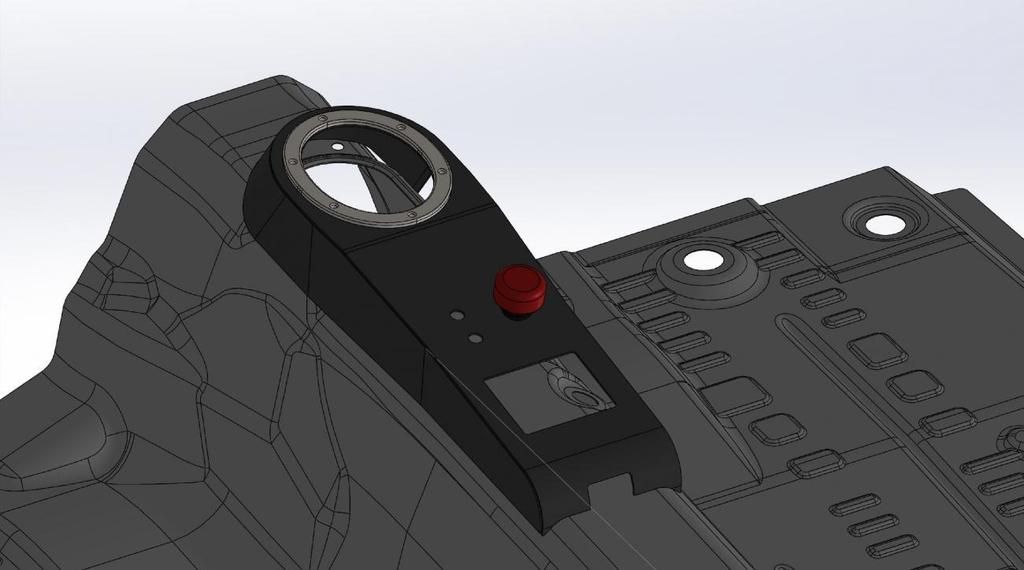
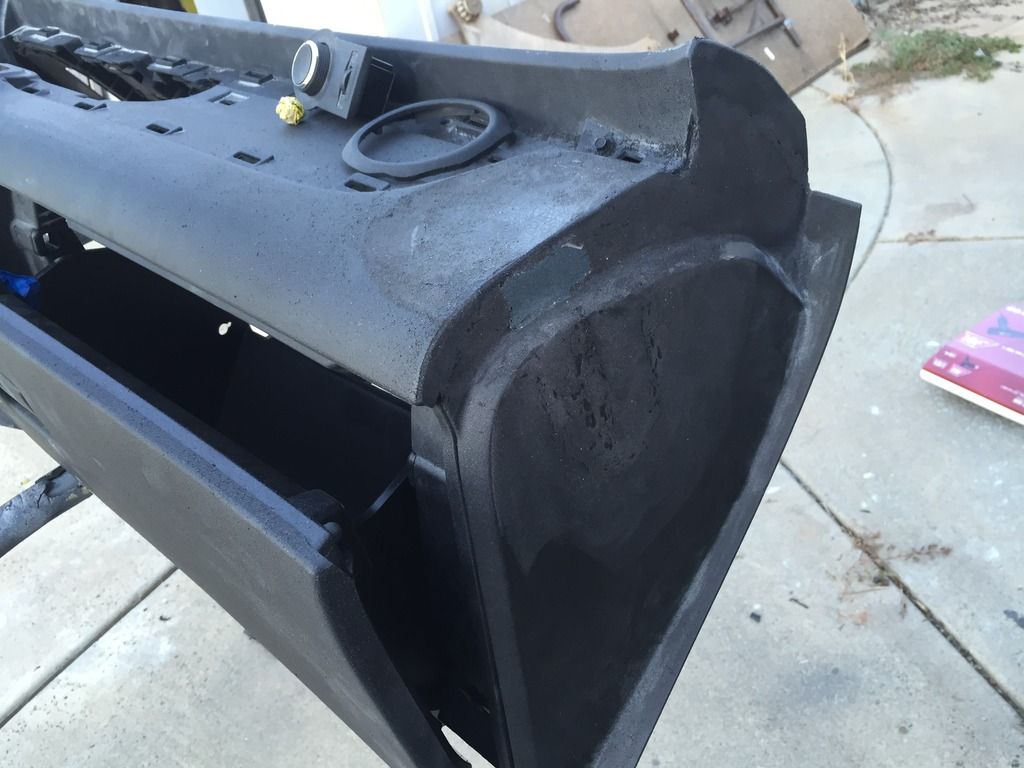
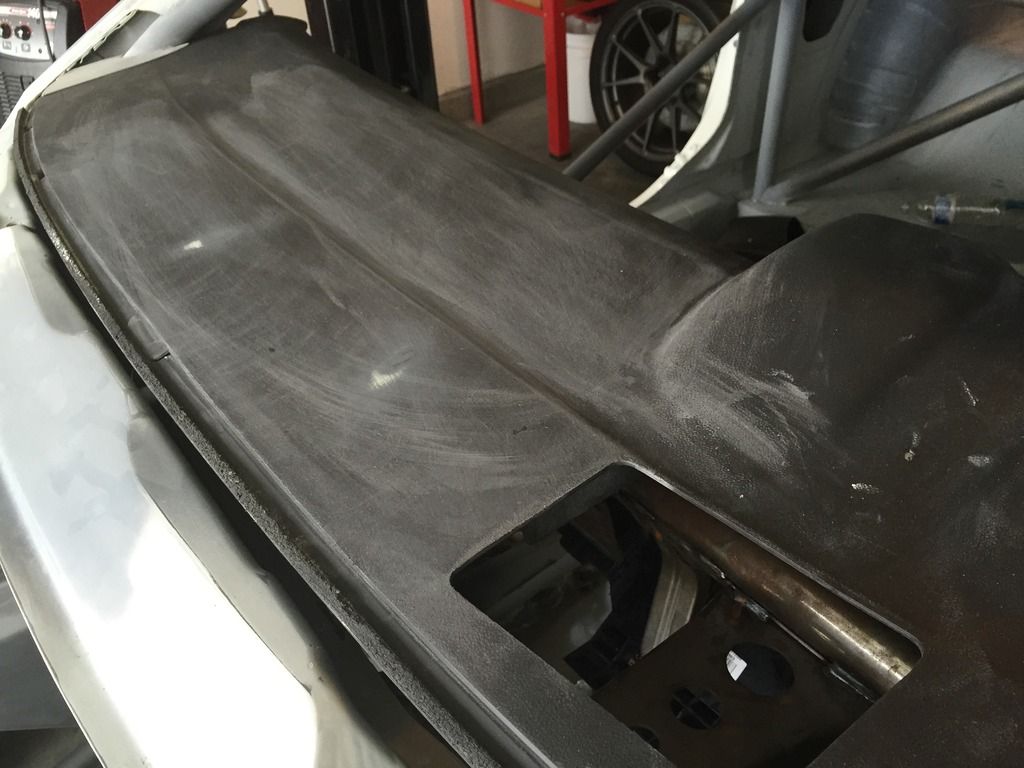
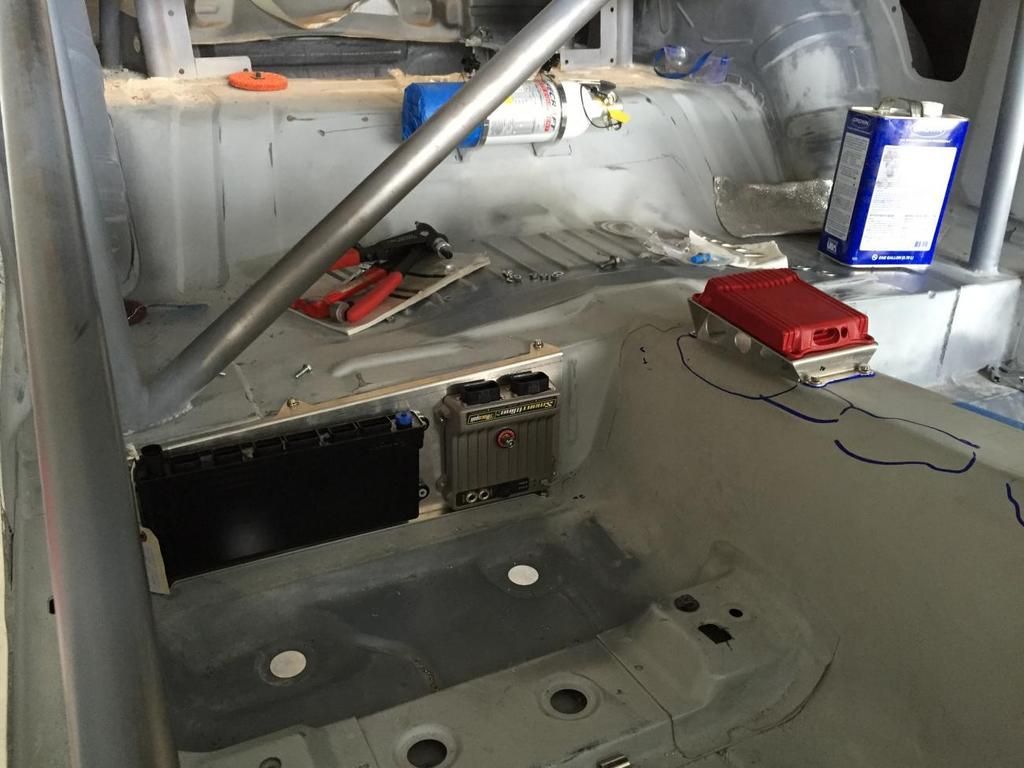
We eliminated the factory hood strut and came up with our own design. The picture below shows were the factory hood strut mounts too. GM designed the same circle on the drivers side of the hood.


We used this location to position our hood pins to come through. This gives the illusion that the hood was design with these circles so that the pins would go through it.


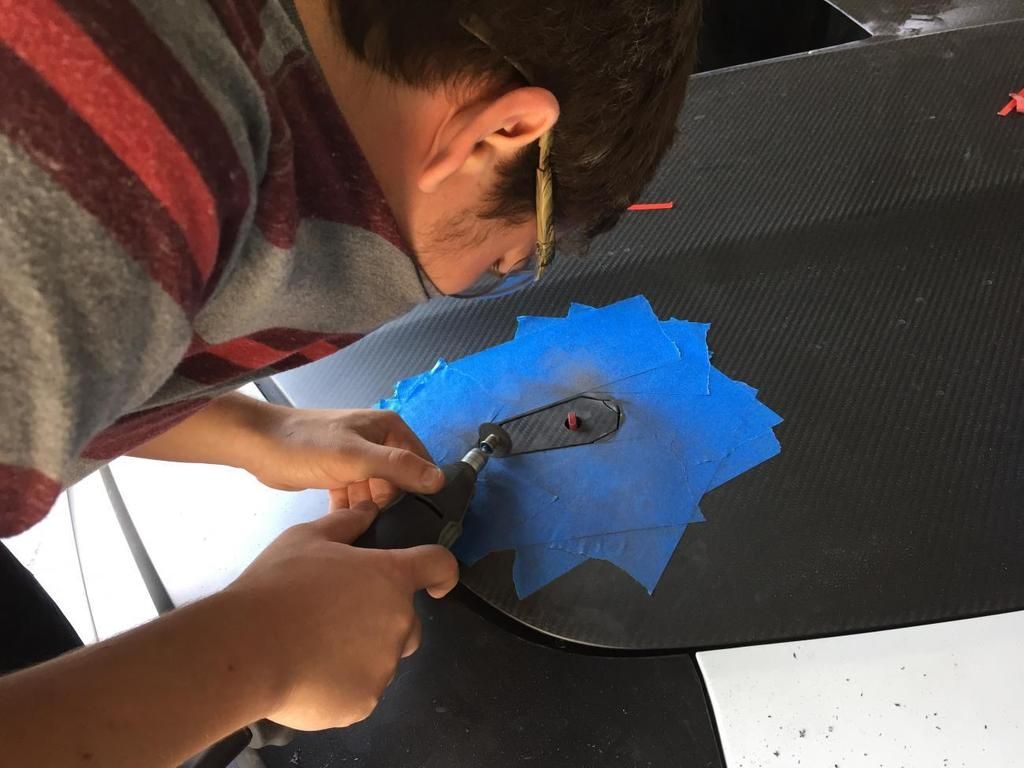
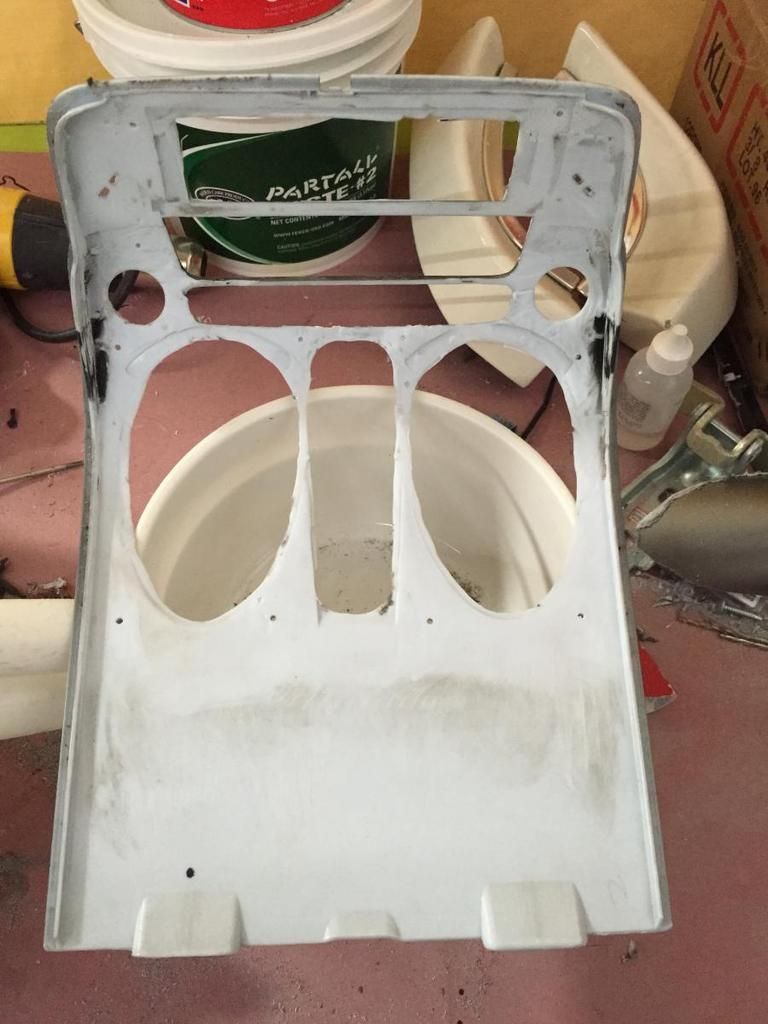
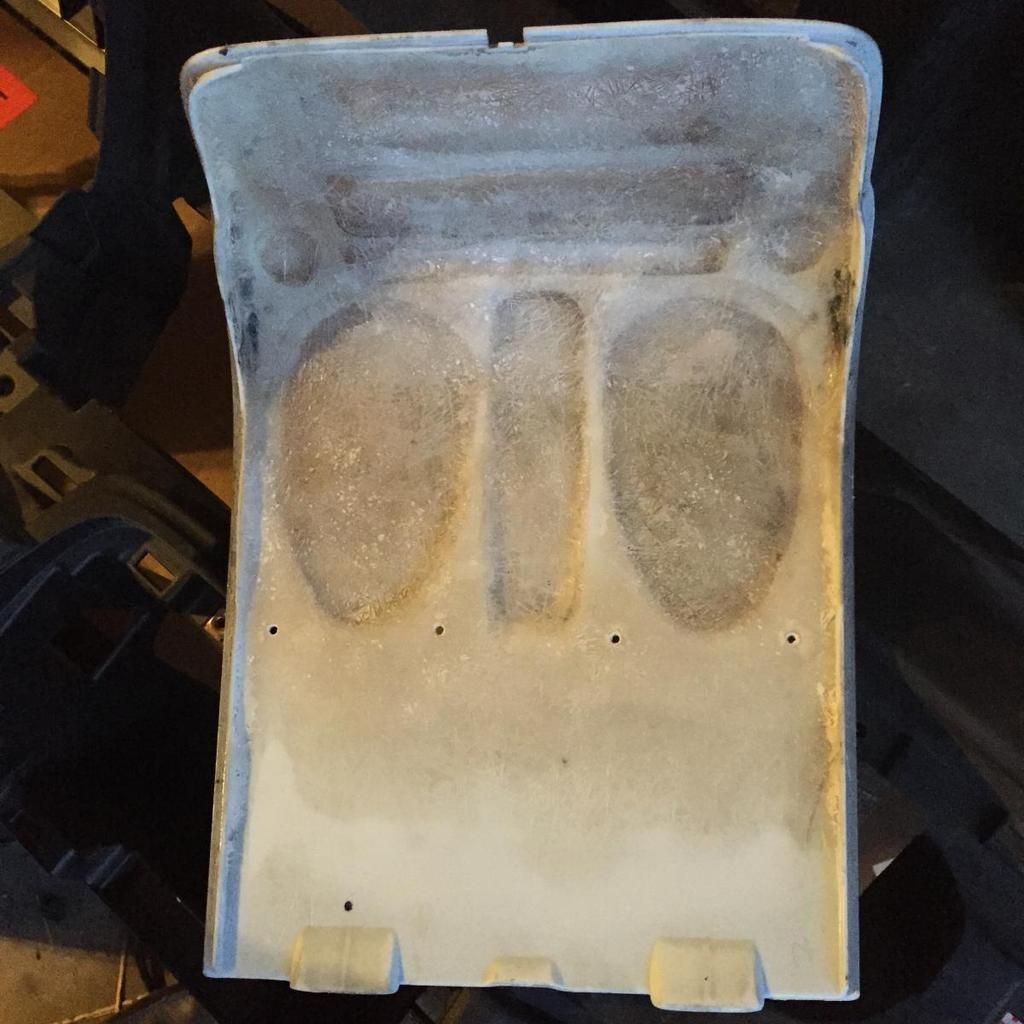
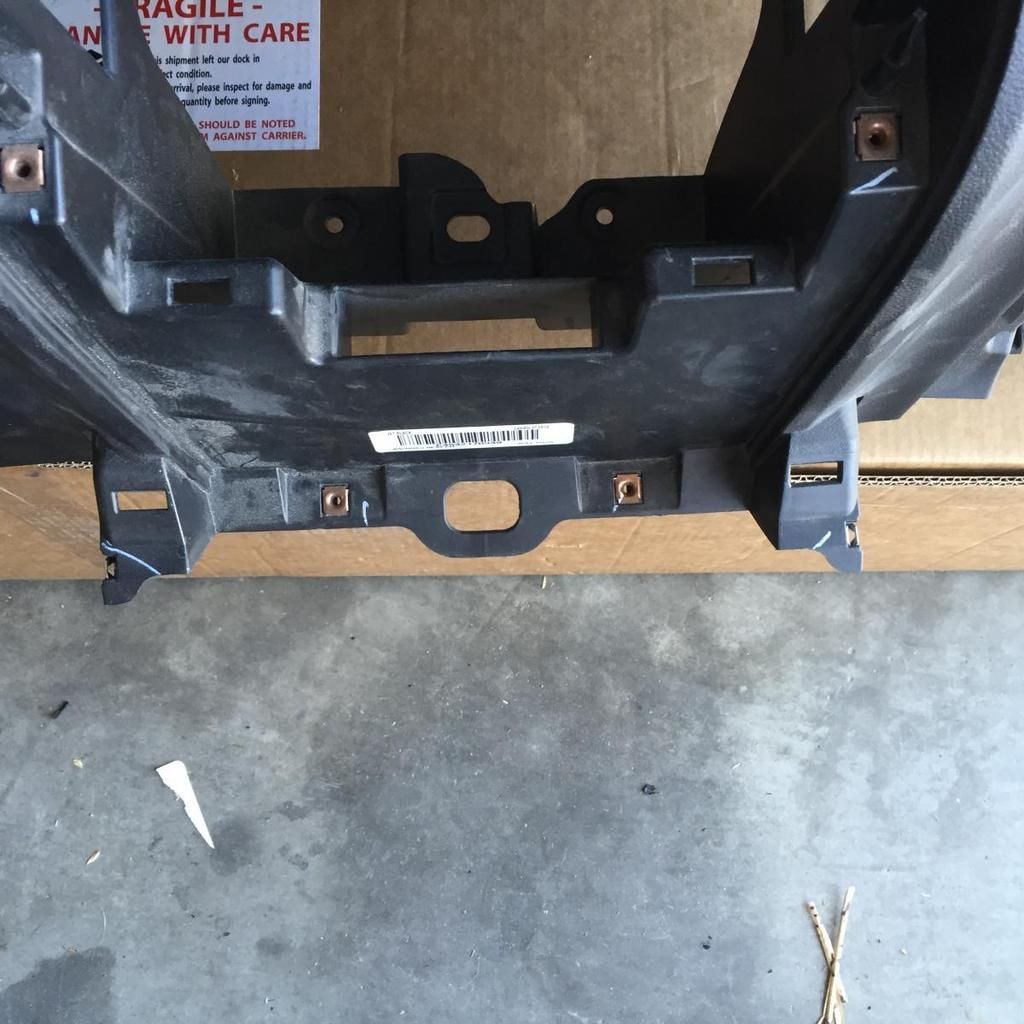
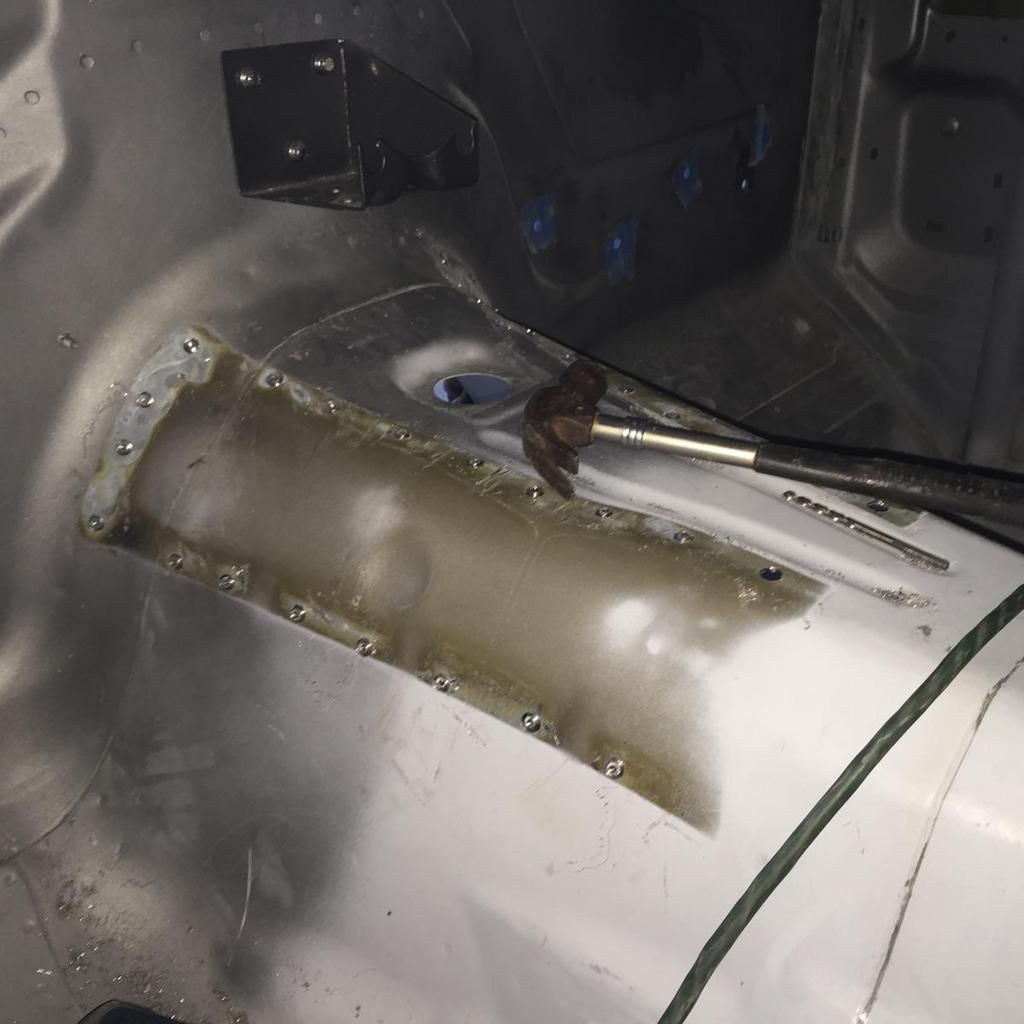
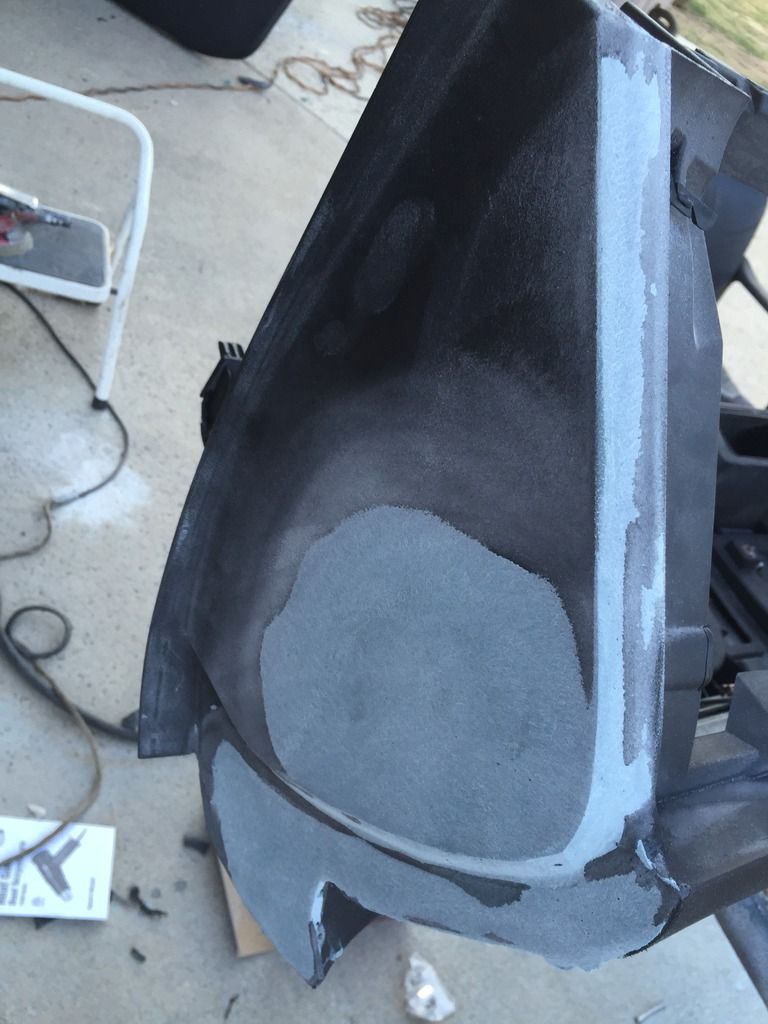
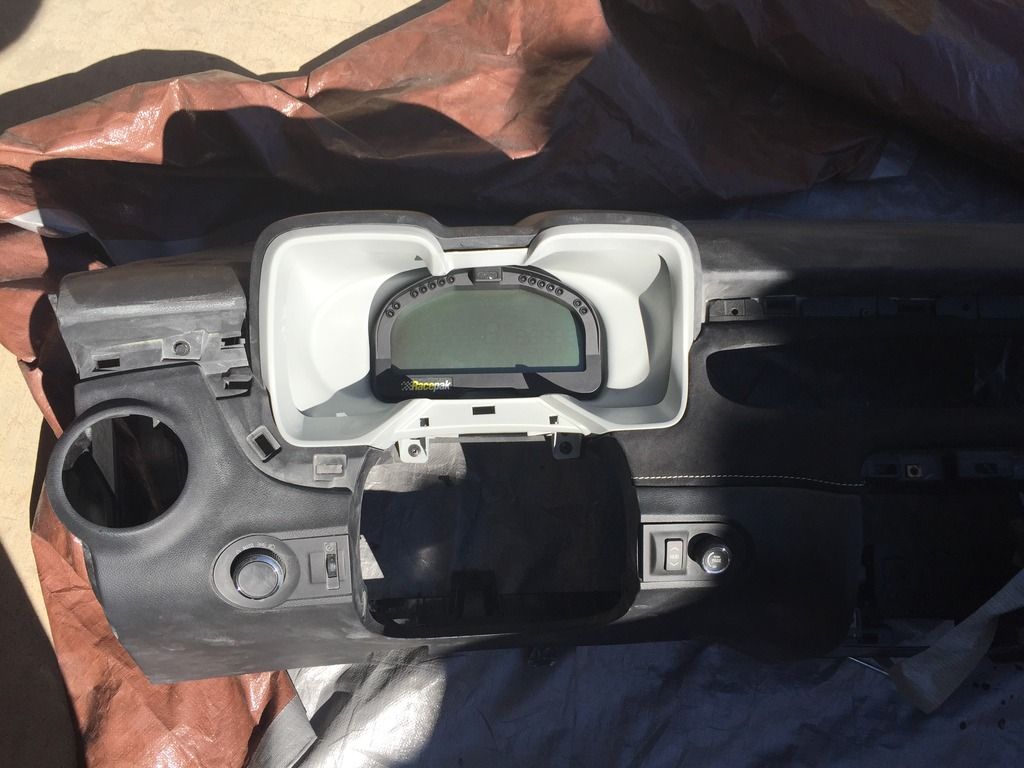
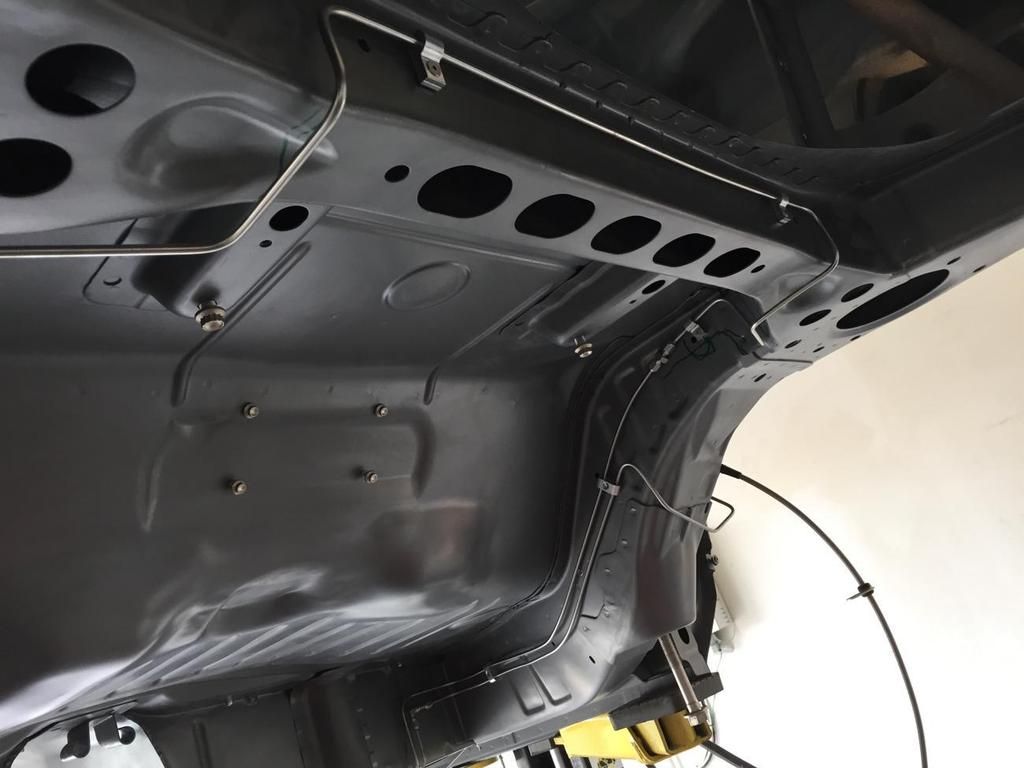
To accomplish this, Justin designed brackets in CAD positioning the pins to come out rough the original factory strut mounted location. (See back circle in picture below)


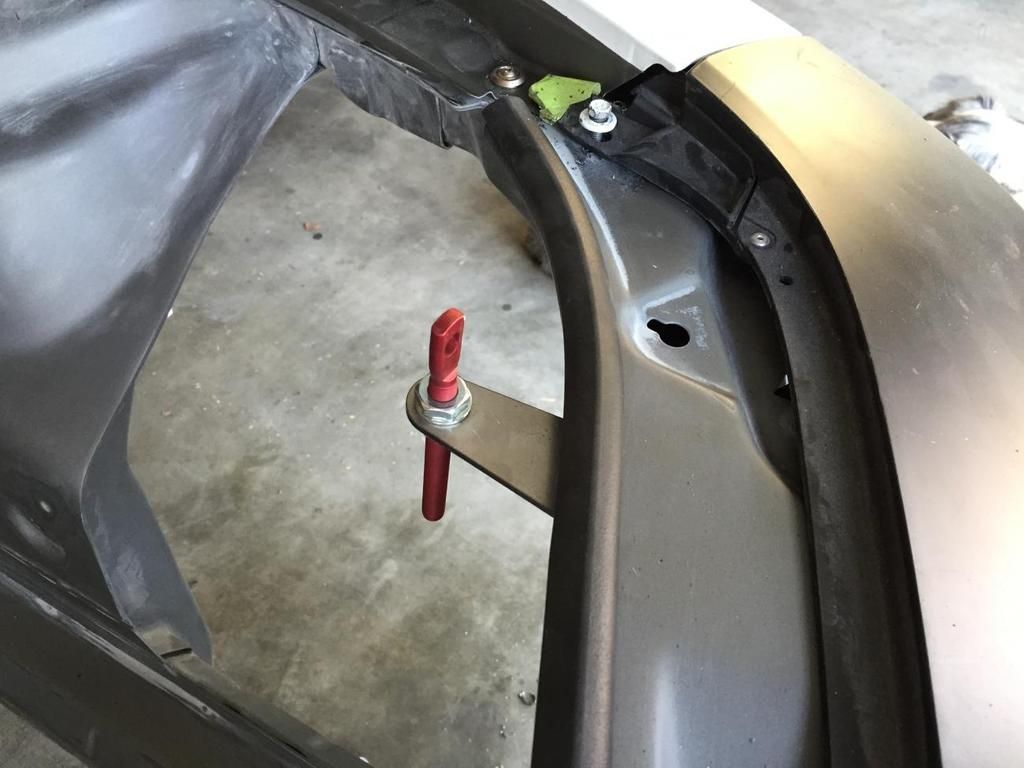
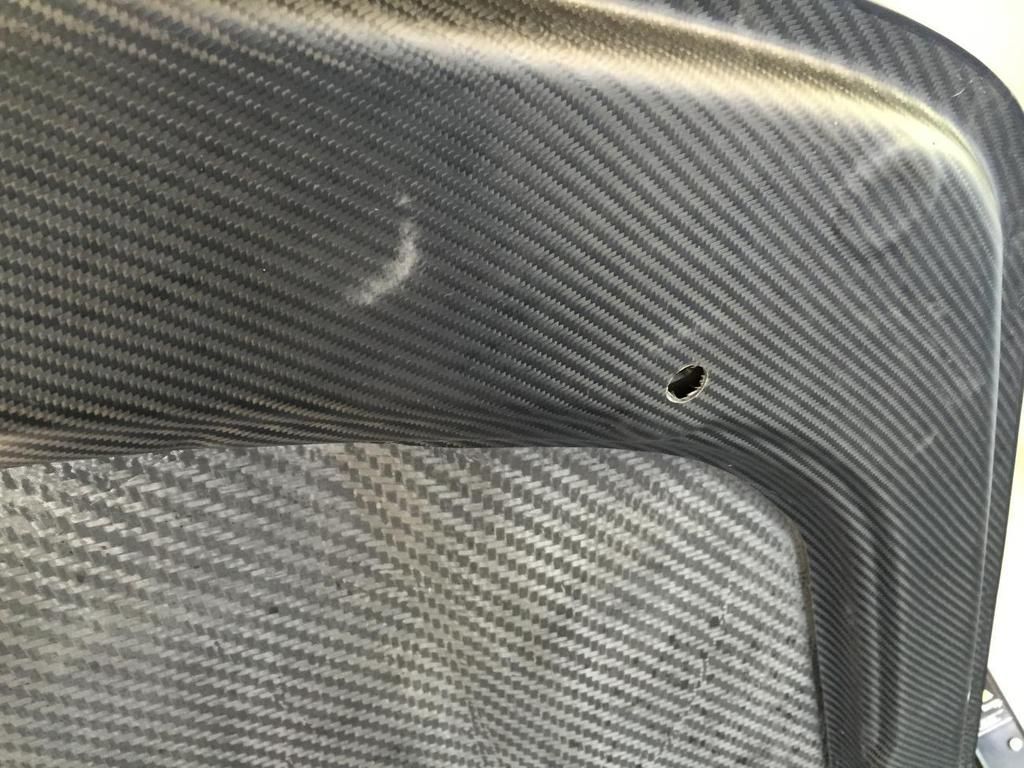
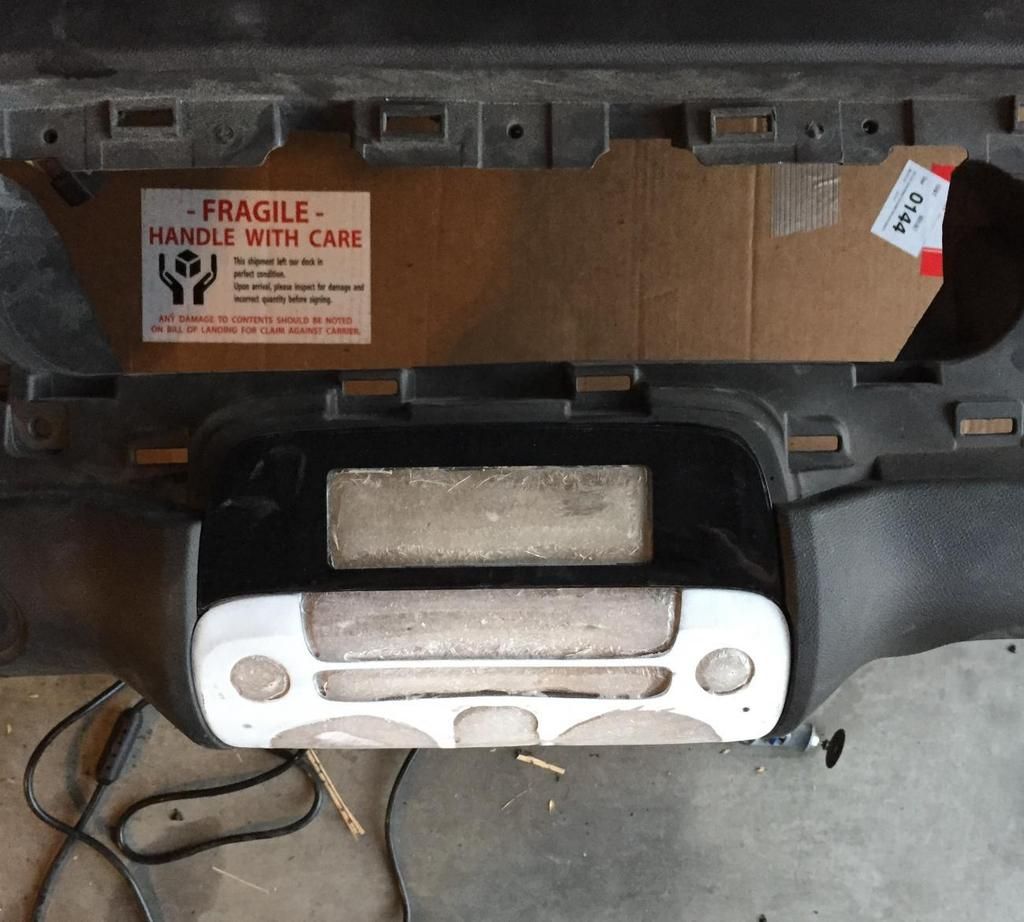
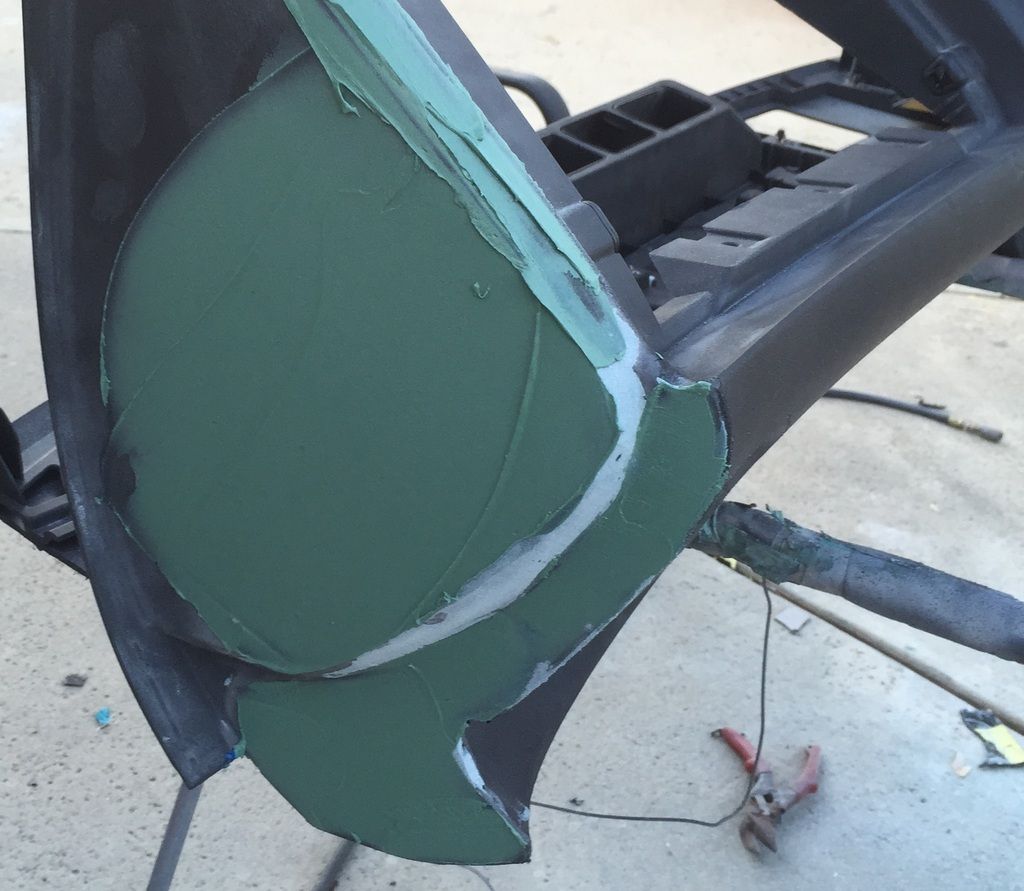
By doing it this way, the latch sit a couple of inches further back from the hood line making it more visually pleasing. The latch were also angled slightly to follow the cowl line instead of positioning them straight forward.

This is an example of the kind of attention to detail thats gone into this build!
Reply With Quote
  #10  
Old 10-19-2015, 11:50 AM
GrabberGT's Avatar
GrabberGT GrabberGT is offline
Senior Member
 
Join Date: Nov 2008
Location: Fort Worth TX
Posts: 674
Thanks: 0
Thanked 2 Times in 2 Posts
Default

Great idea for the aerocatch bezel. I have a set to install on my carbon hood but have hesitated because I didnt want to cut out that large of a portion of the hood structure. I may just look into bonding the nuts into the bezel since a machined bezel is not available.
__________________
Chris

Its not a Vega!!!!

Total Cost Involved - Total Control Products - Gateway Performance - Fatman - MaverickMan Carbon
Reply With Quote
Reply


Posting Rules
You may not post new threads
You may not post replies
You may not post attachments
You may not edit your posts

BB code is On
Smilies are On
[IMG] code is On
HTML code is Off

Forum Jump


All times are GMT -7. The time now is 11:37 PM.


Powered by vBulletin® Version 3.8.11
Copyright ©2000 - 2025, vBulletin Solutions Inc.
Copyright Lateral-g.net