


Text and pictures by owner
Occupation: Nuclear Engineering
I have always been a gearhead. I had my first 1968 Camaro when I was just 14 years old. I worked on that car every day and ultimately took it to my high school prom in 1976. I like to say it had an “LS6” which, frankly, stands for “Long Straight 6”, which in my situation, was a 230ci straight six cylinder. So why did I build this car? Because I thought it would be a great exercise to use what I have learned from the nuclear industry over a 26 year period, and apply that technology to a real breathing machine.
This car was constructed primarily with hand files, a welding machine, tons of sandpaper, muscle and grit and sweat, and good friends. “This car was all about being high performance. It had to have excessive G-forces forward, superior handling, and must stop like a dog hitting the end of his chain We wanted the outside of the car to be SEXY, not just pretty. We wanted the inside of the car to have a new car feel, nothing too radical, simple but nice. When it came to the engine compartment, trunk, and undercarriage, it had to have an INDUSTRIAL, almost NUCLEAR QUALITY about it. No engine covers or trunk upholstery to hide anything. WE WANTED THE GUTS TO SHOW.
How long did it take to build?: 10.5 years, with long breaks in between. We started on August 31, 2002, the final bolt was installed on March 27, 2014.
How long have you been involved in cars?: I have been involved in cars since I was 14 years old, because I lived on a farm and it was the only way to get out.
How did you get involved?: I have been “involved” throughout the build.
BACKGROUND
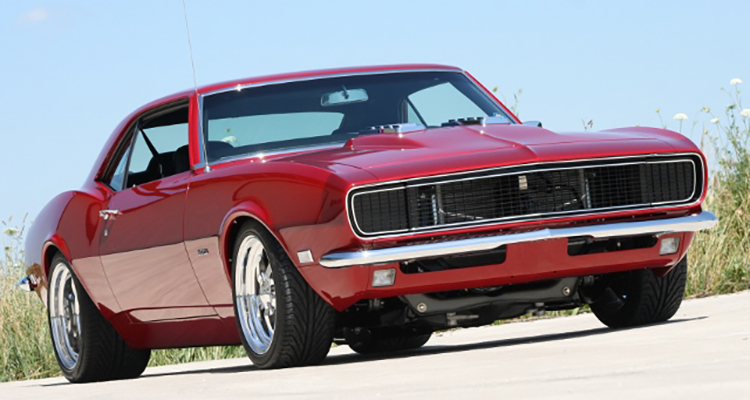
At the age of 14 (that would be back in 1972), I bought my first car ever. It was a 1968 Camaro with a 230ci straight six and a powerglide two speed. I paid $800 for it by working in hayfields for $2 per hour. I was in love with the body lines and overall look of a 68 RS Camaro. Many years progressed where I ultimately sold the car for a 1976 Vega which I pro-streeted but that is another story. In the year 2000, my wife and I decided to build a ground up 1968 Camaro, and this time, it shall be without the limits and financial constraints I endured as a young kid.
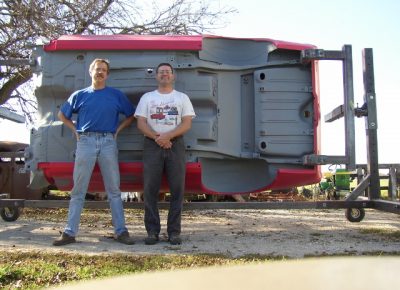
In 2001, we acquired a California car pretty much rust free for $6800. It was in sad shape to say the least, speaker holes cut everywhere including the transmission tunnel! Constructed of 1018 alloy steel box tubing, I TIG welded together my own rotisserie and began an 11.5 year journey.
I disassembled the car by bagging and tagging every fastener. I have over 600 pictures of the complete disassembly. Employing the talent of Kyle Tucker from Detroit Speed and Engineering (DSE), the body was media blasted to provide a fresh canvas for construction. DSE’s very own Paul Morgan began the project by replacing all belt line sheetmetal with original GM NOS panels. I remember driving over 800 miles, one way, to purchase the left rear quarter panel. In addition, he minitubbed the rear wheelwells to accommodate my 335mm tire section width. Subframe connectors, tranny crossmember, and front suspension were also outfitted with the latest development from DSE. Paul Morgan of DSE did not stop there. He repaired countless small areas where speaker holes were cut, small rust areas, and modified the instrument panel to accept a modern stereo head unit. We utilized a stock frame in excellent shape which was purchased in Detroit. Frame modifications include sectioning main crossmember to accommodate a tall deck big block, boxing front crossmember, reliefs for headers and crank pulley, and reinforcing areas as necessary.


At this point, the car came home for my work to begin. I felt like I had a fresh canvas to create something really special in a 68 Camaro platform. My passion was to use the training and experience I had as an engineer in the nuclear industry. So the journey began building this car using all available nuclear processes and procedures. The top ten nuclear practices used to build this car are as follows.
- Nuclear grade Swaglok tubing and fittings are used throughout. Where special fittings are required, Swagelok custom fabricated them.
- Welding procedures used on all stainless steel and structural components are per ASME XI nuclear code.
- Material of choice for all bracketry is advanced 316 stainless steel.
- Electrical separation criteria used throughout, including isolating sensitive fuel injection computer wiring from EMF emitting power cables.
- All wiring soldered per nuclear standard, including tinning, crimping, soldering, and double shrink tubing.
- Corrective Action Program adopted where any problems with the build must go through rigorous process to access root cause, remedial actions, and corrective action to prevent problem recurrence.
- All bolting torqued and documented to calculated specs using torque wrenches calibrated to the National Board of Standards. Where a torque was not specified, one was calculated.
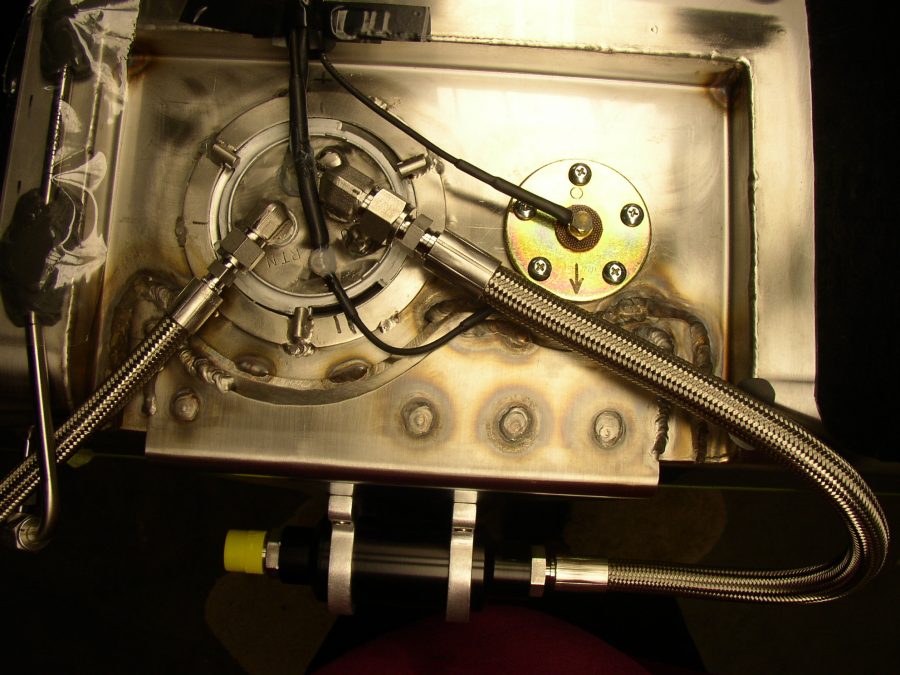
- Fuel cap housing is designed after an ASME Class I flange.
- Single failure criteria: we minimized single failure issues, both push button and key start, polished gold plated electrical terminals where single failure could occur, and because of this, we even carry a spare tire.
- The entire build is documented in logs that specify every action, including but not limited to every fastener installation, torque, size, etc. Also documented are validated procedures for front clip assembly, which is shim free, and engine installation.
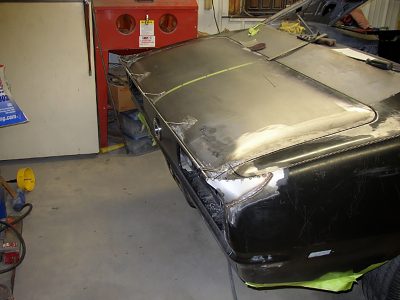
And so the assembly in bare metal began with the intention of mocking up everything possible down to the drivetrain, interior hard parts, and even the electrical relay mounting holes. As an example, our engine dipstick tube was fabricated from nuclear grade 316 stainless steel and was constructed and mocked up in the bare metal phase of the car.
It was finally time for custom sheetmetal work and paint on all surfaces. To this end, we enlisted the tireless help of: Tony Goodrich from Tony’s Rod and Custom, Bunker Hill , Illinois
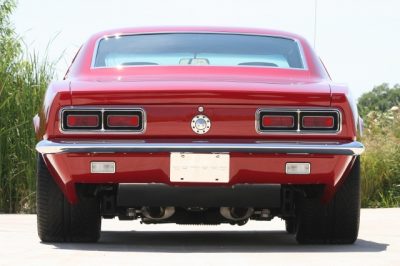
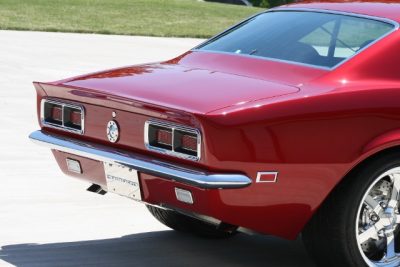
I will never forget when I first met Tony, we were lying under the car discussing how to hide all wiring and my wife makes the comment, “Jim, I think you have finally met your match”. The rest is history. Over the next three years, Tony gave me a very needed second wind. Based in Bunker Hill Illinois, Tony took on my project with the passion I was looking for. We would end up working together for years on this car until completion. Taking me under as an apprentice, Tony employed me and taught me how to form and shape sheetmetal. We would work together on the build until late hours every night. Using Tony’s expertise and me to do the cleanup and grunt work, he fabricated the rear spoiler from cold rolled steel and hand formed 14 ga sheetmetal. But we didn’t stop there. We also added rocker panel extensions which extended the body 2” lower on the sides, with ground effects on both the front of the front tires and behind the rear tires. We also modified the hood underside to accommodate the tall deck big block engine.
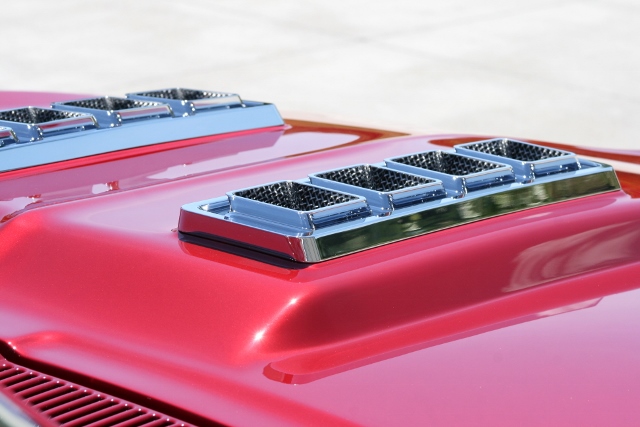
The 1968 Camaro “hood ornaments” were just the ticket for this car, BUT factory pieces were made of potmetal, easy to fail, and hard to chrome plate. So then began yet another project. With the help of Dean Rodgers to perform Solidworks 3D programming, we designed new hood grilles out of billet aluminum, 6061-T6 alloy to be exact, made them twice height for appeal, and employed Baumgartner Race Cars to do the CNC work. Made as a two piece design, and after about 70 hours of hand sanding, we shipped the grilles to Sherm’s Custom Plating where they applied show chrome quality. We also made them functional by cutting holes in the hood and constructing 316 alloy stainless steel vents on the underside to allow that big block heat to escape.
As progress continued in the mockup phase, it soon became time for the engine. To that end, it was important to me that we purchased directly from GM Performance. (They have a research and development department in their performance division that rivals world class standards).
Our next journey was to Keith Roberts Racing Engines in Mooresville, North Carolina. We completed dyno break-in of the 572 ci engine and an initial fuel injection tune. Using a custom built 4L80E electronically controlled transmission, we contacted Mark Bowler who provided the billet 3200RPM stall lock-up torque convertor.

For fuel, oil, and transmission fluid lines, both hard line stainless tubing and hoses, we contacted Scott Carlson from St. Louis Division of Swagelok (Swagelok.com), a supplier of stainless steel tubing and fittings that I was familiar with from experience in the nuclear industry. Using a dual ferrule design, 316 alloy stainless steel, and crimped hose ends, this system was leak free, easy to install, and provided the perfect industrial appeal we were looking for. Some fuel fittings had to be custom fabricated by Swagelok.
When it came to paint, Tony Goodrich applied the appropriate muscle to create a mirror finish using a 36” block sander while in primer mode. He then applied the Dodge Inferno Red color and topped it off with six coats of clear. Block sanded and buffed, you can read fine print in the reflections. I always loved the D90 sport stripe but was never fond of a white or black color so we experimented and found our seventh formula of “home brew” Inferno Red to be just right.
High strength stainless steel fasteners were used throughout. A minimum of 170,000psi yield strength, ARP and 17-4 precipitation hardened wide flange six point bolts were used. Majority of bolts were torqued to design spec, if critical bolts had no specified torque value, I calculated one.
Other items of interest:
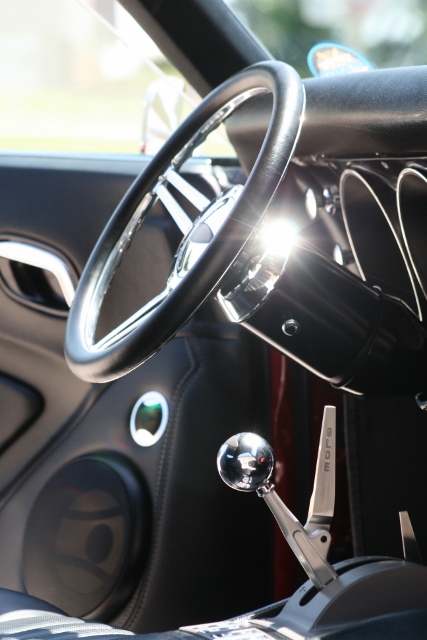
“572” emblems are cut from brass, hand shaped, and chrome plated. Font is custom made on the computer. In limited low stress applications where an ARP six point wide flange stainless bolt was not available, I would cut the body of both bolts and TIG weld together for the proper bolt head and length/thread. One example are the hideaway headlight cover hinge screws. Even the shift knob for the “Gloe” shifter was hand made.
We applied “RustBullet” coatings in all areas vulnerable to rust, both interior and undercarriage. Mostly crevices and rest prone areas. The coolant overflow tank is hand fabricated from stainless steel and uses all Swagelok fittings and tubing. To show our Faith, we had a cross made from stainless steel by blacksmith artist Joe Gentile from the East coast. He started with a square of stainless, unfolded it like origami under heat, and final polished the cross that now sets on the rear glass lower center.
What is the most memorable experience you have had with your car?:
When the car was ready for upholstery, Scott and Gary Long arrived to tackle the task. They set up a sewing room shop in my living room, a work area in my basement, and worked around the clock while sleeping on my sofa. We ate three square meals a day. “It was so exciting to have such talented people in my home, much less working around the clock on our upholstery”.
What was the most challenging part of the buildup?:
I could not find acceptable header gaskets for my engine, regardless of where I looked, and this was because back then, they were just not available. Most people were waterjetting copper but I’m not a big fan, so we decided to design and construct our own set. We enlisted Percy’s High Performance to implement our dimensions but make them as a set of Seal-For-Good gaskets. This technology uses six layers of really soft .010” aluminum, and has proven to be absolutely leak free. These gaskets are now available at Summit Racing as part # PHP-66089.
What would you do differently if you had it to do over again?:
I would have met Richard Nedbal much earlier in the build. Called FastmanEFI out of Sonora, California, he helped me via email, set up my fuel injection software to get the car started, and has been a really great resource when I get in over my head with sequential fuel injection. (When I first got the car finished, I could not get it started because my fuel injection tune was corrupted.)
CHASSIS
Frame / Manufacturer: Factory frame
Modifications: sectioned crossmember for engine clearance, relief cuts for header and harmonic balancer pulley clearance, boxed front crossmember for strength, 1.4” plate insert for jacking the frame without damage. Chassis plumbing material: nuclear grade Swagelok
REAR SUSPENSION
Rearend: Chevy 12 bolt housing provided by DTS with “Torino” bearing housing ends.
Ratio: 3.55 Limited slip TruTrac.
Axles: Moser 33 spline
Four-link: Quadalink by DSE
Panhard bar: DSE Quadralink
Springs: Koni
Shocks: Koni coilovers from their racing division.
Brakes: Baer SS4+ 13” drilled, slotted, and zinc washed with polished hats.
Calipers: Baer SS4+
FRONT SUSPENSION
Suspension style: DSE front suspension throughout
Spindles: stock drum brake spindles which were nondestructively examined by magnetic particle testing per ASME Code.
Steering: 600 steering box manufactured and tuned by DSE.
Springs /Airbags: Koni Racing Division, no air bags.
Shocks: Koni Racing Division out of Kentucky
Antiroll bar: Custom bent 1 1/8” bar was special made to clear a tall deck big block Milidon oil pan. Front sway bar is custom bar with center dip clocked an additional 25 degrees forward and overall 5/16” narrower. It’s an ADDCO bar that John Wright made for me. He was great to work with. Per his email on 11/12/09: “The bar you received is manufactured with the same material that we use for our aftermarket sway bars….1045 Cold drawn steel….Treated at the steel mill.”
Brakes: Alcon/Baer 13.5”
Calipers: six piston monoblock calipers
Master cylinder: DSE
Booster: We went with HydraTech hydraboost system, Stage III, and it provided a very crisp feel to the brakes.
Steering box: DSE 600 steering gear
Steering column: tilt
Fuel tank/material/capacity: 17.5 gallon fuel tank purchased from DSE and modified by owner as necessary to accommodate exhaust, and Swagelok fuel fittings. Fuel tank straps were custom made stainless and feature one of a kind fastening system.
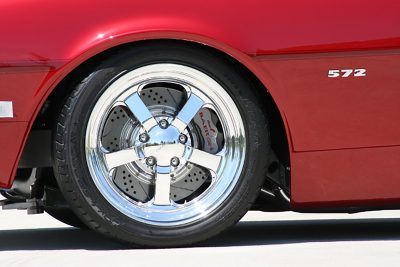
Wheels: Budnik Tiller 5 wheels custom cut centers for caliper clearance. These wheel centers are forged at the same forge as Boeing aircraft landing gear.
Front (size): 17” by 8” wide (backspacing): 4.875”
Rear (size): 18” by 12.5” wide (backspacing): 7.25”
Tires: BFGoodrich: G-Force Rival S
Front (size): 245/40ZR17 Rear (size): 335/30ZR18
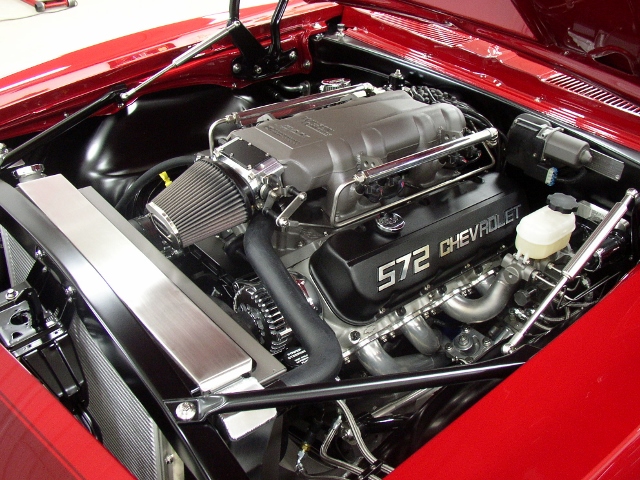
ENGINE: (year): 2005 (make): Chevrolet (type): 10.2” tall deck big block Chevy Bored: Bore = 4.560” Stroked: n/a Balanced: factory internally balanced Blueprinted: 25th block (displacement): 572ci 638HP
Machine Work: GM Performance Parts Division assembled the engine, Gary to be exact.
Assembly by: Performance Assembly Solutions
Crankshaft: forged steel Stroke: 4.375”
Rods: GM forged steel I-Beam and shot peened Material/length: 6.385” center-to-center
Pistons: Forged aluminum Compression ratio: 9.6 to 1
Camshaft (brand): Lunati RRB1-234-244 Precision Machine Incorporated out of Jefferson City Missouri did the cam install and degreeing.
Lift: intake/exhaust = .575” Duration: 234 intake and 244 exhaust at .050” lift
Cyl. heads (brand): Edelbrock Material: Aluminum rectangular port 118cc chambers
Rockers: Forged aluminum 1.7 ratio
Water pump: Stewart Stage 2 reverse flow Fan: Derale dual-pack Spal electric fans
Radiator: BeCool 1000Hp Material: aluminum
Alternator: Vintage Air new style 170amp with heavy gauge connecting wire
Valve covers: Factory “572” covers powdercoated primer and painted semigloss black
Intake manifold: This is a long story. We started with a 502 RamJet intake manifold and employed Wilson Manifolds to make the proper transformation for our application. Shop foreman Tony took on the project with full vigor. He added intake valley material to the intake so it would fit a tall deck big block. This required spacers TIG welded to fill the valley. He also eliminated all unnecessary bosses, webs, and the center fuel rail. He shortened the height 1 1/8” by cutting the individual runners and then refabbing the flange for the two piece assembly. He then installed bungs and external fuel rails to feed the increased performance expected. The ports were CNC’d to accommodate the increased flow. Finally, using a proprietary process, Wilson Manifolds media blasted the exterior to return a factory cast finish.
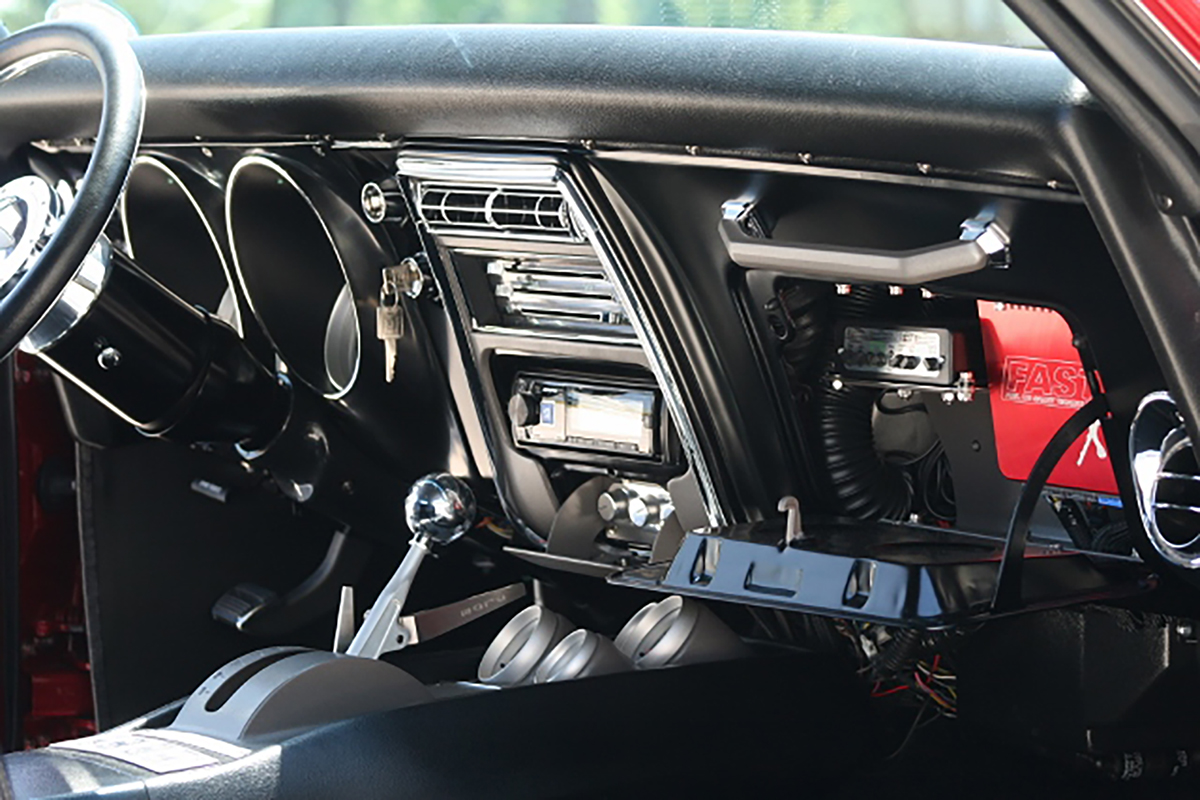
Fuel injection (brand): An Arizona Speed and Marine large oval throttle body is controlled by the Fuel Air Spark Technology (FAST) XFI ECU using version 2.051 software. I am running 60lbf high-Z EV1 injectors. We run in full sequential mode with an injector opening retard of 10 degrees.
Ignition: FAST dual sync distributor fed by an MSD 6A digital ignition and an HVC II MSD coil.
Wires: Taylor Pro Race 409 spiro-wound 10.4mm with 90 degree boots.
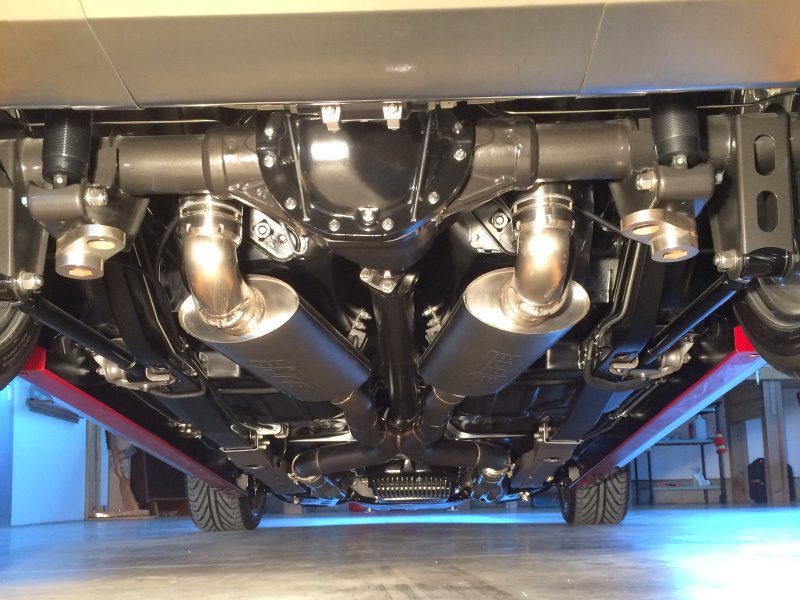
Headers: Custom build with 2” primaries and 3.5” collectors fitted for up to three O2 sensors.
Exhaust system: Three inch dual exhaust tubing, stainless steel, .065” wall thickness, back purged with argon and TIG welded.
Mufflers: Borla stainless steel (model): I honestly don’t know, but they are the biggest ones I could fit.
Hood Hinges: Instead of doing the normal billet hinges, we decided to modify factory hinges to allow gas struts to extend forward on the car. This allowed me to design my own gas struts which were ultimately fabricated of stainless steel in Germany. Trunk hinge struts are also custom one-off designs to allow for the additional weight of the steel rear spoiler.
Belt Drive System: Vintage Air Front Runner system
DRIVETRAIN:
Transmission (make): Gorden Stoney, Supervising Engineer of Hydramatic Division just out of Detroit, built this 4L80E transmission. He dyno’d it and packaged for the trip back to Missouri.
Torque converter: Bowler Billet Torque Convertor 3200 stall
Shifter: Check out my shifter, it’s a “GLOE” shifter. Using a casing from Hurst, we built our own parts to accommodate the desired effect. A Powertrain Control Solutions “Simple Shift” controller manages the four speed transmission and Bowler lock-up convertor.
Driveshaft: Denny’s Nitro Driveshaft using 1350 yokes, both ends.
EXTERIOR:
68 Camaro Coupe Original GM N.O.S. sheetmetal
Hood Hinges: Owner modified factory hinges with struts designed by owner and constructed in Germany out of stainless steel
Paint: Martin Senour 1994 Dodge Inferno Red
Headlights: DSE bright driver headlights Taillights: Spaghetti Engineering LEDs set on sequential mode.
Front bumper: Factory NOS bumpers, shaved bolts, replated to show chrome quality.
Rear bumper: same as front
Chrome: Sherm’s Custom Plating
Body modifications: Rear spoiler, rocker panel extensions, Rear quarter and gravel pan extensions, embellished hood with one-off custom hood grilles,
INTERIOR:
Dash Rebuilt GM Material Luxor II Ultraleather
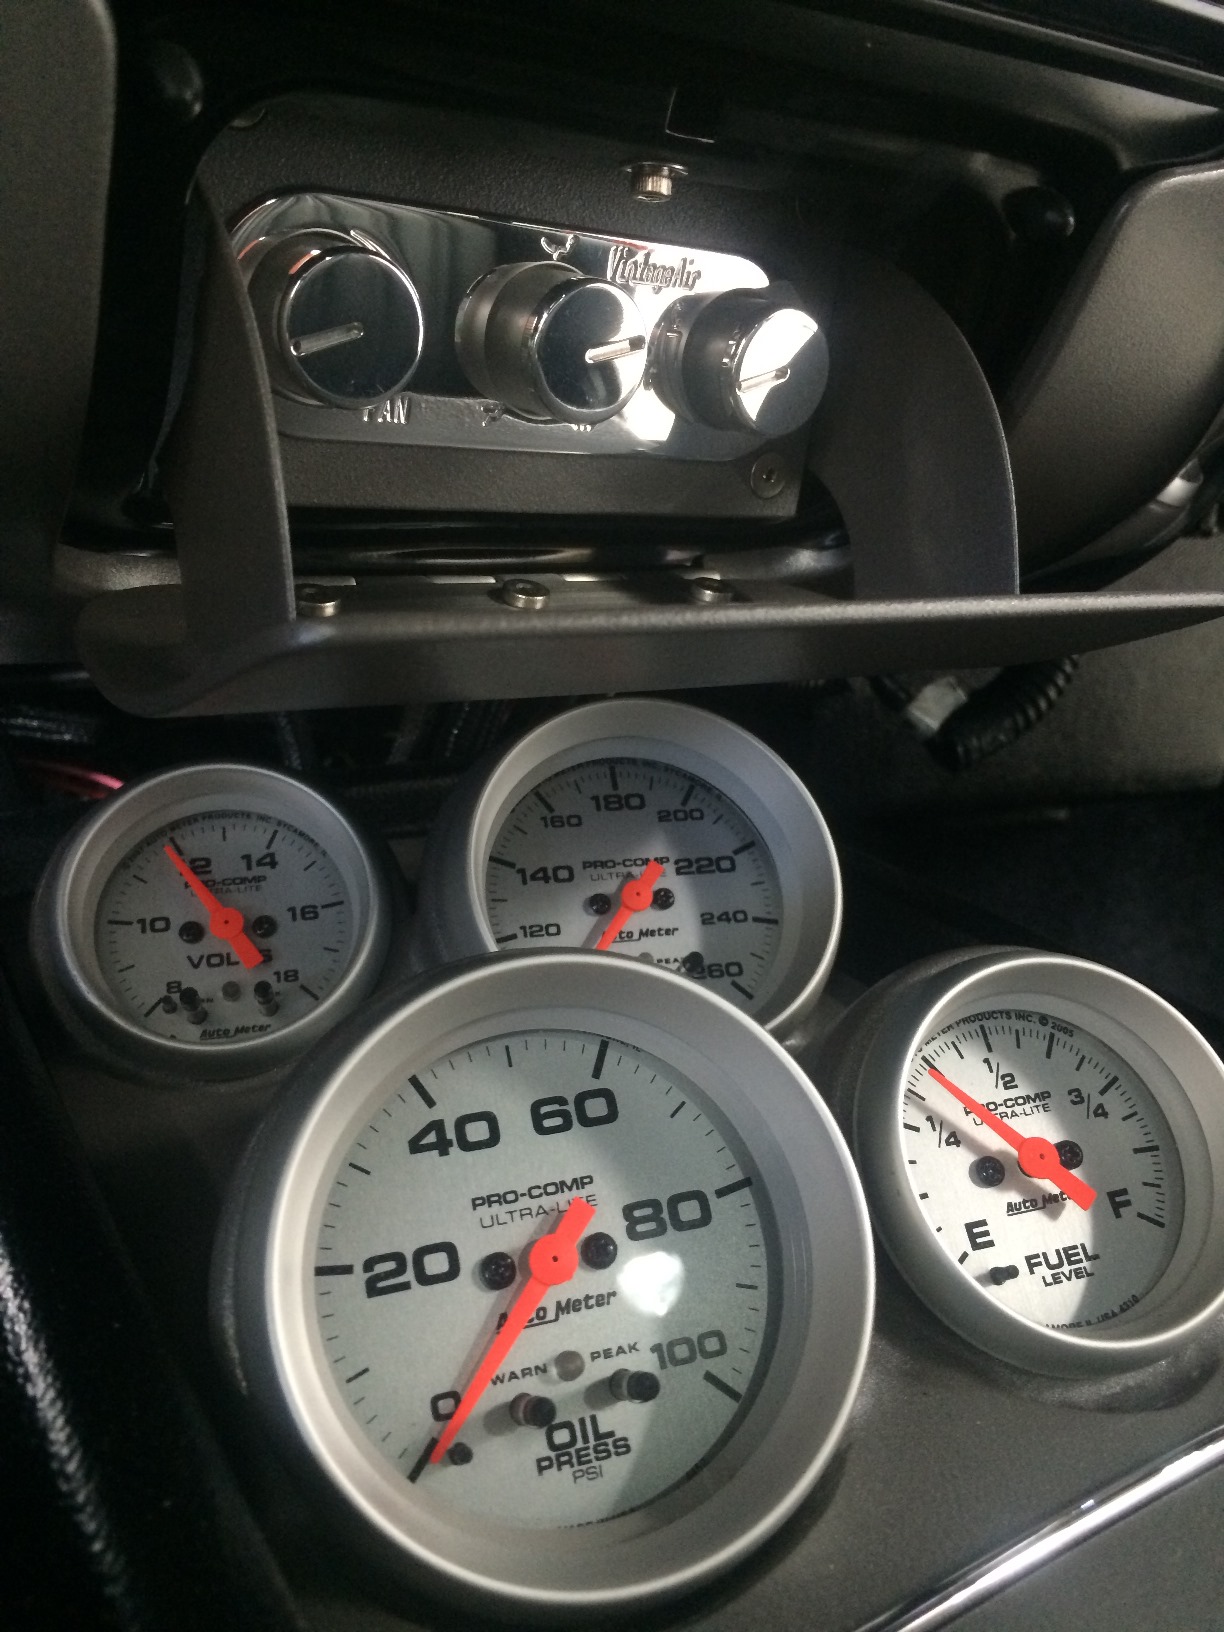
Insert custom made from steel by owner. Gauges are Autometer ProComp Ultralite II with warning lights
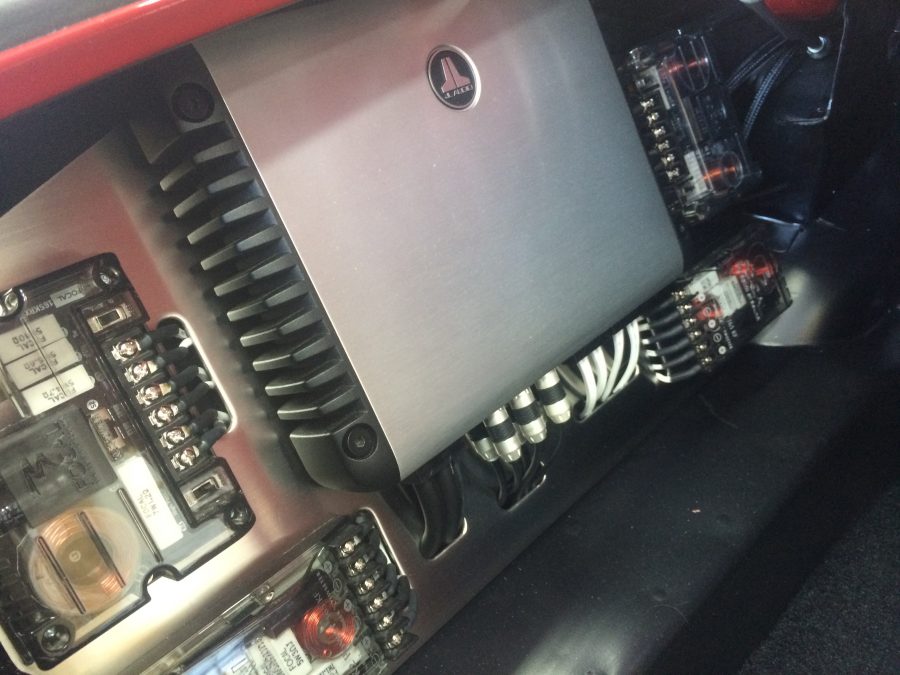
Stereo: Alpine
Amps: JL Audio
Front speakers: Focal K2 Power Slimline
Rear speakers: Focal K2 Power 165KF
Stereo installation: I installed the stereo but had Eric Pyle from “The Entertainer”, in Jefferson City Missouri do all initial set up and tuning. Eric was awesome. He tuned the entire system using special signal generator sounds recorded on CDs to do the final tune.
Air conditioning: Vintage Air Front Runner System, new style. Three bulk packs of Dynamat Extreme. Rolls of Dynaliner as well.
Wiring: Classic Update Series wiring by American Autowire
Steering Column: Ididit Tilt Unit
Steering Wheel: Budnik
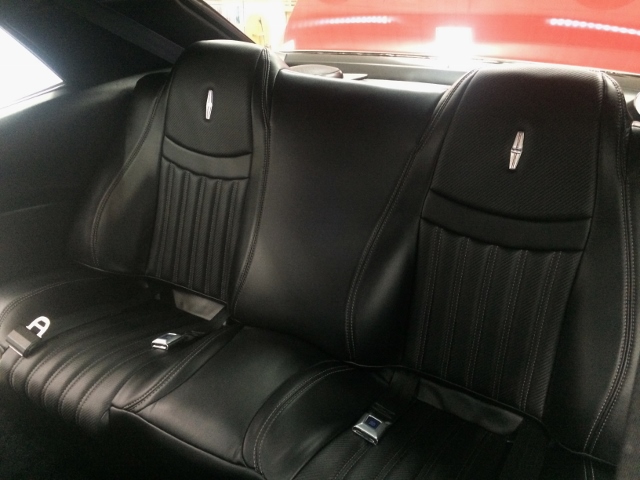
Seats: 4th generation Camaro Seat frames new from GM, then upholstered by Scott and Gary Long in Luxor II Ultraleather black and carbon fiber
Seatbelts: SnakeOyl Products brand but we mounted retractors in the trunk for driver and passenger so as to minimize cockpit clutter.
Carpet brand: Scott and Gary Long hand formed the carpeting from their experience doing custom airplanes
Door panels: Fesler panels modified by adding speaker bosses and going to cable operated inside linkage. Factory console, BUT all inserts were hand fabricated by owner. Even the chrome trim.
Upholstery: Scott and Gary Long
SEANAE Interiors 10400 Ruby Dr Grovespring, MO 65662
