Your motor roars, the tach climbs and speed soars. You reach highway cruising speed in a flash, but the tach is still buried and the car feels like it’s going to explode, even though you’re only going 70 MPH. Not a good feeling, and one we’ve all most likely felt over the years. You could rebuild the rearend for some highway friendly gears, but that low end grunt will be gone. There has to be a way to have your cake and eat it too.
The solution? Install an overdrive transmission. Installing a modern overdrive transmission into an older vehicle that didn’t come with one can seem quite daunting. They are bigger, longer, the shifter can be different, and how do you make the gauges work? You might also want to keep your factory linkage or go hydraulic. The list of questions grows in your head and you might just say, “screw that, I’ll keep my non-overdrive transmission rather than deal with all those headaches.”
Maybe the reason for going to a five-speed is a different reason. You’re upgrading your car and want to upgrade the transmission as well. Or maybe you have an automatic and want to be able to shift the gears yourself. All of these are great reasons. No matter what the reason is, swapping over to a five-speed is a lot easier than one might think.

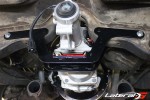
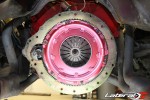
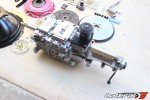
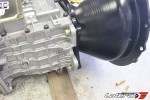
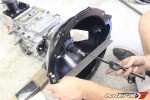
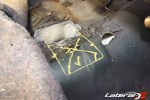
3-Speed Auto Bad; 5-Speed Manual Good.
For us, we were working on a 1969 Plymouth GTX and the factory automatic gave up the ghost. The cost to have the factory automatic transmission rebuilt was almost the same as going to a five speed manual. For a few extra bucks, why not be able to have the low end grunt and comfortably cruise the freeway? With that in mind, we called up Hurst Driveline Conversions with a list of questions.
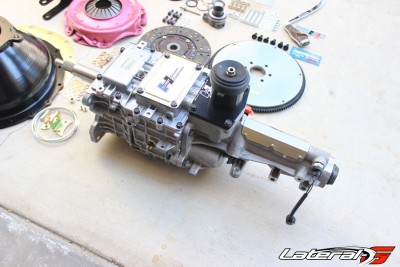
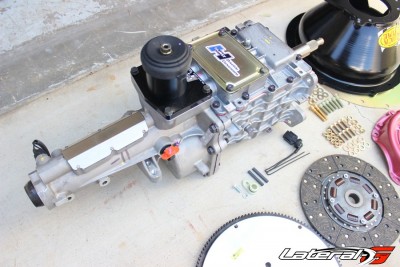
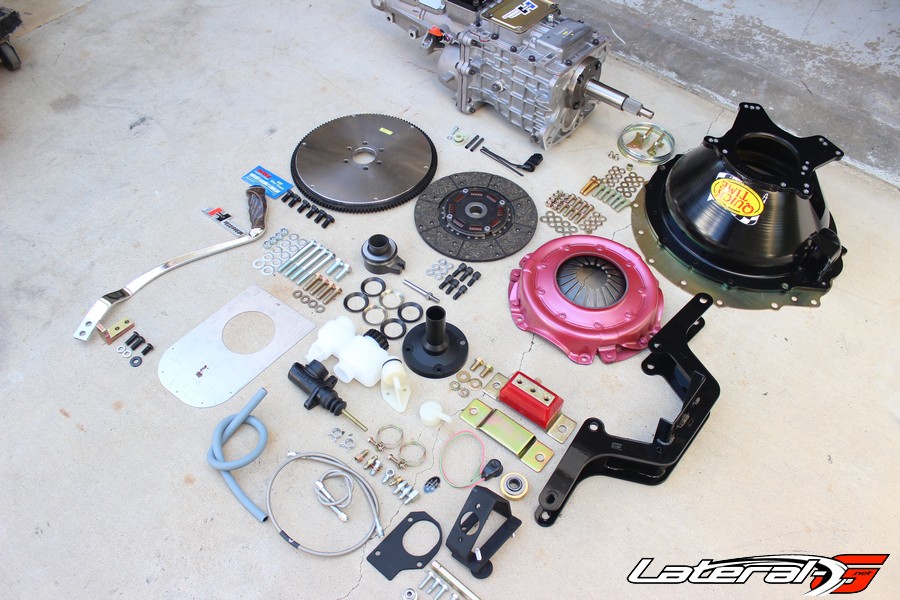
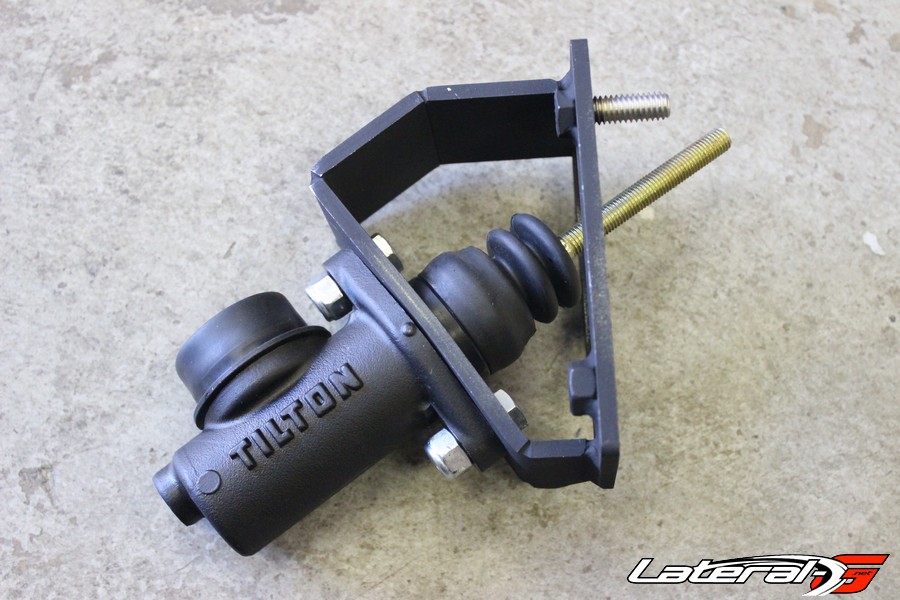
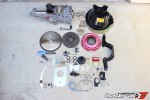
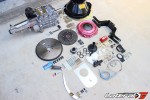
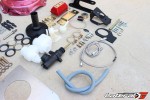
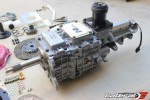
We spoke with Scott Tamblyn, who filled us in on everything. “We have everything covered for your GTX no matter if you’re utilizing stock linkage or hydraulic, console or no console, mechanical or electronic speedometer, and everything else. This kit covers all of that, including the cross member, nuts, bolts, and washers.” We ordered up the kit, which included a new TKO-500 Tremec transmission and cross member, a RAM hydraulic clutch set up and clutch, Quiktime scattershield bellhousing, Energy Suspension transmission mount, and a completely new driveshaft from Inland Empire Driveline that was made once we gave the needed dimensions.
The swap itself is pretty simple and straight forward. If you can drop and replace a transmission, that’s 95% of the work. We did this swap in a garage, on the floor, with a basic set of tools. The only trick tool we did have was a transmission jack, but it’s not necessary by any means if you have an extra set of hands to lift the transmission into place. In total, we only had about eight or so hours into the swap. Well worth the effort to have a modern transmission with overdrive that keeps the RPM’s low for a fuel-sipping motor. There’s really no good excuse to not swap over to an overdrive transmission.
Removal
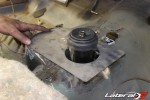
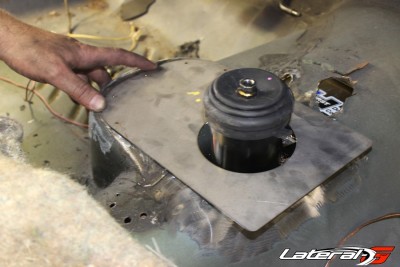
To start, we put the car up on some jackstands, and disconnected the battery. From here we removed the driveshaft, the aftermarket automatic shifter and linkage, along with the exhaust. After removing the starter, we unbolted the flex plate from the torque converter and removed the cooler lines. After removing the transmission cross member and supporting the transmission with a floor jack, we lowered it down so we could remove all the bellhousing bolts and drop the transmission down completely. The last step was to unbolt the flex plate from the engine itself.
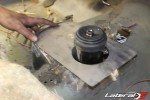
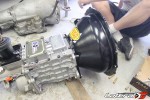
Test Fit Once, Install Once
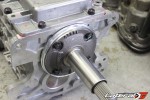
Now the fun part started – installing our new Hurst Driveline Conversion kit. We started by pulling everything out of their boxes and seeing what we had, and giving the instructions a thorough reading. The first step was to remove the input shaft snout and install the new one that works with the hydraulic clutch. This is simple and was accomplished by removing and re-installing four bolts.


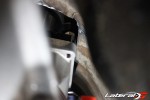
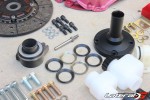
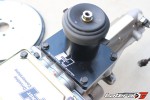
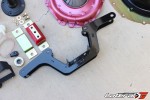
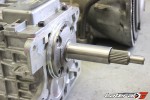
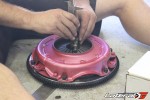
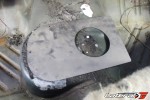
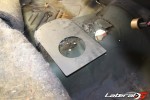
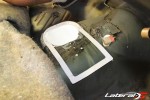
After that, we started the game of measuring everything to ensure that the throwout bearing was positioned correctly. What we did was take the flywheel and clutch and bolted those to the engine so we knew their exact measurements. We then measured and using the instructions, found out how many shims were needed to get the hydraulic clutch throw out positioned perfectly. This was just about the most time consuming part of the project, since we measured and then triple checked measurements to make sure we weren’t going to have any problems.

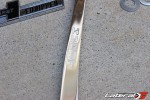
Triple checking measurements.
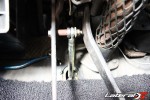
With the measuring completed for the throwout bearing, we wanted to test fit the transmission and see exactly what was needed to make it fit. We knew that the hole for the shifter was going to change, so using the supplied template we cut out the area of the floor where it would now pop through. We then removed the clutch and flywheel from the motor, and installed the bellhousing onto the transmission. Finally bolting the entire transmission to the engine along with installing the cross member, it was easy to see the few spots where the transmission was lightly hitting the floorboards. Removing the transmission, we smacked these areas with a hammer which provided more than enough clearance.
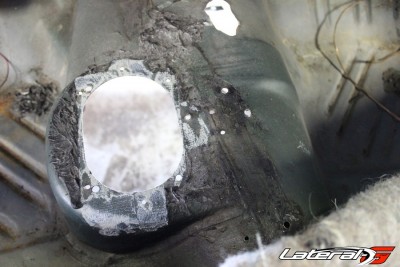


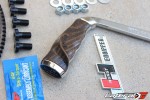
The next step was to install the patch panel for the shifter hole. The instructions do say to screw this piece in, but with our master mechanic and fabricator Ryan on hand, we decided to weld it in place for a cleaner finish.

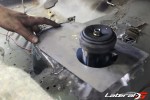
Installing the Beast
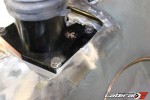
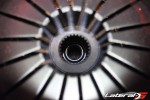
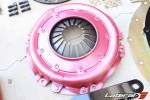
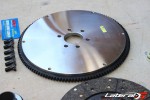
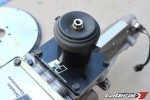
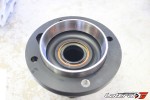
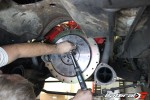
With the test fitting complete, the time came to do the final installation. Starting off, Ryan installed the new pilot bearing into the backside of the crank. From here the plate for the scatter-shield is slipped over the alignment dowels and the flywheel is installed and torqued down to 55 lb-ft. of torque. The new clutch was installed using the alignment pin to keep it square and torqued down to 35 lb-ft. of torque twice, in a star pattern.


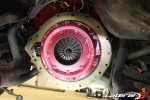
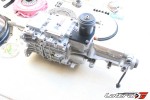
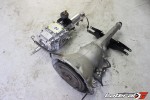
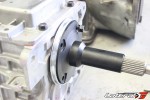
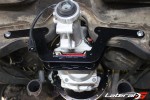
The bellhousing had already been installed onto the transmission during the test fit stage, so the time came to do the final installation. We hoisted the transmission up, playing the game of find-the-pilot-bearing with the input shaft. After a few minutes, there was success and the transmission slid up against the motor like a space shuttle docking at the space station. After bolting the bellhousing up against the block and torquing the bolts, we lifted the back of the transmission up until the holes lined up for the new transmission cross member and Energy Suspension polyurethane mount. Our last step was to re-install the factory starter.

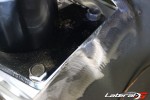
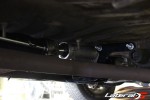
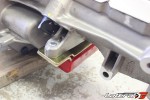
The transmission in it’s final resting place, waiting to be buttoned up.
Connections Are Made
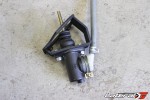
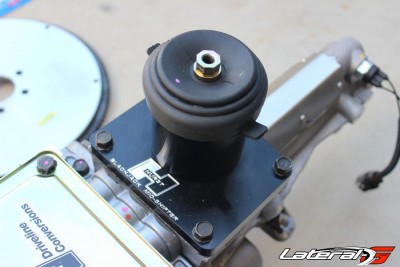
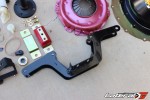
Upgrading to a hydraulic clutch while improving the transmission is a no-brainer. From our perspective, there really isn’t any good reason to retain the factory linkage. The hydraulic system is smoother, easier, and is less of a headache than snaking linkage around headers and suspension parts. But some people have a fear about this – where to mount the master, how to mount it, and everything else involved. Those are all minor things that Hurst Driveline has figured out, making the swap a snap.
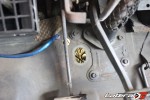
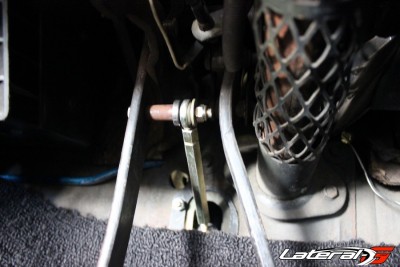
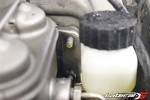
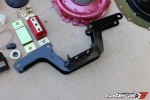
We already have the hydraulic throw-out bearing installed and now just need to mount the master to the firewall and clutch pedal. The kit comes with the brackets needed to not only mount the clutch master through the factory hole in the firewall, but also mounts it at the correct angle. There is also a built in bolt to limit the travel of the pedal so you don’t over-stroke the master. You only want to stroke the master roughly 7/8’s of its travel.
The bracket is two piece, with one on the engine compartment side and one on the passenger side, which sandwich’s the firewall. Three small holes were drilled in the firewall to allow this. After bolting everything together, the rod on the master shoots straight to the clutch pedal. Using the supplied heim joint, we connected the master to the clutch pedal and checked the stroke.


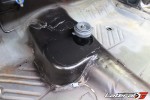
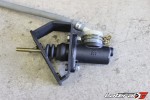
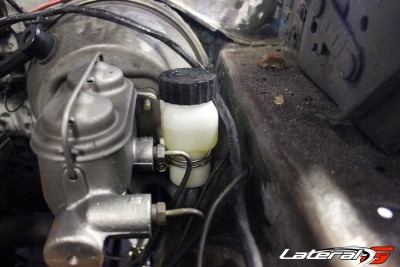
Mounting up the reservoir for the master is left up to the installer. There are several caps, reservoirs and lengths of hose to make the installation custom, allowing each user to mount it with their preference in mind. Ryan chose to mount if off the master cylinder by making a simple sheet metal bracket that slips over the master cylinder mounting bolts. Easy access yet tucked away is the name of the game.
The last major step was to bleed the entire clutch. Using a vacuum bleeder, we had the clutch working better than a new car in just a few minutes.
There were a few more connections that had to be made to complete the installation: back-up lights, speedometer and a driveshaft. The back-up lights were a piece of cake, using the supplied connector on the side of the transmission that tied into the factory wiring harness. The speedometer can be either electronic or cable driven. In this GTX, the factory speedometer is cable driven. However we are upgrading to Auto Meter gauges which will be much easier to use with an electronic speedometer, so we connected the wires to the supplied connector. We will install the gauges at a later date.
With the kit we ordered, the driveshaft doesn’t come with the order. In order to insure the correct length, you send off the measurements after the install has been completed. Using the supplied worksheet, Ryan measured from the output shaft on the transmission, the U-Joint mount on the rearend, along with a few other measurements. We sent off the information and about a week later, a brand new driveshaft showed up at our door from Inland Empire Driveline. Two U-bolts and we were in business.
The very last step, and probably the most important is to fill the transmission with fluid! This transmission takes 2.65 quarts of Pennzoil Synchromesh or GM Synchromesh transmission fluid.
Five Gears To Freedom
With the five-speed installed, the time came to test it out. With the car still up on the jackstands, we started the motor and made sure the clutch worked, the transmission shifted, and the rear wheels moved freely. With that complete, the car was set on the ground and driven around the block. After topping off fluids, the car was cruised down the street and was much more street friendly. The best part was getting up to speed and being able to shift into overdrive – this allows the RPM’s to drop which settles down the entire car and it cruises like a fuel-sippin’ Cadillac.
For more information, be sure to hop on Hurst-Drivelines.com or give them a call at (707) 535-3030.

Lots left to do on this GTX – but she’s now a driver!


-
- Lots left to do on this GTX – but she’s now a driver!


-
- 3-Speed Auto Bad; 5-Speed Manual Good.


-
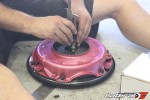
- Triple checking measurements.


-
- The transmission in it’s final resting place, waiting to be buttoned up.