Installing Baer Brakes On Our 1955 Bel Air
Anybody that races knows brakes are just as important, if not more important than what’s under the hood making you go. Sure a wicked sounding engine winding out down the track gets all the attention, but we all know most races are won in the corners. In fact that’s basically how Baer Racing started. Hal Baer saw how slow his Mustang was stopping on the track and decided to upgrade the brakes and started winning races.

On our Project 1955 Bel Air, we won’t be doing any racing. In fact, the car is being built for quite the opposite; cruising for hours on end. The plan is to take this car and drive it to all 50 states. We need really great brakes for that, but not 14″ rotors with 6-Pistons in a monoblock caliper like Baer’s XTR series. We called up Rick Elam of Baer and spoke with him about our plans and to see what brakes he’d recommend.
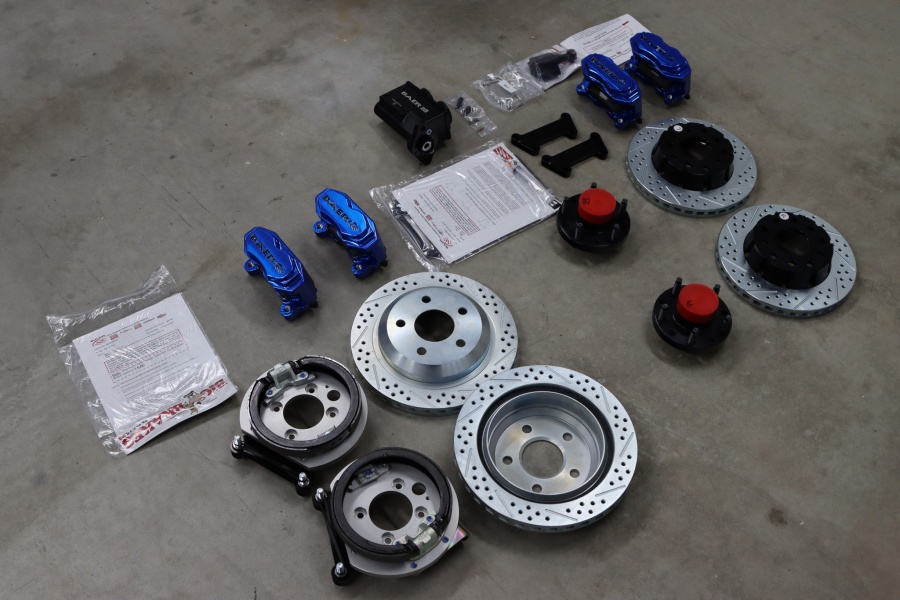
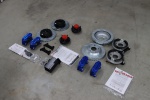
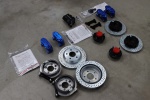
“I would run a SS4+ package. These are four piston calipers, drilled and slotted rotors and even an integrated parking brake for the rears,” stated Rick. This package sounded exactly like what we would need – a brake kit that’s going to be compact to fit inside our 17″ wheels, but be able to stop the car safely while going down the highway or any back road. Remember we plan on putting thousands and thousands of miles crossing our way across the USA.
A Truly Bolt-On Brake
Have you ever heard the term “bolt-in installation” and laughed like a school girl because you know that’s not going to be the case? Well with these Baer brakes it was truly a bolt-in installation. No grinding, massaging, or reconfiguring to make it work. In fact, all the Baer brakes we have installed have been that way.
We tackled the front brakes first. Since this car is a fresh build, there’s no drum brakes to remove or anything like that, just a fresh set of drop spindles.
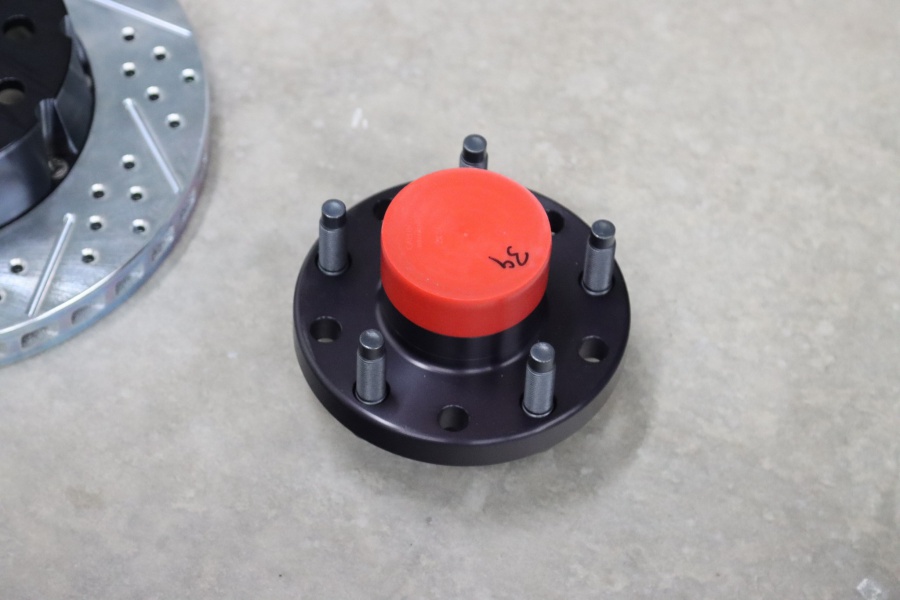
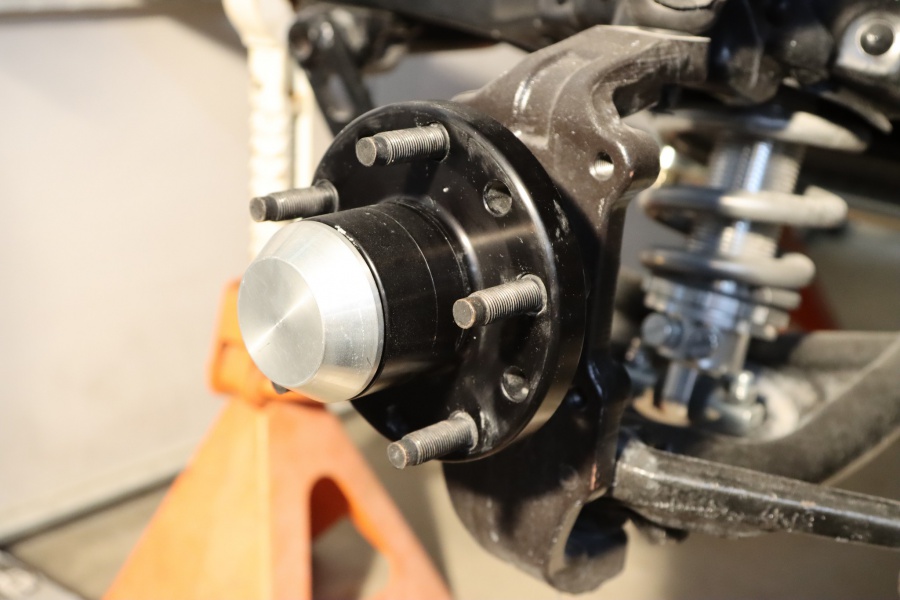
We started by installing the new hub assembly. This isn’t a bare hub with a package of studs and dry bearings. Baer took the time to press in the new 1/2″ studs, pack the bearings and pop them into the hub. All we had to do was remove the plastic cap and slide it onto the spindle. After snugging down the castle nut we slid the cotter pin through to finish. The last step was to install the dust cap. They don’t have the cheap stamped steel ones – Baer uses a machined aluminum one that utilizes an O-ring to keep it in place.

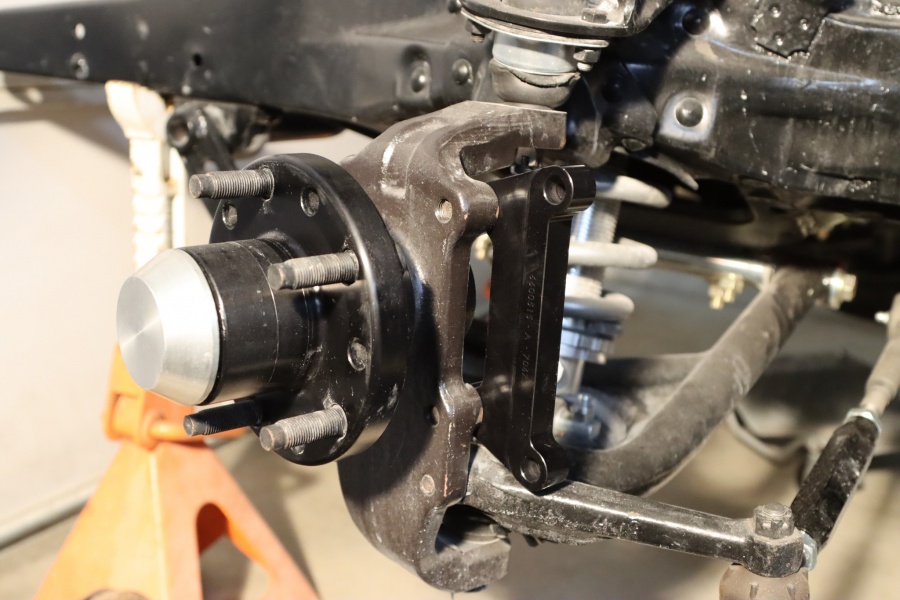
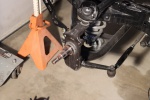
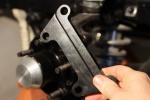
Then we bolted the adapter bracket to the spindle. This bracket is what will hold the caliper to the spindle and came with new bolts to attach it with.
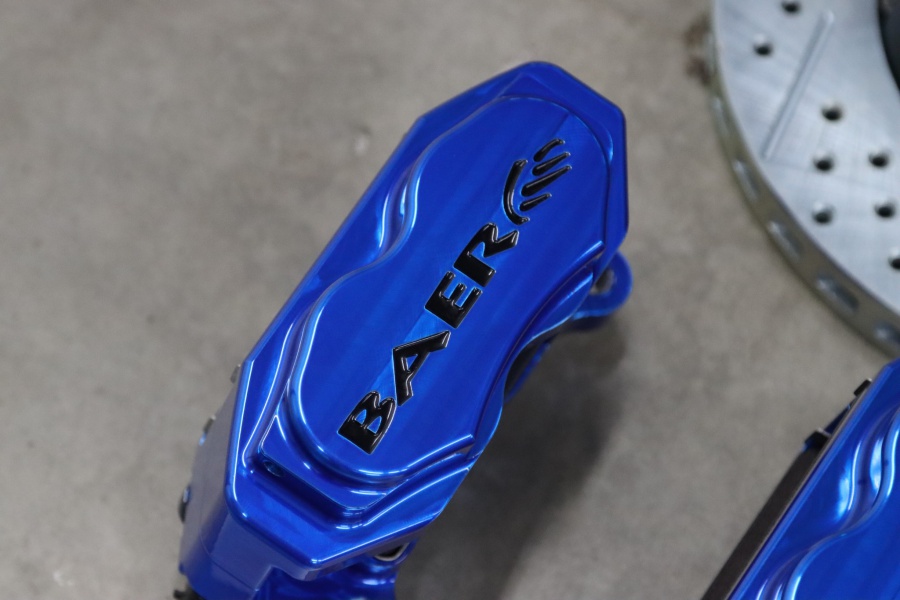
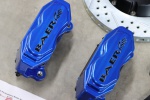
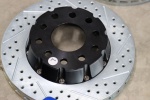
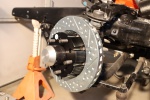
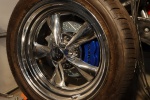
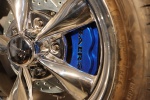
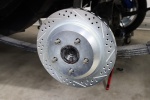
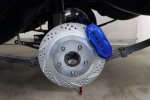
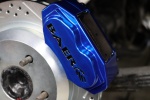
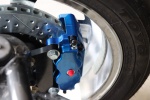
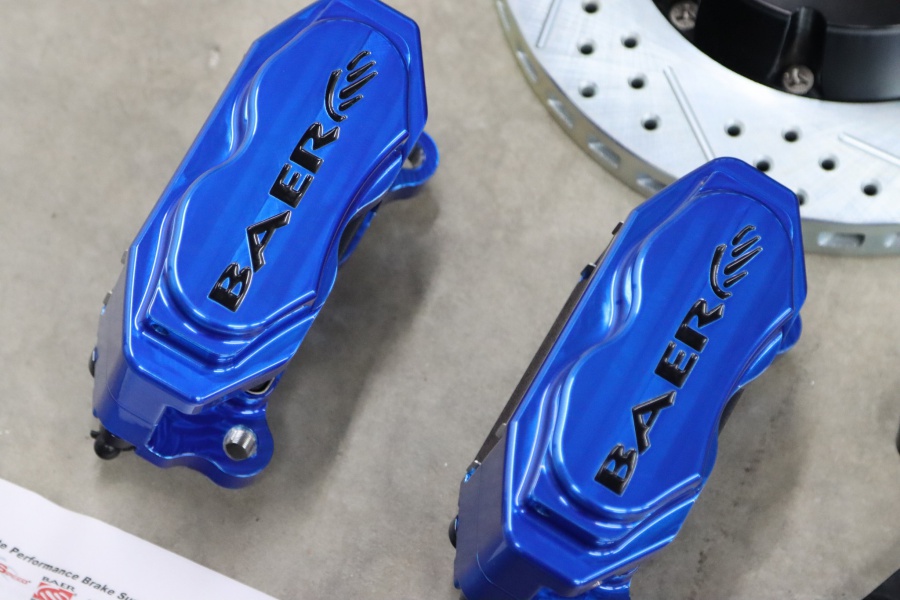
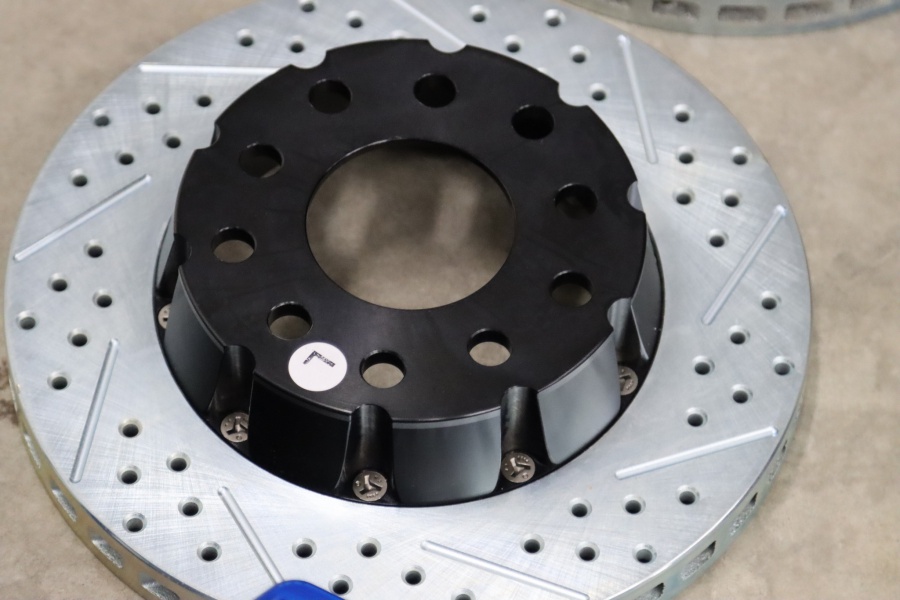
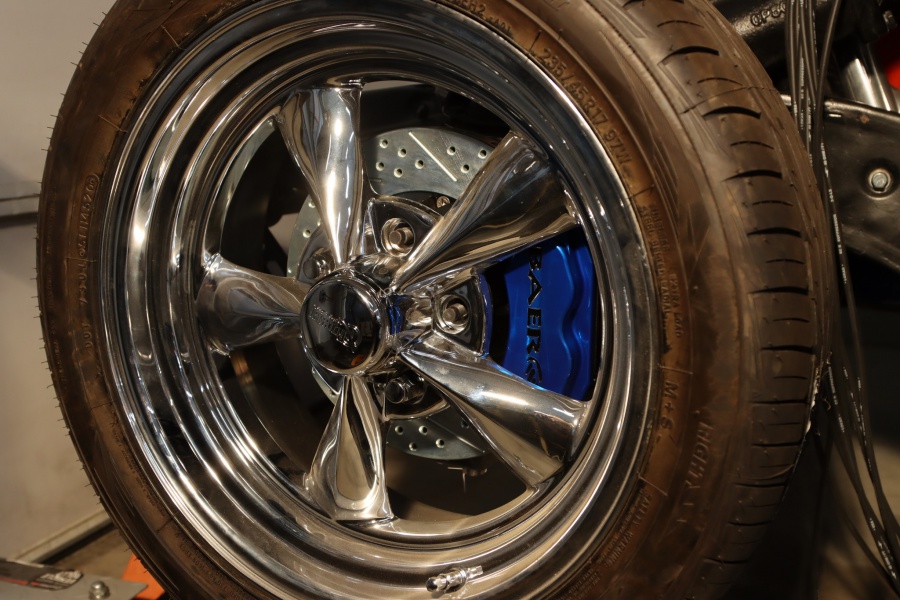
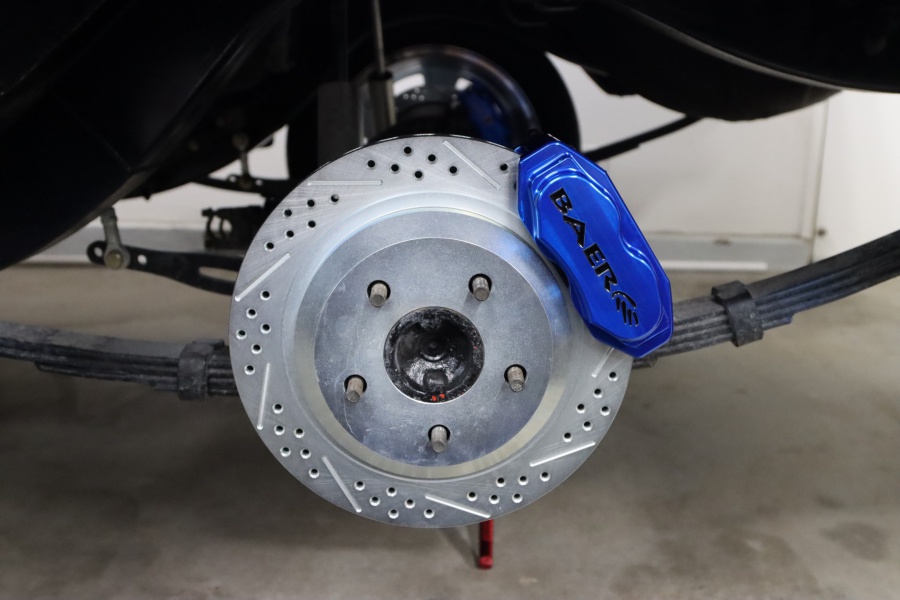
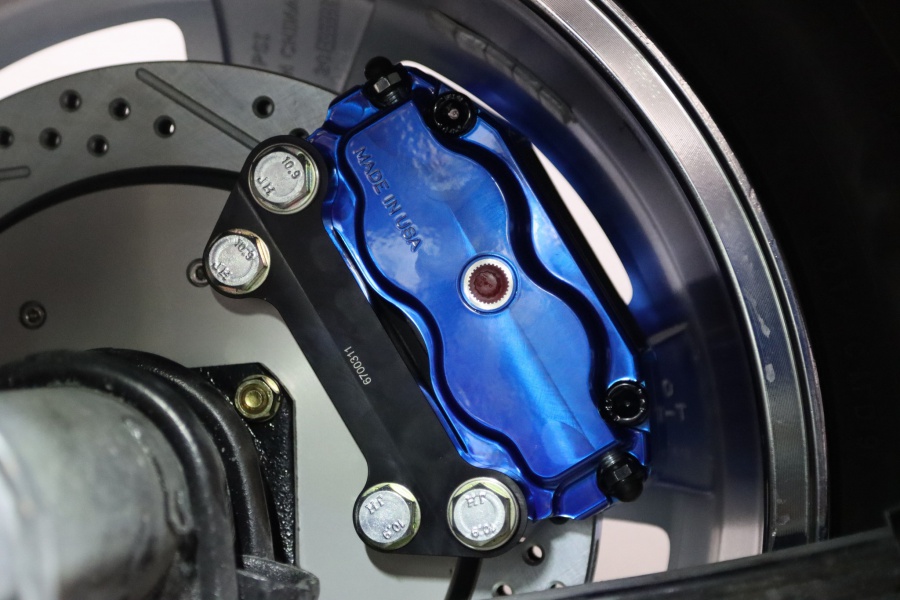
The front rotors are 11″ in diameter and a two piece set up. These come preassembled just like the hubs so we simply had to slide them onto the hubs and called it done. From here we grabbed the calipers. The calipers come from Baer standard in either Red, Black or Silver. We opted to upgrade and chose “Blue Ice” to tie in the paint job with the car.
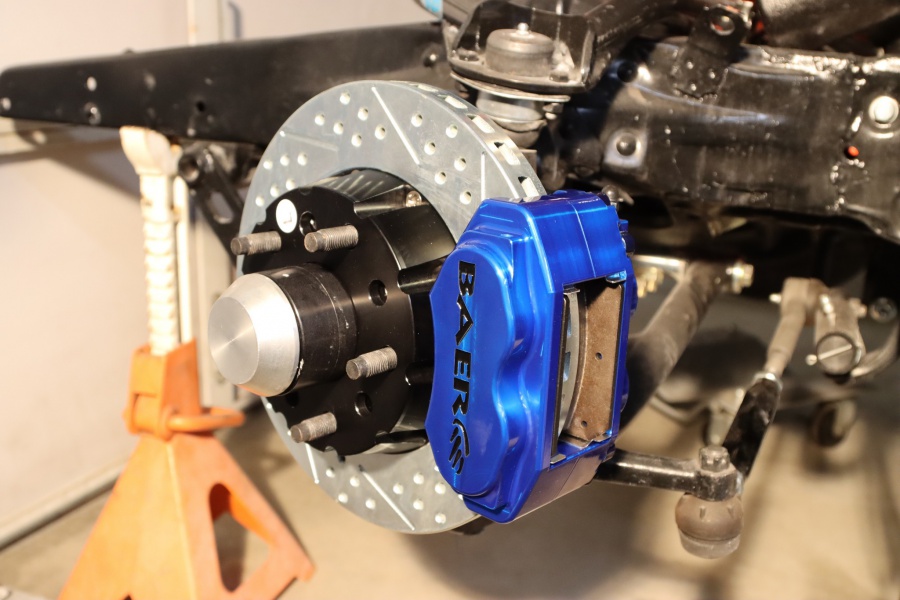


Installing the front calipers is easy as can be as the pads are already pre-loaded. We slid it over the rotor and installed using the two supplied bolts. At this point it was time for some measuring. The rotor and caliper are fixed in this set up so we have to make sure the caliper is perfectly centered on the rotor. Baer supplies an assortment of shims to get it just right but in our experience there’s very little or usually no shimming required. The last step is to install the supplied braided brake hose.
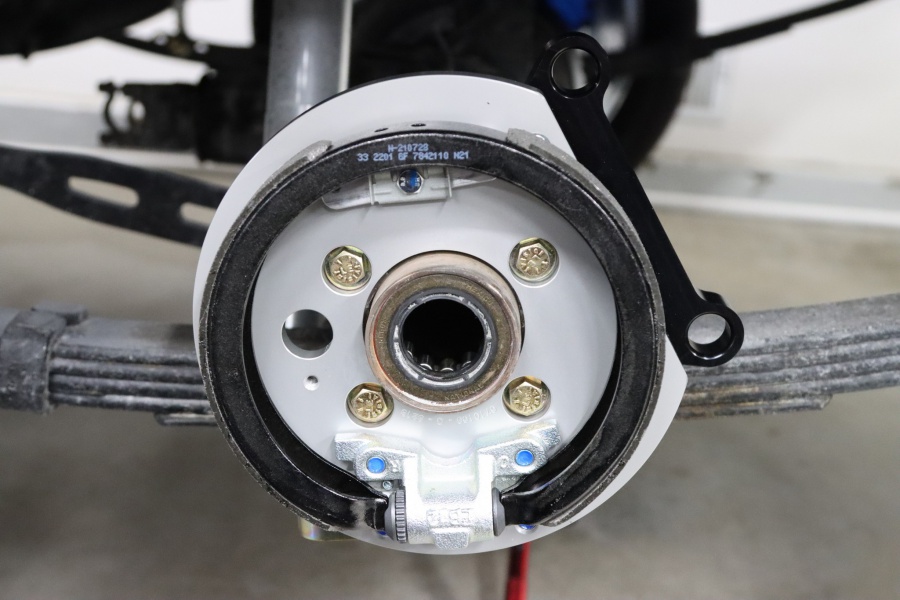
Wrapping Up The Rear
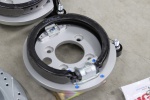
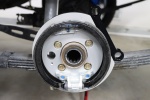
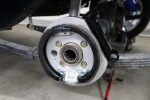
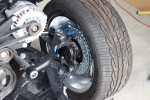
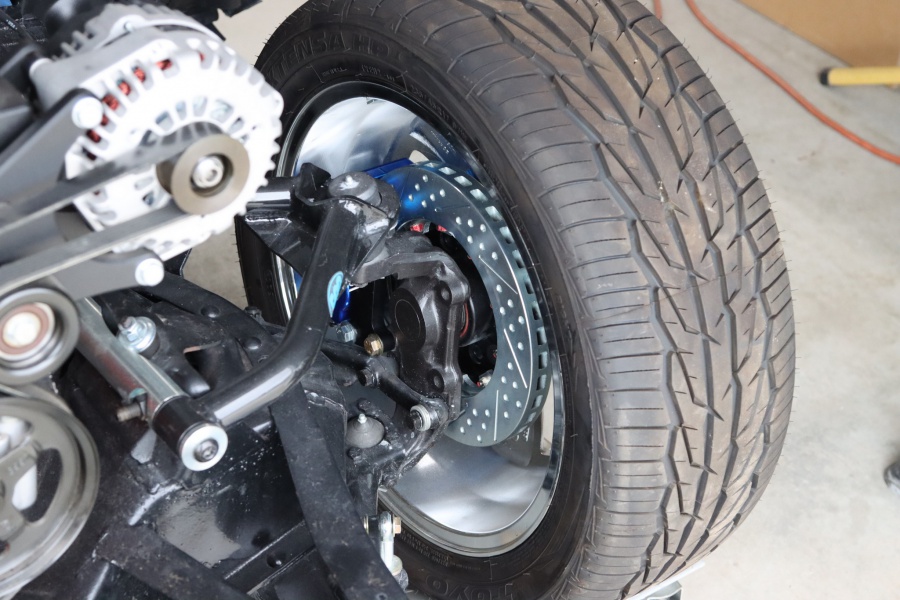
In the rear it’s a bit more work. With this system there’s an internal rear drum brake, which requires a backing plate. Factory drum brakes will have to be removed leaving only the bare housing. In our case on this 10-bolt that means we have to slide the axles out. Luckily we knew this was the case and had done this already to make installation easier. Installing the backing plates requires four bolts and you can reuse the factory bolts or we went ahead and grabbed some fresh grade-8 bolts. As you can see the backing plate holds not only the emergency brake, but the caliper bracket as well.
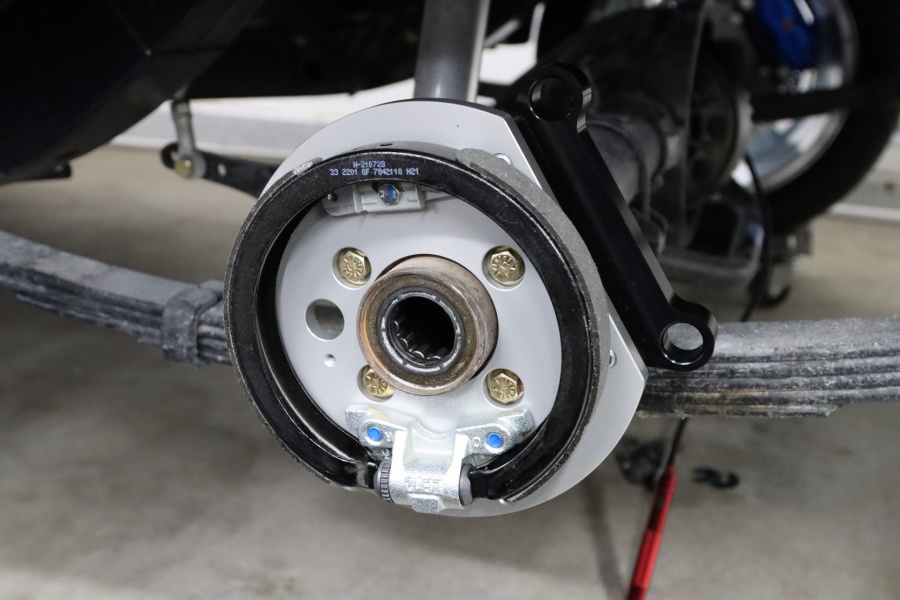
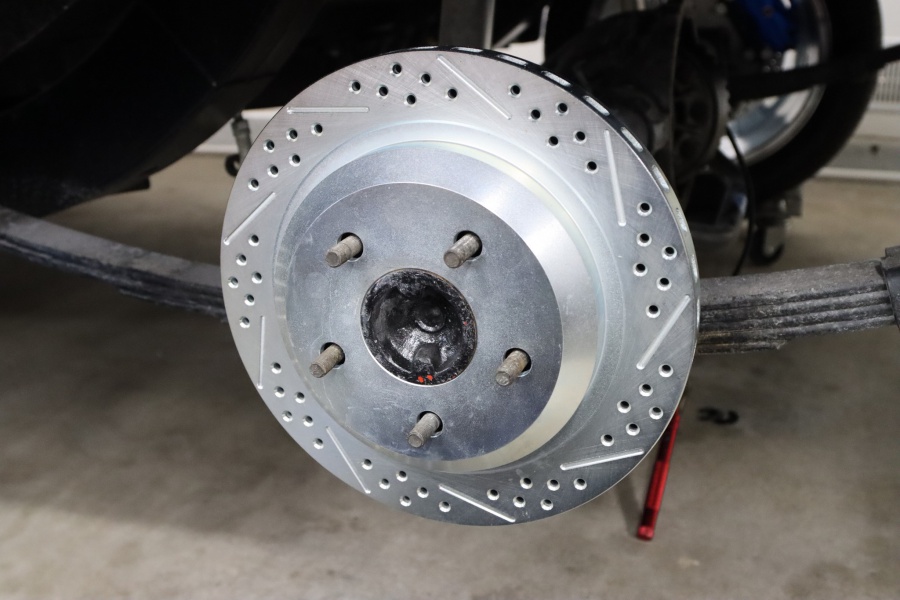
With the backing plate installed we went ahead and slid the axles back in and put the pin back in the diff. Then we took the rotors and slide them over the axles. Grabbing a caliper we slid it over the rotor then tightened down all the bolts. The rear is a semi-floating caliper so there’s no need to shim anything but we still made sure the caliper was pretty much centered over the rotor. The last step was to install the supplied braided brake hoses.

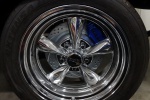
Since the brakes were all installed we just had to bolt up our new wheels which are Rocket Racing Fuel wheels wrapped in Toyo Extensa HP II tires. Everything cleared and more importantly looked absolutely killer!
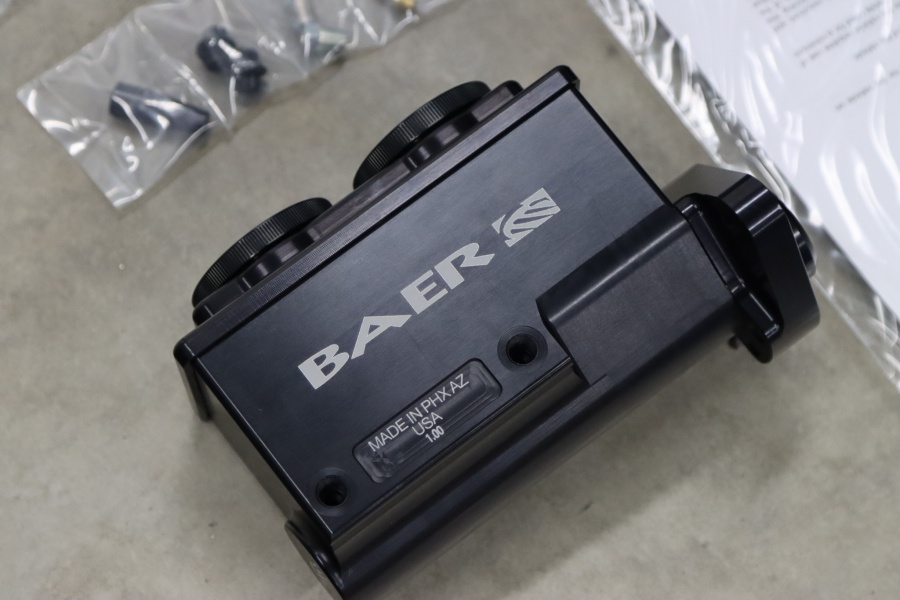
We also picked up a Baer ReMaster cylinder, but we didn’t pick up a booster yet so we couldn’t install it. Plus we still have to run all the hardlines for the brakes, so we will cover all that in another story. All in all we only spent about two hours installing these brakes. Like we said Baer really tries to make everything a truly bolt-on installation and include everything you need to complete the swap.
For more information on Baer Brakes visit Baer.com or give them a call at (602)-233-1411