...

Go Back   Lateral-g Forums > Lateral-G Open Discussions > Project Updates
User Name
Password


Reply
 
Thread Tools Display Modes
  #851  
Old 01-15-2015, 08:59 AM
Beach Cruiser's Avatar
Beach Cruiser Beach Cruiser is offline
Senior Member
 
Join Date: Mar 2006
Location: Virginia Beach, Va
Posts: 603
Thanks: 0
Thanked 1 Time in 1 Post
Default

Since the column is in the same place, and the a-arms and rack should be as well, there's no reason it shouldn't work with Scotts subframe. Only issue I can see is that his A-arm mounts are taller than mine. If you look early in my build thread you can see more details without the sheet metal and all in the way.
__________________
No Shop, No Money, No Time.... No problem!
Reply With Quote
  #852  
Old 01-15-2015, 09:24 AM
Sonar Chief's Avatar
Sonar Chief Sonar Chief is offline
Senior Member
 
Join Date: Dec 2011
Location: Greater Denver area
Posts: 1,366
Thanks: 245
Thanked 163 Times in 72 Posts
Cool

Quote:
Originally Posted by Beach Cruiser View Post
Since the column is in the same place, and the a-arms and rack should be as well, there's no reason it shouldn't work with Scotts subframe. Only issue I can see is that his A-arm mounts are taller than mine. If you look early in my build thread you can see more details without the sheet metal and all in the way.
I'll check the angles and such later today .... these Unisteer joints are huge compared to the Borgeson's joints, I may switch them out to gain clearance!
__________________
JUST PICTUREShttps://imageshack.com/user/mcavery


Let the house go .... NEVER give up your car!!!!
Reply With Quote
  #853  
Old 01-15-2015, 04:24 PM
efs69's Avatar
efs69 efs69 is offline
Senior Member
 
Join Date: Apr 2012
Posts: 253
Thanks: 0
Thanked 0 Times in 0 Posts
Default

Not sure if this will help you but here is my similar frame with Unisteer. I was able to remove the rag joint mount from my tilt column and used a Unisteer adapter. My rack isn't tilted.
Attached Images
 
Reply With Quote
  #854  
Old 01-18-2015, 08:02 AM
Steve68 Steve68 is offline
Senior Member
 
Join Date: Apr 2005
Location: orlando fl
Posts: 965
Thanks: 49
Thanked 45 Times in 33 Posts
Default

Looking good chief!!!


Beach cruiser, you don't have a lock washer or any washers under the nuts on your upper control arms, why not?? aren't you worried about those parts coming loose?
__________________
68 SS Camaro LSX/T56 in work, SMD subframe, , DSE Mini tubs, Fikse Profil 13's, Alston G Link, and other parts!! ,

70 Nova SS street racer, ugly,
Reply With Quote
  #855  
Old 01-18-2015, 08:05 AM
GregWeld's Avatar
GregWeld GregWeld is offline
Lateral-g Supporting Member
 
Join Date: Jul 2005
Location: Scottsdale, AriDzona
Posts: 20,741
Thanks: 504
Thanked 1,080 Times in 388 Posts
Default

Quote:
Originally Posted by Steve68 View Post
Looking good chief!!!


Beach cruiser, you don't have a lock washer or any washers under the nuts on your upper control arms, why not?? aren't you worried about those parts coming loose?


He's using Nylocks
Reply With Quote
  #856  
Old 01-18-2015, 04:27 PM
Sonar Chief's Avatar
Sonar Chief Sonar Chief is offline
Senior Member
 
Join Date: Dec 2011
Location: Greater Denver area
Posts: 1,366
Thanks: 245
Thanked 163 Times in 72 Posts
Smile Update 1/18

Thanks for the pixs guys, I do appreciate all opinions!

Not much to show today, as far as the Camaro that is .... spent this weekend putting up rigid insulation for a ceiling in the garage (tired of freezing my ... off!) came out nice still need to tape the edges.

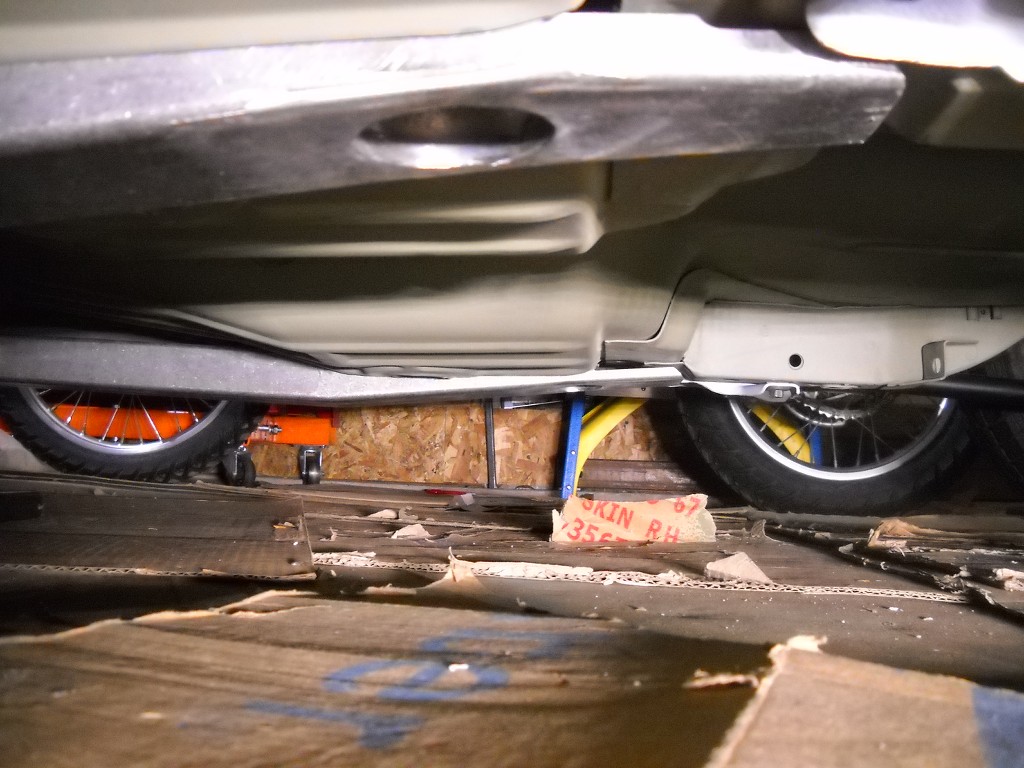
My buddy and I pulled the subframe (w motor and tranny ...Uggg) forward to get my subframe connectors in, PITA Should have pulled the engine combo first, oh well it in and I'm tired of working w that Styrofoam stuff, what a mess that was, I want to work on the Camaro for awhile!
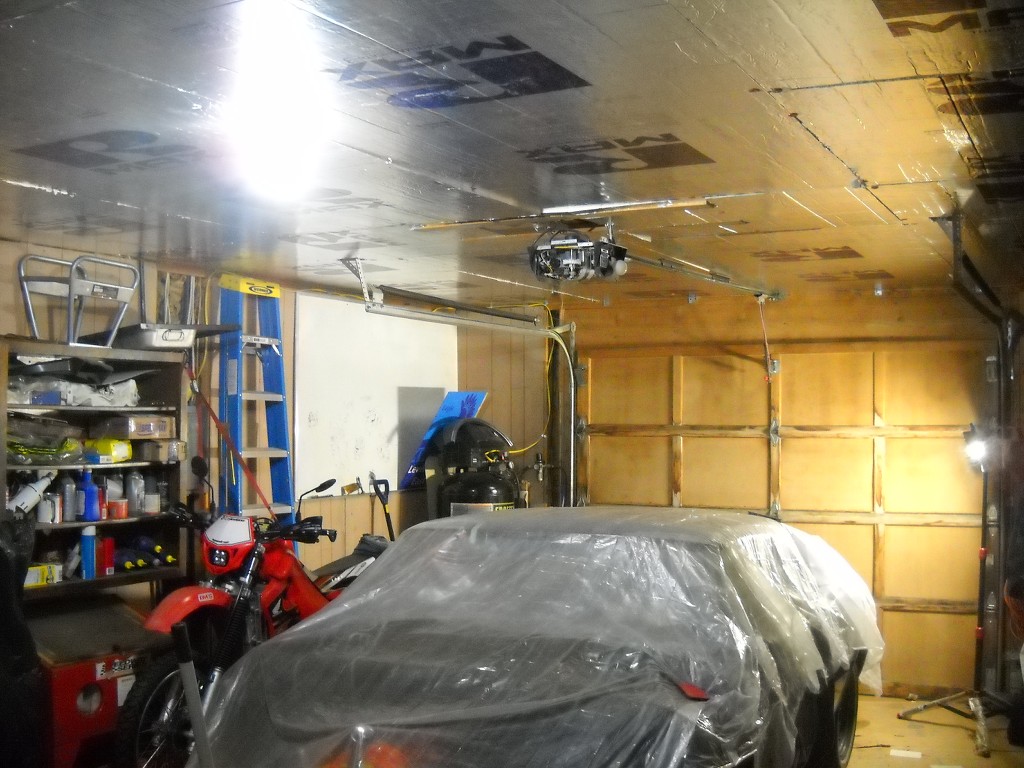

Its brighter too w the reflection.

They are in, still need to push them back flush and get the welder out and make some heat!

I'm gonna go and work on the Camaro now ... no more insulation stuff, supposed to snow tomorrow too, perfect timing!!

Thanks for comments guys .....
__________________
JUST PICTUREShttps://imageshack.com/user/mcavery


Let the house go .... NEVER give up your car!!!!
Reply With Quote
  #857  
Old 01-20-2015, 06:25 PM
Sonar Chief's Avatar
Sonar Chief Sonar Chief is offline
Senior Member
 
Join Date: Dec 2011
Location: Greater Denver area
Posts: 1,366
Thanks: 245
Thanked 163 Times in 72 Posts
Smile Turn up the heat ...

welding generates heat! So I worked on getting the subframe connectors lined up and snug .... (a little anal retentive) I had to open one side to get the subframe to line up with the rear frame rail and left a gap on one side, grrrrr.

Well I got the connectors in and welded to the floor, still need to attach the seat metal to the floor, waiting on warmer day to spray some epoxy under the seat frames.


That's all I have for today, that actually took longer than I thought it would ... , but it's done!

Thanks for looking ...
__________________
JUST PICTUREShttps://imageshack.com/user/mcavery


Let the house go .... NEVER give up your car!!!!
Reply With Quote
  #858  
Old 01-20-2015, 06:41 PM
Build-It-Break-it's Avatar
Build-It-Break-it Build-It-Break-it is offline
Senior Member
 
Join Date: Feb 2014
Posts: 564
Thanks: 30
Thanked 54 Times in 28 Posts
Default

Any progress is good . Looking good chief.
__________________
Ahmad B
Reply With Quote
  #859  
Old 01-20-2015, 07:24 PM
Roberts68 Roberts68 is offline
Senior Member
 
Join Date: Jul 2008
Location: Middle of MN
Posts: 622
Thanks: 2
Thanked 2 Times in 1 Post
Default

When you say you had to trim more and it left a gap on the opposite side how thick was it? Did you have to put a filler strip in there or just lay a fat bead?... Or overlay a little with the bead?

Did you feel comfortable aligning and working alone or did you have some help? I remember you mentioned having a buddy doing the bull work but wondered about the measure twice and weld once parts.
Reply With Quote
  #860  
Old 01-20-2015, 08:30 PM
Sonar Chief's Avatar
Sonar Chief Sonar Chief is offline
Senior Member
 
Join Date: Dec 2011
Location: Greater Denver area
Posts: 1,366
Thanks: 245
Thanked 163 Times in 72 Posts
Cool

Quote:
Originally Posted by Build-It-Break-it View Post
Any progress is good . Looking good chief.
Thanks, wished it was summer thou!

Quote:
Originally Posted by Roberts68 View Post
When you say you had to trim more and it left a gap on the opposite side how thick was it? Did you have to put a filler strip in there or just lay a fat bead?... Or overlay a little with the bead?

Did you feel comfortable aligning and working alone or did you have some help? I remember you mentioned having a buddy doing the bull work but wondered about the measure twice and weld once parts.
I had to shift the passenger connector over in the back to align w the rear rail, yes that left a gap on the outside, I used a copper backer and laid down a wide bead .... slowly!

I always work alone, I had Tom come over to muscle the subframe and help take cross measurements (hard to hold both end of the tape measure myself) and today I double checked everything w my laser level and had to fix the angle of the dangle. I didn't get the template exactly square, that the only thing I could think of .... so I fixed it!

Thanks for asking ....
__________________
JUST PICTUREShttps://imageshack.com/user/mcavery


Let the house go .... NEVER give up your car!!!!
Reply With Quote
Reply


Posting Rules
You may not post new threads
You may not post replies
You may not post attachments
You may not edit your posts

BB code is On
Smilies are On
[IMG] code is On
HTML code is Off

Forum Jump


All times are GMT -7. The time now is 12:26 AM.


Powered by vBulletin® Version 3.8.11
Copyright ©2000 - 2025, vBulletin Solutions Inc.
Copyright Lateral-g.net